
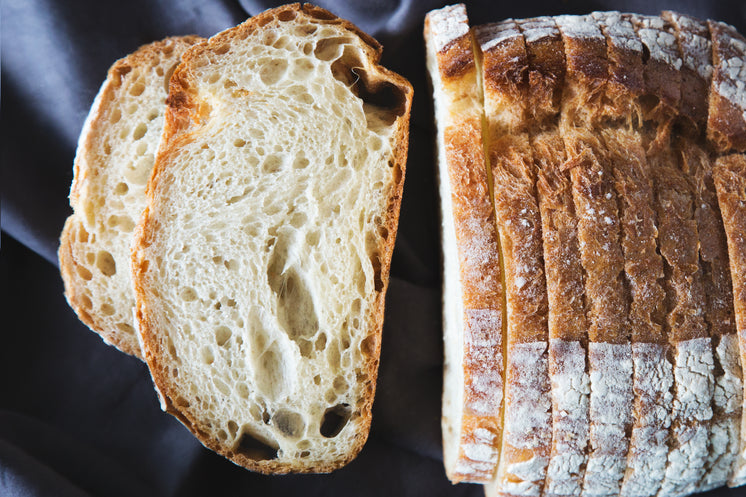
Traditional Methods Of Making Pita Bread
Preparation of Ingredients
Traditional pita bread depends on easy, high-quality ingredients, and their preparation is vital to achieving that characteristic ethereal pocket.
First, let’s address the flour. Ideally, you will use strong bread flour, with a high protein content (around 12-14%). This protein is essential for gluten development, giving the dough its strength and elasticity. The flour ought to be sifted – this removes any lumps and ensures even distribution all through the dough, contributing to a extra uniform texture. Sifting also aerates the flour barely, potentially enhancing the rise.
Next, the water. The temperature of the water is paramount. Lukewarm water, round 105-115°F (40-46°C), is right for activating the yeast. Too sizzling, and you’ll kill the yeast; too chilly, and its activation will be sluggish, leading to a weak rise. Using filtered or spring water, somewhat than faucet water with chlorine or other minerals, is recommended by many bakers for its purity. The quantity of water used will range barely depending on the flour’s absorption rate and humidity, so do not be afraid to regulate as wanted.
The yeast itself deserves cautious attention. Active dry yeast is commonly used. Before adding it to the dough, it’s usually beneficial to “proof” it. This entails dissolving the yeast in a small amount of the lukewarm water with a pinch of sugar. A foamy head will seem after a few minutes if the yeast is alive and energetic, indicating it’s ready to use. This step ensures your yeast is viable and contributes to a successful rise.
Finally, the salt. Salt not only enhances the flavour but in addition performs an important role in gluten improvement and regulating yeast activity. It helps to control fermentation, preventing it from being too rapid or too slow. It’s important to add the salt only after the yeast has been proofed, otherwise it can inhibit the yeast’s growth.
Beyond the individual components, the quality and freshness are additionally significant. Using contemporary, high-quality components significantly contributes to the final product’s taste and texture. Old flour can be dry and less effective, and old yeast could be dormant or useless. Proper storage of components is also vital; flour must be stored in an hermetic container in a cool, dry place to prevent it from going rancid.
In summary, the preparation of those seemingly simple ingredients – flour, water, yeast, and salt – is a nuanced course of requiring consideration to element. Each step contributes to the final consequence: a delicious, mild, and airy pita bread.
Traditional pita bread depends heavily on the standard of its elements and the precision of its mixing. The success of the ultimate product hinges on these initial steps.
Preparation of Ingredients:
Begin with high-quality flour. Many prefer strong bread flour with a excessive protein content (around 12-14%), which offers the required gluten strength for the characteristic pita pockets. The flour must be sifted to remove any lumps and ensure even distribution.
Water is equally essential. Its temperature considerably impacts gluten growth. Lukewarm water, sometimes around 80-85°F (27-29°C), is usually preferred because it prompts yeast optimally without inhibiting gluten formation. The actual temperature may want slight adjustment depending on the ambient temperature and the specific yeast strain.
Yeast, the leavening agent, offers the rise. Active dry yeast is commonly used, requiring activation in warm water with a pinch of sugar before incorporating it into the dough. Fresh yeast can also be employed, typically needing barely less total.
Salt plays an important role. It controls yeast exercise, provides flavour, and strengthens the gluten structure. The precise quantity can vary barely primarily based on preferences and the overall salinity of different components.
Some recipes embody a small quantity of sugar, which feeds the yeast and might barely enhance the browning of the pita bread. Others omit sugar altogether, relying solely on the flour and yeast.
Mixing the Dough: Techniques for Achieving the Right Consistency:
The conventional method involves hand-kneading. This permits for a deep understanding of the dough’s texture and consistency. After combining the moist and dry ingredients, kneading starts with light folding and pushing, progressively rising intensity to develop the gluten. The objective is to attain a smooth, barely elastic dough that passes the windowpane take a look at – a small piece of dough ought to stretch thinly with out tearing. This normally takes 10-15 minutes of vigorous kneading.
Alternatively, a stand mixer can be utilized with a dough hook attachment. Start on a low speed to avoid splashing, then steadily increase to medium-low, kneading for about 8-10 minutes, or till the dough is smooth and elastic. The mixing time would possibly need adjustment relying on the mixer’s power and the amount of dough.
Regardless of the method, the right consistency is essential. The dough should be delicate and barely cheesy, but not sticky or excessively moist. If it is too dry, add a tiny amount of water at a time; if too moist, add slightly flour till the specified consistency is achieved. Over-mixing can lead to a troublesome pita, whereas under-mixing results in a weak, lackluster product.
After the blending part, the dough undergoes a first rise (bulk fermentation). This usually takes about an hour or extra, depending on the ambient temperature and the yeast exercise. The dough ought to roughly double in size. This stage is vital for the development of flavour and texture.
The ultimate stage involves shaping the dough into individual balls. These are then flattened into circles, ready for baking. The final consistency should be pliable and elastic, ensuring the pita bread can puff up fantastically throughout baking.
Traditional pita bread depends on easy ingredients, meticulously ready.
Flour: High-gluten flour, corresponding to bread flour, is crucial for the elasticity wanted to create the characteristic pita pocket. The flour must be measured precisely, using the spoon-and-level methodology to keep away from compaction.
Water: Lukewarm water is preferred, as excessively sizzling water can kill the yeast, whereas very chilly water will decelerate fermentation. The water temperature ideally must be around 105-115°F (41-46°C).
Yeast: Active dry yeast is most commonly used. It needs to be proofed – dissolved in a small amount of the lukewarm water with a pinch of sugar to ensure its viability earlier than including to the opposite ingredients. Instant yeast may be added on to the dry elements.
Salt: Salt controls yeast activity and enhances flavour. It ought to be added after the yeast has been proofed or incorporated into the dry elements, as direct contact can inhibit yeast growth.
Olive oil (optional): A tablespoon or two of olive oil can enrich the flavour and enhance the feel, adding softness and preventing the dough from drying out.
Mixing the dough: The dough must be kneaded totally for about 8-10 minutes until it becomes smooth and elastic. This develops the gluten strands, responsible for the pita’s characteristic texture. Using a stand mixer can reduce the hassle. A slight resistance ought to be felt while kneading. The goal is to achieve a pliable yet agency dough.
First rise (Bulk Fermentation): After kneading, the dough needs a interval of bulk fermentation. This is where the magic occurs – the yeast consumes the sugars within the flour, producing carbon dioxide gasoline which causes the dough to rise. The ideal temperature for this course of is around 75-80°F (24-27°C). A warmer surroundings will velocity up fermentation, whereas a cooler setting will sluggish it down. Duration varies depending on temperature and yeast activity, however sometimes takes about 1-1.5 hours, or until the dough has roughly doubled in dimension.
Factors affecting rise time: The ambient temperature performs a crucial role. A warmer room accelerates fermentation. A proofing box or even a warm oven (turned off after preheating) may help maintain consistent temperature. Yeast quality additionally impacts the rise. Older yeast or yeast that wasn’t properly proofed will lead to a slower rise or perhaps a failure to rise altogether. The amount of yeast also affects the rise; more yeast equals a faster rise.
Determining doneness: The dough is prepared when it is light and ethereal, and springs back slowly when poked gently. The floor should be clean, and the dough ought to have visibly elevated in quantity.
Second rise (Proofing): After the bulk fermentation, the dough is divided into particular person parts. These parts are then formed into balls and allowed to proof, which is a shorter rise of around 30-45 minutes, lined with a damp cloth to forestall crust formation. This step improves flavour and texture of the final product.
Careful attention to temperature and timing throughout both rises are key to achieving completely puffed pita pockets.
Shaping the Pita Bread
Shaping pita bread dough begins with reaching the proper consistency. The dough must be smooth, elastic, and slightly cheesy, not overly sticky or dry. This is essential for correct shaping and consistent inflation during baking.
The next step, and a key to uniform pita, is dividing the dough. Accuracy here is paramount. Using a kitchen scale is extremely beneficial to ensure every portion weighs the identical, resulting in even-sized and evenly cooked pita breads.
If a scale is not obtainable, a practiced hand and visible estimation can work, however it requires important expertise. The dough ought to be divided into portions that will yield pita breads of the specified size—typically starting from 4 to six inches in diameter.
Once divided, every portion should be gently rounded right into a easy ball. This is done through the use of the heel of your hand to cup the dough, slowly rotating it and using a light, cupping motion to bring the dough into a decent, uniform sphere. Avoid pressing down too hard; you need to keep air within the dough.
After forming the balls, they want a short resting interval – typically 10-15 minutes – covered with a moist material to stop them from drying out. This relaxation allows the gluten to chill out, making the dough simpler to flatten in the subsequent step.
To flatten the dough balls, several methods exist. Some bakers use a rolling pin, but a extra conventional strategy uses the palms. The dough ball is placed on a frivolously floured surface and gently pressed down with the palm of your hand, rotating it incessantly to make sure even thickness.
The goal is to create a flat, round disc, ideally fairly thin within the heart, slightly thicker on the edges. The thickness should be consistent throughout the complete floor; otherwise, the pita might inflate unevenly throughout baking.
The stress applied should be consistent and delicate, avoiding tearing the dough. If the dough is simply too resistant, it wants extra resting time. If it’s tearing simply, it’s likely over-proofed or too dry.
The diameter of the flattened disc must be slightly larger than the final desired measurement of the pita, as it will shrink slightly during baking. Experience performs a major position in judging the optimal dimension and thickness.
Once formed, the pita breads are able to be transferred to a baking floor. A lightly oiled baking sheet or a hot, flat griddle are widespread choices. Proper shaping ensures even cooking and the attribute puffed pockets that outline pita bread.
Throughout the entire shaping process, the aim is to deal with the dough with care and sensitivity. Gentle and consistent pressure, mixed with accurate portioning and a light touch, leads to superbly shaped and completely inflated pita breads, showcasing the best of conventional baking strategies.
Consistency in size and form is not only aesthetically pleasing; it ensures uniform cooking and a extra pleasant eating experience. Variations in thickness or size will result in some pitas baking faster or slower than others, resulting in uneven texture and flavor.
Mastering the art of shaping pita bread is a ability honed by way of practice. Experimentation and attention to detail are key to achieving completely fashioned, delicious pita breads every time.
Achieving a superbly formed pita bread begins lengthy earlier than it hits the hot surface of the oven. The rolling course of is essential for consistent baking and that signature puffy pocket.
The first step is making certain your dough is correctly rested and pliable. This permits for easier dealing with and prevents tearing throughout rolling.
Traditionally, no rolling pins are used in authentic pita making. Instead, the dough ball is gently flattened using the palms, employing a circular pushing motion. This approach is vital to attaining the uniform thickness that’s essential for even baking and the creation of those air pockets.
The process begins with frivolously flouring a clear work floor. This prevents sticking and allows for smoother movement of the dough.
Next, take a portion of the rested dough – normally a ball roughly the dimensions of a small orange. Gently press the dough ball with the palms of your arms, flattening it into a disc. The strain must be even and Pita Recipe distributed across the whole surface. This initial flattening is significant; it units the foundation for a constant thickness.
Now comes the crucial part: further flattening and shaping. Use your arms to softly work the perimeters of the disc, stretching and thinning the dough in a managed method. Remember, the aim is to create a uniform circle, not just a flat piece of dough. This requires a fragile balance between firm strain and mild manipulation.
Avoid extreme stretching or pulling, as this can lead to skinny spots or tears. If you discover any thinner areas, gently work the dough to redistribute it, making certain even thickness throughout the entire floor.
For achieving excellent roundness, rotate the dough disc regularly while flattening. This permits for uniform stretching and prevents any oval or irregular shapes from forming. Imagine you are gently coaxing the dough into its best type.
Regularly check the thickness of your dough by gently lifting an edge. Experience helps gauge the best thickness – it should be thin enough to puff up nicely however not so thin as to be fragile. Aim for a thickness of roughly 1/8 to 1/4 of an inch.
As you achieve proficiency, you will develop a feel for the dough’s consistency and be capable of intuitively regulate your pressure and approach. The key’s endurance and a light contact.
Once you may have achieved a relatively uniform thickness and a spherical shape, rigorously transfer the dough to a lightly floured baking sheet or baking stone, leaving sufficient house between every pita.
- Using the arms: The traditional and best method for even thickness.
- Even strain distribution: Essential to prevent skinny and thick spots.
- Regular rotation: Helps achieve a perfectly spherical shape.
- Thickness consistency: Aim for uniform thickness for even cooking and puffing.
- Gentle dealing with: Prevent tears or extreme stretching.
By mastering this seemingly easy process, you’re laying the groundwork for superbly puffed pita bread, a testomony to traditional baking strategies.
Cooking the Pita Bread
The magic of pita bread lies in its airy pockets, a results of exact cooking that creates steam throughout the dough.
Achieving this requires a keenly heated oven, sometimes between 450°F (232°C) and 500°F (260°C).
The greater end of this range is most popular for a quicker puff, but requires careful monitoring to prevent burning.
Preheating your oven is paramount; a minimal of half-hour is recommended, ideally longer, to make sure even heat distribution throughout the oven chamber.
A pizza stone, if available, is a major asset. Its warmth retention properties contribute to a crispier crust and more intense puffing.
If utilizing a pizza stone, place it in the oven while it preheats.
Alternatively, a baking sheet can be used, but the results could also be barely less dramatic.
For best results, flippantly mud the pizza stone or baking sheet with semolina or cornmeal; this prevents sticking and provides a refined textural element.
Gently place the rolled-out Pita Recipe dough rounds onto the preheated floor, leaving a small area between each.
Avoid overcrowding the oven; this could result in uneven cooking and decreased puffing.
Baking time is usually between 4-7 minutes, depending on the oven’s temperature and the thickness of the pita.
The pitas are ready once they puff up dramatically, creating those characteristic air pockets. Their colour should be golden brown, with maybe a quantity of lightly browned spots.
Keep a detailed eye on them during the final minutes; they can go from completely puffed to burnt in a matter of seconds.
Once faraway from the oven, switch the pitas instantly to a clear kitchen towel or a wire rack to cool barely.
The residual heat will continue to cook them gently, so keep away from masking them tightly.
Proper cooling prevents the pitas from changing into soggy.
Experimentation is essential; oven temperatures range, and even the dough’s hydration can barely alter baking time.
Don’t be discouraged if your first attempt is not excellent; with a couple of tries, you will grasp the artwork of crafting perfectly puffed pita bread.
The texture ought to be crisp on the skin, soft and ethereal on the inside, with these pleasant pockets able to be stuffed together with your favorite ingredients.
Consider the kind of flour used; stronger flours with higher protein content material contribute to better construction and puff.
The ambient humidity in your kitchen can also subtly have an effect on the baking course of.
If you find your pitas are consistently burning earlier than puffing, try barely lowering the oven temperature and growing the baking time.
Conversely, if they’re puffing properly but remain pale, increase the temperature.
Observe your oven’s behavior; some ovens run hotter or colder than their displayed temperature.
Using an oven thermometer can guarantee accurate temperature readings and consistency in baking.
Enjoy the method and the scrumptious results of your do-it-yourself pita bread!
Traditional pita bread making depends heavily on the talent of the baker and the responsiveness to the warmth source, particularly when using a hot griddle or tava.
The key to reaching that attribute puff is a combination of things: dough hydration, fermentation, and the exact management of warmth during cooking.
Dough Preparation: A well-hydrated dough is crucial. Overly dry dough will lead to flatbreads, lacking the steam essential for puffing. Conversely, excessively wet dough shall be difficult to deal with and should not cook evenly.
Fermentation: Proper fermentation is paramount for taste development and construction. The yeast produces gases that create inside pockets in the dough, aiding puffing when heated rapidly.
Griddle/Tava Preparation: The griddle or tava needs to be extremely sizzling. This is achieved by preheating it for a considerable amount of time, typically 15-20 minutes, and even longer relying on the warmth source and the thickness of the griddle.
Ideally, a skinny layer of oil or fats must be utilized to the surface. This prevents sticking and ensures even browning, whereas additionally contributing to a slight crispiness.
Shaping: Traditionally, pita dough is shaped into comparatively skinny, spherical discs, about 6-8 inches in diameter. The thickness must be uniform to make sure even cooking. Slightly thicker edges may be desired for a slightly crispier border.
Cooking Technique: Once the griddle is satisfactorily hot, gently place the pita discs onto the floor. Do not overcrowd the griddle; it will decrease the temperature and inhibit correct puffing.
Heat Control: The initial high warmth is important for fast enlargement of the trapped gases within the dough. This creates the pocket in the pita bread. You ought to observe the dough; as the underside surface browns and begins to puff slightly, it is time to flip the pita over.
Turning: Using a thin spatula or a particular pita turner, fastidiously flip the pita. The second side will often cook extra quickly than the primary.
Puffing: The characteristic puffing happens because of the fast growth of the steam generated throughout the dough because it heats up. The trapped moisture will inflate the pita from inside. This must be noticeable visually as the pita will visibly rise.
Cooking Time: The total cooking time is mostly brief, usually between 1-2 minutes per facet, and even less. Overcooking will lead to dryness and a leathery texture.
Removing from the Griddle: Once each side are cooked to a golden brown and puffy, carefully remove the pita from the griddle and switch it to a clean cloth or wire rack. Do not stack the pita till it has cooled slightly.
Troubleshooting:
- Flat Pitas: This could point out insufficient fermentation, too low of a griddle temperature, or a very dry dough.
- Burnt Pitas: This is attributable to too high a heat or inadequate attention whereas cooking.
- Unevenly Cooked Pitas: This could also be due to uneven dough thickness, uneven warmth distribution on the griddle, or overcrowding.
- Sticky Pitas: This usually implies inadequate oiling of the griddle surface.
Mastering the artwork of cooking pita bread on a scorching griddle or tava takes practice and attention to element, however the rewarding result is perfectly puffed, flavorful, and aromatic pita bread.
Traditional pita bread making begins with a easy dough: flour, water, yeast, and a contact of salt. The key is hydration; the dough must be delicate and pliable, however not sticky.
Kneading is essential. A lengthy, thorough kneading develops the gluten, creating the elasticity needed for the attribute pita pocket.
The dough needs a primary rise, a sluggish fermentation at room temperature, allowing the yeast to work its magic and give the bread its ethereal texture.
Once risen, the dough is divided into small, uniform balls. These are flippantly oiled and allowed a second, shorter rise.
A very popular, preferably stone, oven is important. The intense warmth is what causes the pita to puff up dramatically.
Before inserting the pita balls within the oven, they are sometimes flattened slightly, both by hand or with a rolling pin, but not too thin.
The baking time is short, usually just a few minutes per pita. The oven’s temperature is so high that overbaking is a real risk.
Recognizing a superbly cooked pita is a matter of observation. The bread will puff up considerably, almost doubling in size, forming the characteristic air pocket.
The floor shall be golden brown, speckled with lightly browned areas, indicating even cooking.
The sound of the pita puffing is a key indicator; a satisfying whoosh signifies a profitable bake.
If the pita is pale or undercooked, will in all probability be dense and chewy, lacking the airy texture of a well-baked pita.
Conversely, if the pita is dark brown or burnt, it goes to be exhausting and crisp, quite than gentle and Pita Recipe pliable.
The perfect pita has a barely chewy exterior and a delicate, ethereal interior. The pocket should be well-formed and substantial enough to carry fillings.
When faraway from the oven, the pitas should be immediately wrapped in a clear material to retain their moisture and softness.
Allowing them to chill fully earlier than storing will stop them from becoming soggy.
Traditionally, pita bread is baked in a wood-fired oven, but a very hot typical oven can achieve related outcomes. The key’s excessive heat and a brief baking time.
Experimentation is vital to mastering the artwork of pita bread making. Adjusting the hydration of the dough, the size of the rises, and the oven temperature will all affect the ultimate product.
With apply, you will learn to recognize the delicate indicators of a perfectly cooked pita—the golden colour, the satisfying puff, and the proper steadiness of chewiness and airiness.
The aroma alone might be a testament to your success; the warm, yeasty scent of freshly baked pita is a reward in itself.
Enjoy the method, and savor the delicious outcomes of your conventional pita bread baking endeavor.
Serving and Storage
While the traditional methods of creating pita bread concentrate on the dough and baking course of, the enjoyment of this versatile flatbread extends considerably into its serving and storage. Proper storage ensures freshness and optimal texture for later use, while creative serving recommendations elevate the easy pita right into a culinary centerpiece.
Storage: Freshly baked pita bread must be saved properly to take care of its delicate texture and stop it from becoming stale or dry. The finest methodology is to put the still-warm pitas in a resealable plastic bag or airtight container. This traps moisture, stopping the bread from drying out. Alternatively, wrapping them tightly in a clean kitchen towel or aluminum foil works nicely for short-term storage. For longer storage (up to a week), freezing is really helpful. To freeze, wrap particular person pitas tightly in plastic wrap and then place them in a freezer-safe bag to prevent freezer burn. Reheating frozen pita may be done in a toaster oven, oven, or even a dry skillet until warmed by way of and slightly crisp.
Serving Suggestions & Accompaniments: Pita bread’s versatility shines in its ability to pair with an enormous array of flavors and cuisines. It serves as an ideal base for dips, fillings, and toppings, making it a staple in Mediterranean, Middle Eastern, and many other world cuisines.
Dips & Spreads: Hummus, arguably the most iconic pita accompaniment, provides a creamy, chickpea-based base with a hint of lemon and garlic. Baba ghanoush, a smoky eggplant dip, presents a contrasting flavor profile. Tzatziki, a refreshing yogurt-based dip with cucumbers and herbs, is another in style alternative. Other choices embrace: muhammara (red pepper dip), white bean dip, various flavored cream cheeses (herb, roasted pink pepper, and so on.), and even easy olive oil with herbs.
Fillings for Pitas (Pockets): Pita bread’s capability to be stuffed makes it an ideal vessel for numerous elements. Falafel, a deep-fried chickpea patty, is a basic choice. Shawarma, thinly sliced marinated meats (chicken, lamb, or beef), is one other popular filling. Grilled vegetables (onions, peppers, zucchini) create a recent and flavorful possibility. Hummus and other dips can also be used as fillings, typically together with different components. Adding feta cheese, chopped tomatoes, cucumbers, and olives brings a Mediterranean twist.
Accompaniments past fillings and dips: The versatility extends beyond fillings and dips. Pita bread can be served alongside grilled meats or kebabs, providing a scrumptious way to absorb juices and enhance the overall eating experience. It pairs nicely with soups and stews, providing an ideal utensil for sopping up flavorful broths. Cubed pita can be added to salads for added texture and crunch.
Other Serving Ideas: Consider serving pita triangles with a number of dips, organized artistically on a platter. Or, create pita chips by slicing pitas into wedges, brushing with olive oil, and baking until crispy. These could be served with varied dips and at the equal time as a base for small appetizers. Experiment with totally different taste combos to search out your favourite pairings. The potentialities are nearly endless.
Proper storage ensures the pita’s quality, while considerate serving suggestions rework a easy bread into an important factor of a memorable meal.
Storing leftover pita bread requires a thoughtful method to prevent it from drying out and turning into stale. The secret is to attenuate air publicity and retain moisture.
Freezing: This is arguably the best methodology for long-term storage. Wrap particular person pita breads tightly in plastic wrap or place them in a freezer bag, squeezing out as a lot air as potential. Freezing prevents staling and permits for preservation of several weeks and even months.
Refrigeration: While not best for extended storage, refrigeration can hold pita bread contemporary for a few days. Place the pita breads in an hermetic container or wrap them tightly in plastic wrap. The refrigerator’s barely lower temperature slows down the staling course of, nevertheless it won’t cease it completely.
Bread Box: A conventional bread field provides a moderate degree of protection towards staleness. Ensure the bread box is airtight or at least tightly sealed. However, this technique is only suitable for short-term storage (1-2 days).
Paper Bag: A paper bag provides minimal protection towards staling. While breathable, it offers little insulation. Use this methodology only if storage is for less than a day.
Reviving Stale Pita: If your pita bread has turn into stale, you can try reviving it by lightly spritzing it with water after which heating it in a preheated oven (350°F/175°C) for a couple of minutes, or until it’s warm and delicate. Alternatively, you presumably can heat it in a dry skillet for a similar effect. The steam generated will assist rehydrate the bread.

Tips for Optimal Storage:
- Always allow pita breads to chill fully before storing them.
- Avoid storing them in a moist setting as it will promote mold growth.
- When freezing, attempt to use a vacuum sealer for the most effective leads to preserving freshness.
- If freezing multiple pita breads, separate them with parchment paper to forestall them from sticking collectively.
- For best outcomes, use refrigerated or frozen pita breads within an affordable timeframe, contemplating the storage method used.
By following these simple steps, you can enjoy your leftover pita bread for days or even weeks, sustaining its delicious texture and style.