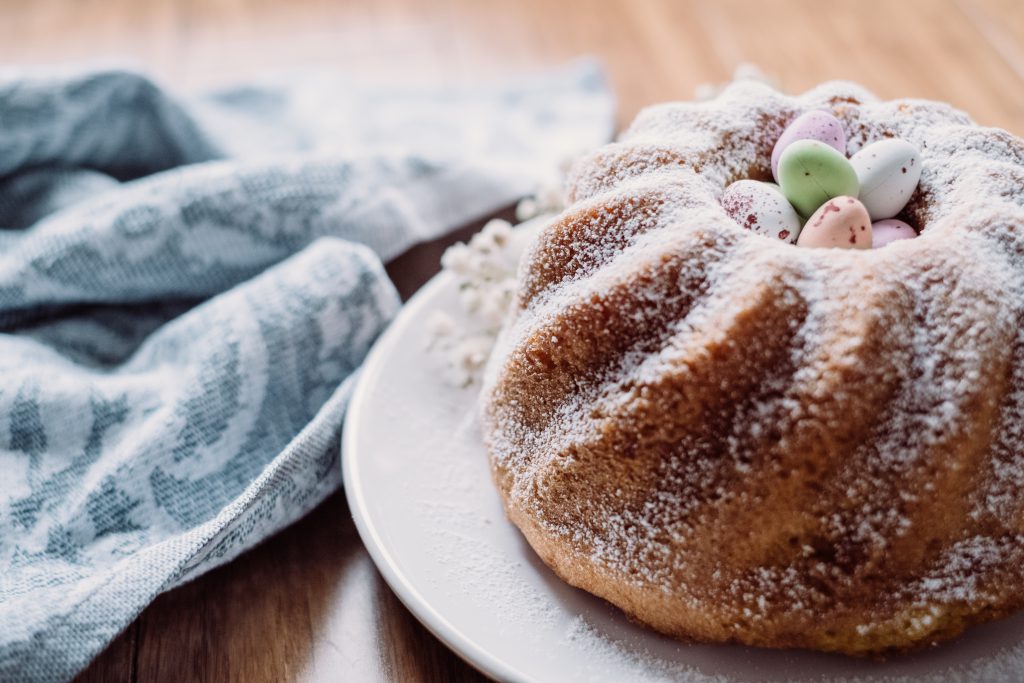
The Best Tools And Equipment For Making Keto Ice Cream At Home
Essential Kitchen Appliances
A high-powered blender is arguably essentially the most essential appliance for making keto ice cream at home.
Unlike commonplace blenders, which often struggle with thick, frozen ingredients, a high-powered blender boasts a considerably more highly effective motor, capable of pulverizing ice and frozen fruits with ease.
This power is crucial for achieving the smooth, creamy texture characteristic of good ice cream, stopping the formation of large ice crystals which detract from the overall experience.
Brands like Vitamix and Blendtec are business leaders, recognized for his or her durability and ability to deal with even the toughest frozen mixtures.
Their powerful blades, typically manufactured from hardened stainless steel, effectively break down frozen ingredients right into a homogeneous combination, making a remarkably clean and constant texture.
Beyond the motor power, the design options of high-powered blenders are also necessary. A extensive, deep container allows ample area for ingredients, reducing the need for a quantity of mixing cycles and ensuring thorough mixing.
Tamper instruments, usually included with high-end fashions, further facilitate the mixing process by pushing elements down in course of the blades, making certain full processing.
The capability to finely grind nuts and seeds is another advantage. Many keto ice cream recipes utilize nuts for added texture and healthy fat; a strong blender makes this step easy and environment friendly.
When choosing a blender for keto ice cream, consider the wattage—look for models exceeding 1000 watts for optimum performance.
Read critiques to assess the blender’s capability to deal with frozen elements particularly, paying close consideration to feedback concerning ice cream or frozen dessert recipes.
While the preliminary investment may seem vital, the versatility of a high-powered blender extends far beyond keto ice cream. It excels at making smoothies, soups, sauces, and nut butters, making it a useful addition to any kitchen, particularly one centered on healthy eating.
Consider the dimensions of your container, selecting one that suits your typical batch measurement, whereas also preserving in thoughts that larger batches might require longer mixing instances.
Finally, verify the guarantee and out there buyer help. A reliable blender is an funding that ought to final for years, and a great warranty offers peace of thoughts.
Investing in a high-quality, high-powered blender is a significant step towards constant success in crafting delicious and creamy keto ice cream at residence, far surpassing the capabilities of a regular blender.
The smoother texture achieved immediately impacts the overall enjoyment of the ultimate product, making the investment worthwhile for critical keto ice cream fanatics.
Don’t underestimate the significance of this single equipment in your keto culinary journey. A nice blender is the cornerstone of many delicious keto creations.
Making keto ice cream at house requires particular appliances to attain the desired creamy texture and prevent ice crystal formation. While you presumably can technically make it with out specialised equipment, the results are considerably improved with the proper tools.
The most important appliance is an ice cream maker. There are two main types: compressor and frozen bowl.
Compressor Ice Cream Makers: These are considered the superior option for frequent ice cream making. They have a built-in compressor that constantly freezes the mixture, eliminating the necessity for pre-freezing. This means you could make ice cream on demand without the a number of hours of advance preparation needed for frozen bowl models.
Compressor models offer greater control over the churning course of and produce consistently smooth outcomes. They are generally quicker, churning ice cream in as little as 20-30 minutes. The continuous freezing also ensures consistent texture, reducing the chance of icy patches even when the churning time is extended.
However, compressor ice cream makers tend to be dearer and bigger than their frozen bowl counterparts. They also eat more power during operation.
Frozen Bowl Ice Cream Makers: These models require you to pre-freeze the bowl for several hours before making ice cream. The frozen bowl acts as a cooling agent in the course of the churning course of. This sort of machine is mostly extra compact and much less expensive than compressor fashions.
Frozen bowl ice cream makers are best for infrequent ice cream making. Because they rely on a pre-frozen bowl, the churning time is crucial. If the bowl is not sufficiently frozen or the churning time is too long, the ice cream can become icy. Additionally, as soon as the bowl is frozen, it needs to be returned to the freezer after each use to organize for the subsequent batch.
Choosing the Right Model for Keto Ice Cream: For keto ice cream, the smoother texture achieved with a compressor mannequin is usually preferable. The lower sugar content in keto recipes can make the ice cream more prone to icy crystals, so the constant freezing and churning of a compressor model helps mitigate this problem.
Regardless of which type you choose, think about the capability. If you incessantly make large batches or entertain, a bigger capability is beneficial. Check reviews to see how well the machine handles different sorts of keto-friendly ice cream bases, like those made with heavy cream, coconut milk, or avocado. Some machines might wrestle with thicker or denser bases.
Beyond the ice cream maker itself, different useful kitchen instruments for making keto ice cream embrace:
High-Powered Blender: To guarantee smooth and even mixtures, particularly when incorporating ingredients like nuts or seeds, a high-powered blender is important for making a clean base.
Kitchen Scale: Accurate measurements are necessary for successful keto baking and ice cream making, to get the proper stability of fats, proteins, and sweeteners.
Spatula or Scraper: For scraping down the edges of the ice cream maker through the churning course of to make sure even freezing and mixing.
Airtight Containers: For storing your delicious homemade keto ice cream to take care of its high quality and forestall freezer burn.
Ultimately, one of the best ice cream maker for making keto ice cream at home is decided by your finances, frequency of use, and desired degree of convenience. While a frozen bowl model will suffice, a compressor model will typically yield superior outcomes and provides a extra seamless experience, particularly for the often-challenging texture of keto ice cream.
Making keto ice cream at house requires precision, especially when dealing with the fragile stability of fats, sweeteners, and other elements.
A reliable kitchen scale is your most crucial ally on this endeavor. Forget measuring cups; for keto baking and ice cream making, a scale ensures accuracy right down to the gram.
Many recipes call for particular weights of elements like heavy cream, erythritol, or cream cheese. Variations, even small ones, can considerably impression the final texture and taste of your ice cream.
A digital kitchen scale is preferable to an analog one, offering greater precision and readability. Look for a scale with a capacity suitable on your typical batch sizes – at least 5 kg (11 lbs) ought to suffice for most homemade ice cream recipes.
Ensure your scale is tare capable. This function allows you to zero out the burden of a bowl or container earlier than adding ingredients, simplifying the measuring course of. This is especially necessary whenever you’re including multiple components to a single bowl.
Beyond the size, different important home equipment for crafting keto ice cream include a high-powered blender or food processor. A good blender is essential for making a clean and creamy base, blending ingredients successfully.
The ice cream maker itself is clearly a necessity. Choose one that matches your needs – consider a compressor mannequin for frequent use, or a churn-style mannequin should you choose an easier, more budget-friendly choice. Compressor models generally produce a denser, richer ice cream.
While not strictly appliances, having a set of mixing bowls of various sizes and spatulas (both rubber and metal) will assist in the process, allowing for simple mixing and ingredient preparation.
Beyond the core home equipment, consider some supplementary instruments. A fine-mesh sieve can be beneficial for removing lumps or ensuring a wonderfully smooth consistency before churning.
Some recipes could require the utilization of a double boiler for melting delicate elements like chocolate without scorching them.
Finally, having a thermometer – each a candy thermometer for exact temperature monitoring of cooked components, and a food thermometer for checking the temperature of your ice cream base – is essential for excellent results.
By investing in these essential kitchen appliances and tools, notably a exact kitchen scale, you may be well-equipped to create scrumptious and completely textured keto ice cream at residence, each time.
Key Ingredients & Their Preparation
High-quality heavy cream is paramount. Look for cream with a minimum of 36% milkfat for the richest, creamiest texture. Source it from a reputable dairy if potential.
Full-fat coconut milk adds a refined sweetness and creamy physique, complementing the richness of the heavy cream. Make positive it is the full-fat sort, not mild coconut milk.
Erythritol or one other keto-friendly sweetener is important for balancing the richness of the fats. Experiment with completely different sweeteners to seek out your most popular degree of sweetness and aftertaste.
Vanilla extract lends a classic ice cream flavor, enhancing the general expertise. Use a high-quality extract for the most effective results.
Optional additions like cocoa powder (for chocolate ice cream), peanut butter (for peanut butter ice cream), or different keto-friendly mix-ins significantly broaden the flavor profiles.
For the smoothest ice cream, a high-powered blender is crucial for emulsifying the components and achieving a super-smooth texture. An immersion blender can also suffice however a high-speed blender is mostly preferred.
Accurate measuring is vital for achievement. Invest in a set of high-quality measuring cups and spoons, preferably made of stainless steel or sturdy plastic for easy cleansing.
Use separate measuring cups for dry and moist components to take care of accuracy and prevent cross-contamination of flavors.
Nested measuring cups and spoons are space-saving but can typically be less correct than individual ones, notably for smaller measurements.
When measuring liquids, ensure to use a measuring cup with a spout for accurate pouring and to forestall spills.
For dry ingredients like erythritol or cocoa powder, use a spoon to softly fill the measuring cup, then level it off with a straight edge (like a knife or spatula) for exact measurement.
Pay attention to the units of measurement laid out in your recipe (cups, tablespoons, teaspoons) and guarantee your measuring instruments match.
Always double-check your measurements before mixing to avoid by chance using an excessive quantity of or too little of any ingredient.
Cleaning your measuring cups and spoons immediately after use prevents sticky residues from hardening and ensures they remain correct and easy to wash.
Consider buying a set with clearly marked measurements, in both metric and imperial items, for larger versatility.
Remember, even small discrepancies in measurements can have an effect on the final outcome of your keto ice cream, so precision is highly beneficial.
Properly maintained measuring instruments are essential not only for profitable keto ice cream making but additionally for all your baking and cooking endeavors.
Beyond the essential instruments, consider an ice cream maker for optimal outcomes. A high-quality ice cream maker ensures a wonderfully clean and scoopable consistency.
If you wouldn’t have an ice cream maker, you’ll be able to still freeze your keto ice cream in a freezer-safe container, but you could have to stir it often to forestall ice crystals from forming.
Invest in good high quality freezer-safe containers to store your do-it-yourself keto ice cream, guaranteeing correct sealing to stop freezer burn and preserve freshness.
An hermetic container is crucial for preventing the ice cream from absorbing undesirable odors or drying out within the freezer.
High-quality ice cream maker: A compressor-based model is good for attaining a smooth, creamy texture, minimizing ice crystals. Look for a mannequin with a big capability when you plan to make large batches.
Heavy-duty stand mixer (optional however recommended): While not strictly necessary, a stand mixer makes the preliminary mixing process significantly simpler, particularly when coping with larger portions of ingredients.
Measuring cups and spoons: Accurate measurements are essential in baking and ice cream making. Invest in a set of dependable measuring instruments.
Rubber spatula or picket spoon: These are essential for scraping down the perimeters of the mixing bowl and guaranteeing all components are completely mixed.
Fine-mesh sieve or strainer: Sieving dry elements, just like the sweetener, helps forestall lumps and contributes to a smoother final product.
Airtight freezer-safe container: For storing your completed keto ice cream. The container should be capable of stand up to the temperature fluctuations of the freezer.
Mixing Bowls:
Large mixing bowl (stainless steel or glass): Choose a large bowl able to holding all of your elements comfortably. Stainless metal is sturdy and straightforward to wash; glass is non-reactive with components.
Medium mixing bowl (stainless metal or glass): Useful for getting ready individual parts just like the sweetener mixture or the cream/full-fat coconut milk mixture individually earlier than combining.
Small mixing bowl (stainless steel or glass): Can be used for whisking collectively dry elements or measuring out smaller portions of elements.
Key Ingredients and Their Preparation:
Heavy cream (or full-fat coconut milk): The basis of your keto ice cream. Ensure it’s very cold for optimum outcomes. No particular preparation needed, simply chill totally.
Erythritol or different keto-friendly sweetener: Measure precisely in accordance with your recipe. Sieving is beneficial to prevent lumps and ensure even sweetness throughout the ice cream.
Keto-friendly flavorings: This might include extracts (vanilla, almond, and so forth.), cocoa powder, nut butters, or different permitted sweeteners. Prepare these according to the recipe directions. For example, soften chocolate if needed for a chocolate ice cream.
Salt (optional): A pinch of salt can improve the flavour of the ice cream and steadiness sweetness. No special preparation required.
Thickening agents (optional): Some recipes might call for xanthan gum or guar gum to enhance the texture and forestall ice crystals. Measure fastidiously as an excessive amount of can result in a gummy texture. These generally don’t require particular preparation past correct measurement.
Mixing Technique:
Generally, you will begin by combining dry components (sweetener, optional thickening brokers, and salt) in one bowl. In another bowl, mix moist ingredients (cream, coconut milk, and flavorings). Then, gently fold the moist ingredients into the dry elements until simply mixed. Avoid overmixing, as this can incorporate too much air, leading to a much less dense ice cream. A stand mixer is right for this when you have one; otherwise, use a whisk or spatula and blend gently.
Churning the Ice Cream:
Once the combination is completely mixed, switch it to your ice cream maker and churn based on the producer’s directions. This normally takes 20-30 minutes, relying in your machine and the recipe. Transfer the churned ice cream into the freezer-safe container and freeze for at least a few hours to permit it to fully firm up.
For actually creamy keto ice cream, the key ingredients are essential. High-fat coconut milk is paramount; full-fat, canned coconut milk supplies the necessary richness and creaminess. Avoid low-fat varieties.
Heavy cream is one other important, including additional richness and aiding in the smooth texture. The larger the fats content material, the higher the result.
A good quality sweetener is required to replace sugar. Erythritol, monk fruit, or stevia are well-liked keto-friendly choices. Experiment to find your most popular style profile; these sweeteners range in sweetness and aftertaste.
Flavorings are the place you presumably can really personalize your keto ice cream. Vanilla extract is a basic, but cocoa powder, nut butters (like almond or peanut), and even spices like cinnamon or cardamom can be integrated.
Preparation of those ingredients is straightforward. For coconut milk, simply chill it completely earlier than utilizing, as this helps with achieving a thicker, more frozen consistency.
Heavy cream must also be chilly, ensuring it whips nicely and incorporates correctly into the mixture.
Sweeteners ought to be measured precisely based mostly on their sweetness stage – start with the decrease end of your recipe and regulate to style.
Flavorings should be added based on recipe pointers. Cocoa powder, for example, must be sifted to stop clumping.
For whisk or spatula utilization: A whisk is beneficial for incorporating air initially, significantly when whipping the cream earlier than adding it to other components. This helps create a lighter texture.
A rubber spatula or silicone spatula is invaluable for scraping down the sides of the bowl, making certain all elements are fully combined and preventing lumps. It’s essential in the course of the blending course of of combining all ingredients.
Once the bottom is complete, a spatula is mostly adequate for transferring the combination to an ice cream maker, especially if the recipe requires folding in additions like chocolate chips or nuts.
The selection between whisk and spatula is dependent upon the stage of preparation. The whisk aerates, while the spatula ensures thorough mixing and prevents waste.
Using each instruments in succession usually yields one of the best results; the whisk for initial whipping and the spatula for final mixing and transfer.
Beyond these fundamental instruments, an ice cream maker is crucial for attaining a smooth, scoopable texture. While some keto ice cream recipes allow for freezer-based strategies, these often result in a much less fascinating consistency.
Consider using a high-quality ice cream maker to attenuate ice crystal formation and guarantee a perfectly creamy, frozen dessert.
In conclusion, the success of selfmade keto ice cream hinges on utilizing high-quality, fat-rich ingredients and employing the right tools – a whisk for initial aeration, and a spatula for thorough mixing and switch, all culminating in a scrumptious and satisfying treat.
Making the Perfect Keto Ice Cream Base
High-quality ice cream makers are key to achieving a smooth, creamy texture. Look for fashions with a built-in compressor for steady freezing, eliminating the necessity for pre-freezing the bowl. Consider manufacturers like Cuisinart, KitchenAid, or Breville, recognized for his or her durability and efficiency.
A good kitchen scale is crucial for accurate measurements, especially when working with keto-friendly sweeteners which can range in sweetness and bulk. A digital scale with a tare operate (to zero out the burden of a bowl) is highly beneficial for precise outcomes.
A high-powered blender or meals processor is essential for creating a completely easy base. A Vitamix or Blendtec will effectively mix all of the elements, minimizing ice crystals and making certain a velvety texture. A less powerful blender may depart lumps.
Having multiple mixing bowls of different sizes allows for environment friendly preparation of the ingredients, preventing cross-contamination and making the process more organized. Stainless steel bowls are sturdy and easy to scrub.
A sturdy rubber spatula or silicone spoon is essential for scraping down the sides of the blender or mixing bowls, making certain all elements are incorporated evenly. This is especially essential when dealing with thicker keto ice cream bases.
Measuring cups and spoons with precise markings are needed for measuring out elements like heavy cream, coconut milk, and sweeteners. Accurate measuring ensures the recipe’s success.
An hermetic container is critical for storing your do-it-yourself keto ice cream. An airtight container helps prevent freezer burn and preserve the quality and texture of the ice cream. Opt for a freezer-safe container made of plastic or glass.
Optional however helpful instruments: a fine-mesh sieve (for removing any lumps or seeds from the base), a thermometer (to monitor the temperature of the cream mixture), and parchment paper (for simple elimination of the frozen ice cream from the container).
Regarding sweeteners, Erythritol is a popular choice as a outcome of its minimal impact on blood sugar and lack of aftertaste. It blends properly into ice cream bases and provides sweetness without the extreme cooling sensation of another sweeteners.
Monk fruit sweetener provides intense sweetness, so use it sparingly. It blends well but can be costlier than different keto-friendly options. A little goes a good distance.
Stevia is one other intensely sweet choice, however it could have a barely bitter aftertaste which some discover unpleasant in ice cream. Experimenting with small quantities is beneficial to determine private preference.
Allulose is a newer keto-friendly sweetener with an analogous texture and sweetness to sugar but with minimal influence on blood glucose. However, it can have a barely completely different style from Sugar Free Ice Cream.
A mix of sweeteners usually produces the most effective results. Combining erythritol with a small amount of monk fruit or stevia can steadiness sweetness and reduce any aftertaste. Experimentation is key to discovering your good mix.
Remember to all the time check the nutritional data of your chosen sweetener to make sure it aligns together with your ketogenic dietary targets and desired caloric intake.
- Prioritize quality components for one of the best taste and texture.
- Properly chilling the elements earlier than churning helps obtain a smoother result.
- Avoid over-churning, as this could create a grainy texture.
- Allow the ice cream to harden in the freezer for a minimal of 2-4 hours earlier than serving.
Crafting the right keto ice cream base hinges on deciding on the best fats, and understanding how they behave in the course of the freezing course of. Avoid overly saturated fat which can lead to a grainy texture.
Coconut milk full-fat is a foundational ingredient. Its creamy texture and inherent sweetness contribute significantly to the ice cream’s final mouthfeel and taste profile. Opt for the canned model, because it typically accommodates a better fat content material than refrigerated variations.
Heavy cream, another cornerstone, brings richness and additional enhances creaminess. The greater the fats content (at least 36%), the better the outcome. Look for organic options every time attainable.
Avocado oil, though not as broadly used, offers a novel smoothness and mild taste. It contributes to an opulent mouthfeel without altering the taste considerably. Use it sparingly, as an excessive amount of can impart a slightly vegetal notice.
Unsweetened almond milk can be included for a lighter texture and delicate nutty flavor. Choose unsweetened varieties to take care of control over the sweetness level.
Beyond the fats, contemplate incorporating additional flavoring agents corresponding to vanilla extract, cocoa powder (for chocolate variants), or other keto-friendly extracts and spices.
Now, let’s delve into the tools and equipment essential for making distinctive keto ice cream at residence:
High-quality immersion blender (or stand blender): This is indispensable for achieving a smooth, emulsified base. An immersion blender permits for direct blending in the mixing bowl, eliminating the need for transferring.
Precise kitchen scale: Accurate measurements are key for balancing flavors and achieving the desired consistency. A digital scale ensures consistency.
Airtight freezer-safe containers: These stop freezer burn and preserve the ice cream’s high quality. Choose containers which may be the proper size for your batches.
Ice cream maker (optional but highly recommended): While you possibly can technically freeze the combination without an ice cream maker, it will end in a coarser texture with bigger ice crystals. A good high quality ice cream maker, whether or not a compressor or a churn kind, drastically improves the final product’s smoothness and creaminess.
Large mixing bowls: You’ll want ample house for mixing the ingredients.
Spatula or whisk: For incorporating ingredients and scraping down the perimeters of the bowl.
Measuring cups and spoons: Accurate measurements are very important for a well-balanced recipe.
Properly chilling the mixture before churning is vital for one of the best outcomes. This permits the fat to solidify and prevents excessive ice crystal formation. Aim for at least 4-6 hours of chilling.
With cautious ingredient choice, exact measurements, and the right gear, you can craft keto ice cream that rivals store-bought variations, with out the added sugars and unhealthy components.
High-quality ice cream makers are essential for reaching a smooth, creamy texture. Consider fashions with a built-in compressor for continuous freezing, eliminating the necessity for pre-freezing the bowl. Look for bigger capability fashions if you plan on making frequent batches or bigger portions.
A good kitchen scale is important for precise measurements, notably when working with keto-friendly sweeteners which can have varying sweetness ranges in comparison with sugar. Accuracy ensures the proper steadiness of flavors and prevents a finished product that’s too sweet or bland.
A high-powered blender or food processor is vital for creating a superbly smooth ice cream base. A highly effective motor ensures that every one components, especially fattier ones, are totally blended, preventing icy crystals from forming.
Airtight containers are needed for storing your keto ice cream. Using hermetic containers helps to prevent freezer burn and keep the standard and flavor of your ice cream over time. Opt for containers which are simple to stack and retailer within the freezer.
A sturdy whisk is helpful for incorporating air into the ice cream base earlier than churning. This helps obtain a lighter, airier texture. Choose a whisk that’s comfortable to carry and use.
Measuring cups and spoons, ideally with both metric and imperial measurements, provide accurate measurements for all elements. This contributes to consistency across completely different batches of ice cream.
A spatula or rubber scraper is very helpful for scraping down the sides of the blender or food processor to ensure that all elements are thoroughly combined. It’s also helpful for transferring the ice cream combination to your ice cream maker.
For incorporating mix-ins, think about small bowls and spoons for portioning out the add-ins before gently folding them into the churned ice cream. This helps to distribute them evenly all through the ice cream with out over-mixing.
Optional however useful tools embody a thermometer for monitoring the temperature of the ice cream base during the churning course of, and parchment paper for lining containers if you’d like simple elimination after freezing.
Investing in these tools will enhance your keto ice cream-making expertise, allowing you to create persistently delicious and creamy frozen treats. The proper tools guarantees a easy, easy course of and a superior ultimate product.
Freezing and Storage Techniques
Making keto ice cream at house requires cautious consideration to freezing and storage to hold up its texture and forestall ice crystal formation. The finest outcomes come from utilizing high-quality equipment and using proper strategies.
Freezing Techniques:
Ice Cream Maker: An ice cream maker, significantly a compressor model, is essential for achieving a smooth, creamy texture. Compressor models chill the combination constantly, leading to less ice crystal formation. Batch freezers require pre-freezing of the bowl, which might influence efficiency.
Freezing in Stages: For smaller batches or should you don’t personal an ice cream maker, think about partial freezing. Freeze the mixture partially before churning it by hand or with a easy whisk. This technique reduces the likelihood of large ice crystals forming.
Rapid Freezing: Rapid freezing minimizes the time the ice cream spends within the temperature vary the place large ice crystals form. This could be achieved with a high-quality ice cream maker or through the use of shallow, broad containers for freezing.
Temperature Control: Monitoring the freezer temperature is vital. A constantly chilly freezer (-18°C or 0°F or colder) prevents ice crystal development and maintains optimal texture. Fluctuations in temperature lead to poor texture.
Storage Techniques:
Airtight Containers: Proper storage is vital to stopping freezer burn and maintaining quality. Airtight containers, ideally made from high-quality, freezer-safe materials like glass or BPA-free plastic, are important. These containers create a barrier towards air, which is the first reason for freezer burn.
Container Size: Opt for containers that are appropriately sized for your batch of ice cream. Overfilling can result in uneven freezing and elevated ice crystal formation. Smaller containers permit for quicker freezing and simpler portioning.
Proper Sealing: Ensure that the containers are tightly sealed to stop air from getting into and causing freezer burn. Check the seals frequently, particularly after opening and refreezing.
Labeling and Dating: Label your containers with the date of freezing. Keto ice cream, whereas scrumptious, does have a shelf life, and correct labeling ensures that you use it before it loses its quality.
Freezer Placement: Avoid inserting the ice cream containers in areas of the freezer that experience important temperature fluctuations, similar to near the door or vents.
Airtight Container Materials:
Glass: Glass containers are best as a end result of they’re non-porous and will not take in flavors or odors. They are durable and freezer-safe, but can be vulnerable to breakage.
BPA-Free Plastic: High-quality, BPA-free plastic containers are a great alternative to glass. Ensure that they’re particularly designed for freezer use. Avoid utilizing low-quality plastics, as they will leach chemical substances into the ice cream.
Stainless Steel Containers: These are an more and more in style alternative; they’re sturdy, don’t take up odors, and are freezer-safe. They are additionally simple to clean.
By using these freezing and storage techniques and utilizing applicable airtight containers, you’ll find a way to ensure your homemade keto ice cream maintains its scrumptious creamy texture and optimal taste for as long as potential.
While the prompt requests data on freezing and storage techniques, it’s essential to grasp that the context of “keto ice cream” necessitates a concentrate on methods that reduce ice crystal formation and maintain the creamy texture desired on this low-carb dessert.
Freezing Techniques for Keto Ice Cream: The best technique involves utilizing an ice cream maker, particularly one designed for churning frozen desserts. These machines repeatedly agitate the mixture whereas freezing it, stopping large ice crystals from forming.
If an ice cream maker is not available, a less optimal but nonetheless viable technique includes using a shallow, freezer-safe container. Pour the keto ice cream base into the container, guaranteeing it is unfold thinly to maximize surface area for speedy freezing. This will reduce massive ice crystal formation but likely result in a barely icier texture.
Another technique, useful for smaller batches, is using a silicone mould. These molds freeze shortly, and the versatile silicone makes it straightforward to pop out the frozen ice cream.
Proper Freezing Temperatures and Times: The perfect freezing temperature for keto ice cream is -18°C (0°F) or lower. This temperature ensures correct freezing and inhibits the expansion of ice crystals. The freezing time varies based on the quantity of the combination, the sort of freezer, and the freezing method used.
Using an ice cream maker, the churning course of usually takes 20-30 minutes. However, this is solely the preliminary freezing. After the ice cream maker cycle finishes, it is strongly recommended to harden the ice cream further within the freezer for several hours or in a single day.
For the shallow container or silicone mold technique, anticipate a freezing time of a minimal of 4-6 hours, or even longer for bigger batches. It’s crucial to check for doneness and allow for longer freezing if wanted.
Storage Techniques: Once the keto ice cream is fully frozen, proper storage is essential for sustaining quality and stopping freezer burn. Airtight containers are essential. Consider using containers designed for freezer use, which are often thicker and more sturdy.
For longer-term storage, wrap the container tightly in freezer-safe plastic wrap or aluminum foil earlier than putting it in a freezer bag. This helps create a double layer of safety against freezer burn, which is brought on by exposure to air and moisture.
Optimal Storage Times: While keto ice cream can final for several weeks in the freezer, its texture and flavor are greatest throughout the first two weeks. After that, the texture might become slightly icy as a result of ice crystal progress, and the flavour may subtly diminish.
Tools and Equipment: Besides an ice cream maker (highly recommended), important tools for making keto ice cream embrace: a high-quality blender or meals processor for creating a clean base; measuring cups and spoons for precise ingredient measurements; spatulas or ice cream scoops for serving.
Freezer-safe containers of various sizes will be needed, along with plastic wrap, aluminum foil, and freezer bags for storage. A thermometer may be useful to observe freezer temperature. Finally, a kitchen scale is extraordinarily useful for precise measurements of ingredients.
Remember to at all times comply with recipe tips regarding freezing instances and methods. Experimentation may be needed to good the approach for your explicit tools and recipes.
Making keto ice cream at home requires careful attention to freezing and storage methods to achieve a clean, creamy texture and keep away from large ice crystals.
Ice cream makers are important for churning the combination, incorporating air, and stopping ice crystal formation. Look for fashions with sturdy motors and good temperature control.
An airtight container is essential for storage. Avoid containers which would possibly be too shallow, as this exposes a larger floor space to the freezer, accelerating ice crystal formation.
Freezer burn is a major enemy of easy keto ice cream. To forestall it, ensure your container is hermetic and consider using a freezer-safe wrap or bag as an extra layer of safety.
Proper freezing temperatures are vital. Your freezer ought to be set to a constant temperature ideally under 0°F (-18°C). Fluctuations in temperature lead to ice crystal development.
Rapid freezing helps decrease ice crystal formation. This can be aided by using a smaller container and guaranteeing even distribution of the ice cream combination earlier than freezing.
Using stabilizers in your keto ice cream recipe will drastically scale back ice crystal formation. Common stabilizers embrace xanthan gum, guar gum, or even a small amount of cream cheese or full-fat coconut milk.
Choosing the proper fats is essential. Higher fat content material contributes to a creamier texture and inhibits ice crystal progress. Consider using full-fat coconut milk, heavy cream, or avocado oil.
Minimize air exposure through the freezing course of. Pour the mixture into the container and seal it tightly to forestall the formation of huge ice crystals on the floor.
Consider utilizing an ice cream stabilizer package. These kits typically include ingredients particularly designed to reduce ice crystals, improving the feel and preventing freezer burn.
Pre-freezing your ingredients (particularly the cream and coconut milk) might help create a smoother ice cream base.
Avoid opening and shutting the freezer frequently. Each time you open it, warm air enters, causing temperature fluctuations and inspiring ice crystal formation.
Don’t over-churn the ice cream. Over-churning can incorporate too much air, making the ice cream icy. Follow the instructions of your ice cream maker carefully.
For optimum texture, enable the ice cream to sit in the freezer for a minimal of 4-6 hours (or longer, ideally overnight) before scooping to allow the fats to correctly solidify and the ice crystals to meld collectively.
High-quality ingredients are essential. Using fresh, high-quality elements will result in a superior ice cream that’s less prone to ice crystal formation, whatever the technique used.
Experiment with completely different recipes and strategies to search out what works greatest for you and your equipment. Keep detailed notes of what you do to perfect your course of over time.
Investing in a quality thermometer permits you to monitor the temperature of your freezer and ice cream mixture to ensure optimum conditions for freezing.
Properly cleaning your ice cream maker after every use is crucial to stop micro organism progress and preserve optimum performance.
Remember to always follow your ice cream maker’s instructions for finest results. Different machines could have particular necessities for churning time, freezing course of and even maintenance.
By following the following tips, you’ll find a way to significantly enhance your chances of creating delicious, smooth keto ice cream at home, free from giant, unpleasant ice crystals.
Advanced Techniques and Recipes
Creating luxuriously clean and creamy dairy-free keto ice cream at residence requires greater than just a good recipe; it calls for the best instruments and equipment.
A high-quality blender is paramount. Look for a model with a strong motor capable of pulverizing nuts and seeds into a completely clean butter. Vitamix and Blendtec are popular selections recognized for their capacity to deal with even the hardest ingredients.
An ice cream maker is, after all, essential. While some recipes claim to bypass this step, the feel will lack the graceful, scoopable quality that defines great ice cream. Consider whether or not a compressor mannequin (which chills itself) or a canister model (requiring pre-freezing) most intently fits your needs and budget. Compressor fashions provide more convenience but have a larger footprint.
For measuring components precisely, a great kitchen scale is indispensable. Keto baking and ice cream making often depend on particular ratios of fats and sweeteners, so accuracy is essential. A scale permits for more precise measurements than volume-based tools.
Investing in a set of fine high quality measuring cups and spoons is also essential, even with a scale. They’re useful for checking the scale’s accuracy and for recipes which may require a mix of weight and quantity measurements.
A spatula or rubber scraper will turn out to be useful for scraping down the edges of your blender to make sure every little thing is totally blended and to switch the ice cream base to the ice cream maker.
For achieving the proper consistency, a fine-mesh sieve may be useful. This is especially helpful if you’re using nuts or seeds that need to be exceptionally finely floor to avoid a gritty texture.
Depending on your chosen recipe, a food processor may additionally be a priceless addition. It’s particularly helpful for finely chopping elements like nuts or creating a easy base for certain taste combinations.
Beyond the core gear, think about these additions: Airtight containers for storing your finished ice cream and freezing it correctly. Freezer secure bowls or containers appropriate for churning are one other necessity.
Finally, don’t forget the little issues: clean kitchen towels for wiping up spills, a thermometer for checking the temperature of your ice cream base (if the recipe requires it), and a timer for monitoring churning time.
With the proper instruments and a little persistence, you’ll find a way to create delicious and decadent dairy-free keto ice cream that rivals store-bought varieties. Remember to choose quality equipment; it’s going to significantly influence the ultimate product’s taste and texture.
Investing in these tools is not going to solely enhance your ice cream-making experience but allow for greater creativity and experimentation with numerous keto-friendly components and flavor combinations.
Consider the frequency of use when selecting your equipment. If you are a frequent ice cream maker, a high-end compressor ice cream maker is a worthwhile investment. If you only make it occasionally, a canister model could suffice.
Regardless of your finances, prioritizing high quality over quantity in your gear selections will undoubtedly result in superior dairy-free keto ice cream.
Beyond the basics of a high-powered blender and an ice cream maker, venturing into superior keto ice cream creation opens up a world of potentialities.
A high quality immersion blender can be invaluable for achieving exceptionally easy textures, especially when coping with thicker, creamier bases or incorporating nut butters.
Precise temperature control is essential. An instant-read thermometer ensures you achieve the right consistency in your custard base earlier than churning, preventing icy crystals.
A vacuum sealer can elevate your game by eradicating excess air from the ice cream container throughout freezing. This minimizes ice crystal formation and enhances the creamy texture. Consider this for longer-term storage too.
For truly bold projects involving tempering chocolate or creating intricate layered desserts, a double boiler is your good friend. Gentle, even heating ensures that delicate components stay easy and don’t seize.
Experimenting with taste combinations is where the real fun begins. Start by contemplating the bottom itself: coconut milk lends a tropical sweetness, heavy cream adds richness, and cream cheese provides a tangy depth.
Infusing your cream with spices earlier than churning provides refined complexity. Consider cardamom, cinnamon, or even a trace of chili powder for a kick.
Explore unconventional sweeteners: erythritol blends nicely and avoids the aftertaste of some alternatives, while monk fruit offers intense sweetness in small quantities.
Nut butters are your allies: almond butter offers a nutty warmth, whereas cashew butter supplies a creamy indulgence. Peanut butter, carefully, provides a basic salty-sweet profile.
Fresh herbs, when finely minced and added simply earlier than churning, lend shocking freshness. Basil, mint, and even rosemary can create unexpectedly scrumptious mixtures.
Embrace the power of extracts: vanilla is basic, but discover almond, peppermint, and even coffee extracts for distinctive flavor profiles.
Don’t shrink back from unconventional additions: finely grated zest of citrus fruits (lemon, lime, orange) offers shiny bursts of flavor.
Think about creating layered ice creams, with distinct flavor profiles in each layer. A chocolate base, followed by a raspberry swirl, and topped with a coconut cream layer, presents visual appeal and style complexity.
Consider incorporating keto-friendly chocolate chips or chunks for further texture and indulgence.
For those with a extra adventurous palate, attempt incorporating coffee grounds into the base for a mocha-flavored ice cream.
Experiment with various kinds of nuts and seeds: chopped pecans, macadamia nuts, and even chia seeds add pleasant texture and dietary worth.
Don’t neglect in regards to the importance of salt: a pinch of sea salt can improve the sweetness and complexity of your ice cream, balancing the flavors.
Once you’ve got crafted your good recipe, meticulously doc it, including ingredient ratios and any adjustments you made. This might be your information as you refine your culinary creations.
Finally, tasting and adjusting is crucial. Don’t be afraid to tweak your recipes to excellent your most well-liked flavor stability and consistency. The pleasure of keto ice cream is in the creative process.
Crafting exceptional keto ice cream at residence hinges significantly on the instruments and gear you utilize. Investing in the best gear ensures a smoother, quicker, and extra successful ice cream-making process.
High-Quality Ice Cream Maker: A compressor ice cream maker is the gold normal. These machines freeze the ice cream constantly, eliminating the necessity for pre-freezing the bowl, resulting in a quicker and smoother texture. Look for fashions with a big capacity should you plan to make larger batches.
Immersion Blender (Stick Blender): Essential for attaining a totally clean and creamy texture. A powerful immersion blender simply blends the components, stopping ice crystals from forming.
Accurate Kitchen Scale: Precise measurements are crucial in keto baking and ice cream making. A digital kitchen scale ensures constant results, notably when working with low-carb sweeteners that have totally different volumes and weights.
High-Powered Blender (Optional but Recommended): While not strictly necessary, a high-powered blender can considerably help in making a smoother base, particularly when using elements like nuts or seeds that need thorough mixing.
Good Quality Saucepan: A sturdy saucepan is needed for heating the cream mixture to include flavors and melt any thickening brokers like coconut flour or xanthan gum.
Thermometer: A sweet thermometer or instant-read thermometer is significant for monitoring the temperature of the cream mixture, ensuring even cooking and preventing scorching.
Airtight Containers: Proper storage is essential. Use airtight containers to store your keto ice cream in the freezer to prevent it from absorbing freezer smells and ice crystals from forming.
Spatula or Scraper: A sturdy spatula or scraper is invaluable for scraping down the edges of the ice cream maker and transferring the finished product into its container.
Optional additions:
Ice Cream Scoop: A good quality ice cream scoop makes serving a lot easier, especially when the ice cream is frozen strong.
Silicone Ice Cream Molds: For making particular person servings, these are a fantastic different to plain containers.
Advanced Techniques and Recipes:
Using Stabilizers: Incorporating stabilizers like xanthan gum or guar gum helps forestall ice crystals from forming and creates a smoother, creamier texture. Use them sparingly, as an excessive amount of can create a gummy consistency.
Fat Selection: Experiment with totally different fats: heavy cream, coconut cream, full-fat coconut milk. Each supplies a slightly totally different flavor and texture profile. Balance your fats sources for the ideal consistency.
Sweetener Selection: Erythritol, monk fruit, and stevia are popular low-carb sweeteners. Each has its own sweetness level and aftertaste, influencing the overall taste of your ice cream.
Infusing Flavors: Experiment with infusions. Steep vanilla beans within the cream, add cocoa powder for chocolate, or incorporate fruit purees (be aware of carb counts).
No-Churn Method: For these with out an ice cream maker, a no-churn method using whipped cream and sweetened condensed milk (keto-friendly version) can be utilized, though the texture shall be barely totally different.
Troubleshooting Common Keto Ice Cream Problems:
Icy Texture: This typically results from inadequate fat content or improper churning. Increase fats content material, use stabilizers, or ensure your ice cream maker is functioning accurately.
Grainy Texture: This usually stems from uneven mixing or utilizing sweeteners that crystallize easily. Use a high-powered blender to fully combine the components and select a sweetener recognized for its smoothness.
Too Soft: This signifies the ice cream hasn’t been frozen long enough. Let it freeze for a longer interval or adjust your freezer temperature.
Too Hard: This happens if the ice cream is frozen for too lengthy. Let it sit at room temperature for a couple of minutes earlier than scooping.
Off Flavors: This may be caused by utilizing low-quality components or an imbalance of flavors. Always use contemporary, high-quality ingredients and punctiliously adjust the ratios of sweeteners and flavorings.
Remember that experimentation is essential to mastering keto ice cream making. Don’t be afraid to strive totally different recipes and methods to search out what works best for you and your palate.
Cleaning and Maintenance
Making keto ice cream at residence opens up a world of scrumptious, guilt-free indulgence. But to maintain having fun with that creamy goodness, proper cleaning and maintenance of your ice cream maker are crucial.
The first step, and arguably the most important, is to immediately clear your ice cream maker after every use. This prevents dairy and other elements from hardening and becoming tough to remove.
Most ice cream makers have removable parts, such as the freezing bowl and the paddle. These should be separated and cleaned totally.
If your ice cream maker has a removable bowl, verify the manufacturer’s instructions. Some are freezer-safe and can be cleaned in the dishwasher, while others require hand washing.
For hand washing, use warm, soapy water and a soft sponge or fabric. Avoid abrasive cleaners or scouring pads, as these can scratch the floor of the bowl, impacting its efficiency and longevity. Rinse completely and dry utterly earlier than storing.
The paddle, usually made from metal or plastic, is often dishwasher secure. However, hand washing is gentler. Pay close attention to any crevices where ice cream might have amassed.
If you are fighting cussed ice cream residue, soak the bowl and paddle in warm, soapy water for a while before scrubbing. A little baking soda added to the water may help cut by way of grease.
Never immerse the motor unit or electrical components of your ice cream maker in water. Wipe these components down with a damp material and dry totally.
Once all elements are clean and dry, re-assemble your ice cream maker based on the manufacturer’s directions. Ensure every thing is securely in place before storing.
For long-term storage, hold the freezing bowl within the freezer, prepared for your next ice cream making adventure. This ensures it’s all the time cold and prepared to churn. Store the other components in a clear, dry place away from moisture and excessive temperatures.
Regular maintenance can be key. Periodically, examine the seals on the freezing bowl to ensure they’re not damaged or worn. Replace worn seals as needed, to maintain up proper insulation and prevent leaks.
Following these easy cleaning and upkeep tips will extend the life of your ice cream maker, making certain you’ll be able to take pleasure in scrumptious do-it-yourself keto ice cream for years to return. Remember to seek the advice of your particular ice cream maker’s manual for detailed cleansing instructions.
Investing in high-quality cleaning tools, corresponding to a non-scratch sponge, a soft-bristled brush, and a microfiber cloth, will make the process much more efficient and environment friendly. Keeping your ice cream maker clear will keep your frozen treats tasting their best!
Maintaining your ice cream maker is essential for longevity and constant outcomes. Regular cleansing prevents bacterial development and ensures optimal efficiency.
After every use, immediately unplug your ice cream maker and permit it to chill completely earlier than cleaning. This is especially important for fashions with motorized parts.
For many ice cream makers, the bowl is an important part requiring cleansing. If your mannequin allows it, wash the bowl in heat, soapy water. A soft sponge or non-abrasive cloth is best to avoid scratching the floor. Avoid harsh chemical compounds or abrasive cleaners.
Some bowls are freezer-safe and may be cleaned in the dishwasher. Always check your manufacturer’s directions to verify dishwasher-safe compatibility.
If your ice cream maker has removable elements like paddles or dashers, these should be cleaned individually. They can normally be hand-washed with warm, soapy water or, once more, positioned in the dishwasher depending on the manufacturer’s recommendations.
Thoroughly rinse all parts to remove any soap residue. Allow all elements to air dry utterly earlier than storing. Do not use towels or cloths to dry, as this could depart lint behind.
The exterior of the ice cream maker ought to be wiped down with a humid fabric after each use. Pay attention to any crevices or areas the place ice cream might have spilled.
For longer-term storage, ensure the ice cream maker is totally dry before placing it away. This prevents mould and mildew progress.
Store the ice cream maker in a cool, dry place, away from direct sunlight and excessive temperatures. Avoid stacking heavy items on high of it.
Keep the facility cord neatly wrapped and keep away from kinking or damaging it. This helps to take care of its integrity and prevents malfunctions.
If your ice cream maker has a particular storage container for the bowl or different components, use it to ensure every little thing stays protected and arranged.
For models that utilize a compressor or different specialized cooling mechanisms, consult your user manual for particular cleansing and upkeep directions. Some models may require occasional deep cleansing or lubrication of specific parts.
Regular upkeep will make sure that your ice cream maker continues to produce scrumptious keto ice cream for years to come back. Remember, prevention is best than remedy. A little effort in cleaning and storage will pay off in the long term.
Consider investing in a protecting cowl to keep dust and debris off your machine when not in use, significantly in case you are storing it for prolonged durations.
Finally, at all times check with your producer’s directions for particular cleansing and upkeep procedures relevant to your model of ice cream maker. These directions will usually contain useful suggestions and warnings particular to the supplies and elements used in your system.