
The Art Of Decorating Peanut Butter Balls For Special Occasions
Classic Designs
Classic designs for peanut butter balls often lean towards simplicity, emphasizing the rich shade and texture of the confection itself.
A simple drizzle of melted chocolate is a timeless selection, creating a chic distinction in opposition to the peanut butter base.
The drizzle could be utilized in a straight line down the center, a zig-zag sample, or even a extra haphazard, inventive streak.
For a extra refined look, think about using a piping bag with a small round tip to create delicate chocolate dots or dashes.
These dots may be organized in a linear pattern, clustered together, or scattered randomly for a playful feel.
Melted white chocolate offers a beautiful contrasting drizzle towards darkish chocolate-covered peanut butter balls.
A combination of darkish and white chocolate drizzles allows for artistic patterns like alternating stripes or a marbled effect.
Adding a sprinkle of sea salt to the moist chocolate drizzle adds a classy salty-sweet dimension.
For a festive touch, coloured sprinkles may be integrated into the chocolate drizzle, or sprinkled on high as soon as the chocolate has set.
Red and green sprinkles are good for Christmas, whereas pastel colours are ideal for Easter or spring celebrations.
Consider utilizing finely chopped nuts, like chopped pecans or pistachios, instead or addition to sprinkles for a textured element.
A dusting of powdered sugar can create a fragile, snowy impact, especially suitable for winter events.
For a more advanced design, utilize a stencil to create intricate patterns, like snowflakes or hearts, with melted chocolate.
Pressing the stencil gently onto the peanut butter ball before drizzling the chocolate ensures a crisp, outlined pattern.
Once the chocolate has set, carefully remove the stencil to reveal the beautiful design.
To achieve a clean and consistent drizzle, ensure your melted chocolate is on the proper consistency—neither too thick nor too thin.
Use a fork to create a country, hand-painted impact by dragging the tines throughout the melted chocolate in a sweeping motion.
For a modern aesthetic, use a contrasting colored sweet melt as an alternative of chocolate, creating vibrant and visually putting designs.
Experiment with totally different piping strategies to create numerous textures and thicknesses in your drizzled patterns.
Remember, the secret is to maintain the base simple and let the drizzle be the focus of your decorative design.
Practice on a few balls before decorating your ultimate batch to excellent your approach and obtain the desired look.
Ultimately, one of the best designs are people who replicate your private style and the event you’re celebrating.
Don’t be afraid to get artistic and experiment with totally different mixtures of colours, textures, and patterns to create distinctive and memorable peanut butter ball masterpieces.
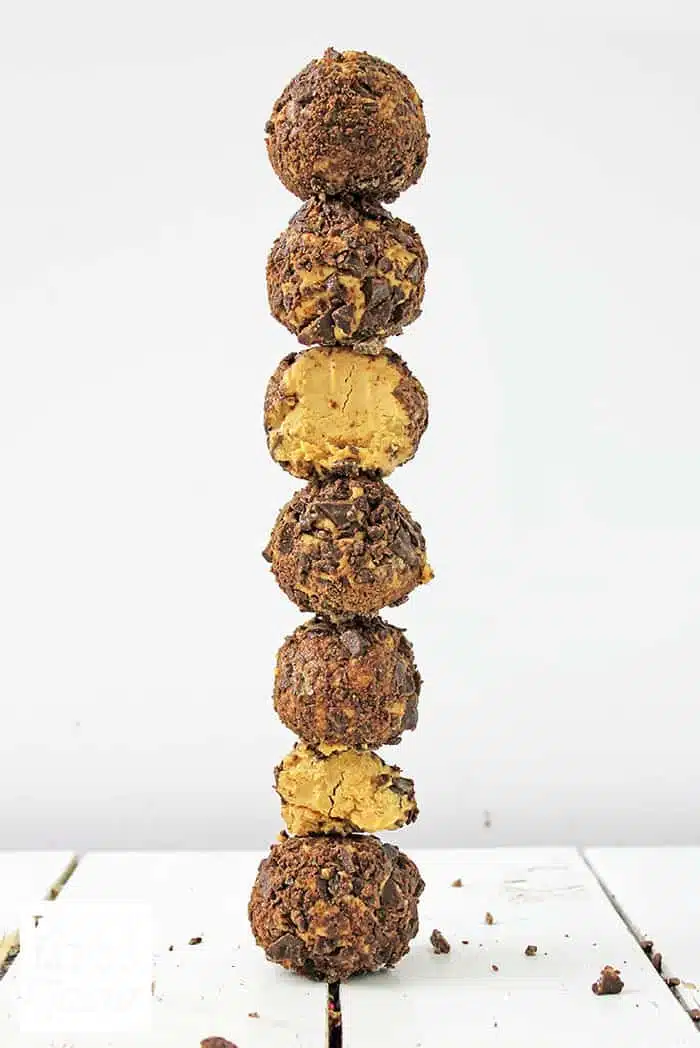
The humble peanut butter ball, a confectionery traditional, transforms into a miniature masterpiece with the application of basic design and stylish rolled edges. The secret is within the details, elevating a simple treat into one thing really particular for celebrations.
Firstly, consider the bottom. A completely easy, uniformly formed peanut butter ball is paramount. This basis ensures the subsequent decorative parts shine. Gentle rolling between the palms ensures a satisfying roundness, avoiding any flat spots or irregularities.
For rolled edges, reaching a crisp, clear end requires the right technique and elements. A light dusting of powdered sugar or cocoa powder before rolling creates a non-stick surface, stopping the chocolate coating from adhering to your hands and ensuring a precise edge.
The choice of coating considerably impacts the rolled edge’s appearance. Tempered chocolate, whether or not dark, milk, or white, offers the most skilled look, offering a shiny sheen and snap. Alternatively, a simple melted sweet coating offers a neater, less temperamental alternative, although it may lack the same visible appeal.
The rolling course of itself is delicate. Dip the peanut butter ball utterly into the melted coating, making certain even coverage. Then, utilizing the back of a spoon or a small offset spatula, gently carry the ball, allowing excess coating to drip away. Avoid scraping in opposition to the edges of the bowl, as this will create ugly marks.
The essential step is the rolling. Place the coated ball onto a non-stick floor (parchment paper or a silicone mat are ideal) and gently roll it back and forth until the edge is easy and refined. Avoid extreme strain, which may distort the form. A mild contact is essential for creating a perfectly rolled edge.
Once the rolled edges are good, consider elaborations. A dusting of finely chopped nuts provides texture and visual interest. Drizzled melted chocolate, in contrasting colors, creates elegant traces. Tiny sprinkles, edible glitter, or even finely grated coconut add a contact of festivity.
For a truly refined contact, consider using a piping bag to create delicate designs atop the rolled edge. Melted white chocolate piped in intricate swirls or a simple border adds a way of elegance. Consider using food-safe gold or silver luster mud to additional improve the design.
Classic designs can embrace simple yet efficient approaches:
- A single, completely rolled edge in a stable colour.
- A two-toned impact, achieved by utilizing completely different coloured chocolates for the coating and the drizzle.
- A easy sample created by using a toothpick to make delicate strains or dots after the rolling.
Beyond the visible attraction, contemplate the overall presentation. Arranging the peanut butter balls on an ornamental serving platter enhances their attract. Using small cupcake liners or decorative paper cups adds an additional layer of sophistication.
In conclusion, the artwork of adorning peanut butter balls transcends mere confectionery; it is an exercise in precision, creativity, and attention to detail. With the right techniques and a touch of creativeness, these humble treats turn out to be elegant and impressive additions to any big day.
The combination of completely easy peanut butter balls, elegantly rolled chocolate edges, and punctiliously chosen embellishments elevates them to a brand new stage of sophistication, showcasing the artistry inherent in even the only of treats.
Peanut butter balls, these delightful little spheres of creamy peanut butter goodness, provide a surprisingly versatile canvas for festive decoration, significantly when using the timeless magnificence of classic candy cane stripes.
The key to attaining a truly hanging sweet cane impact lies within the precision of the applying. Begin with completely shaped peanut butter balls, chilled totally to ensure firmness and forestall melting in the course of the adorning process.
For the traditional red and white stripes, you will need high-quality melting chocolate – an excellent high quality brand will guarantee a easy, glossy finish. Melt the white chocolate individually from the purple, maybe utilizing a double boiler or microwave in brief bursts, stirring frequently to forestall scorching.
Using two separate piping luggage, or even easy zip-lock bags with a tiny nook snipped off, permits for precise management. You can obtain varying stripe thicknesses by adjusting the size of the opening.
A strategic method is significant. Consider starting with a skinny band of white chocolate around the equator of the peanut butter ball. Allow this to set barely earlier than proceeding to the red stripes.
Alternating purple and white stripes, sustaining constant width and spacing, creates the iconic sweet cane design. A regular hand and slightly patience are crucial here; speeding the method can lead to smudged or uneven stripes.
To add sophistication, think about using a toothpick or a thin skewer to gently draw strains via the still-wet chocolate, creating a subtle textured effect. This provides depth and visible curiosity to the simple stripes.
Once the chocolate has absolutely set, you’ll be able to enhance the sweet cane impact by including a dusting of edible glitter or even finely crushed candy canes to the stripes, for extra sparkle and texture.
Variations on the basic candy cane theme are infinite. Consider using completely different coloured goodies – mint green and white, for instance, or even incorporating a metallic gold or silver accent stripe.
For a very luxurious contact, drizzle melted white chocolate over the finished sweet canes, letting it drip down the edges to imitate melting snow. This provides a touch of caprice and class.
The utility of these stripes is not limited to only the perimeters; contemplate incorporating them across the highest, creating a more comprehensive sweet cane design. Alternatively, create a simple swirl of red and white as a substitute of distinct stripes for a different aesthetic.
Once your adorned peanut butter balls are full, show them artfully on a festive platter. Consider including sprigs of holly or small candy canes for an additional contact of vacation cheer. The careful utility of candy cane stripes transforms these easy treats into miniature artistic endeavors, perfect for any big day.
Remember, apply makes perfect. Don’t be discouraged in case your first attempts aren’t flawless. With a little patience and a focus to element, you’ll quickly be mastering the artwork of making superbly striped peanut butter balls.
Beyond the vacation season, these embellished treats can be adapted for varied celebrations by adjusting the colors. Think pastel stripes for Easter, or patriotic pink, white, and blue for the Fourth of July. The prospects are truly endless.
Ultimately, the key to success lies in using high-quality ingredients, taking your time, and having fun with the inventive process. The ensuing beautiful and delicious peanut butter balls might be a delightful deal with for you and your guests.
Themed Decorations
Peanut butter balls, those delightful little spheres of peanut butter goodness, are extremely versatile and lend themselves superbly to themed decorations. Their easy, round shape offers a blank canvas for creativity, permitting for a wide range of festive seems depending on the occasion.
For Christmas, contemplate a snowy scene. Roll the balls in finely crushed white chocolate, then gently dust with powdered sugar for a contemporary snowfall impact. Miniature red and green sprinkles add a contact of festive cheer, or maybe tiny candy canes strategically placed.
Alternatively, a country Christmas theme can be achieved by coating the balls in melted milk chocolate after which sprinkling them with chopped pecans, crushed pretzels, or even finely shredded coconut for a more natural, textural appearance.
Valentine’s Day offers a vibrant palette. Dip the peanut butter balls in melted pink chocolate, then drizzle with white chocolate in a heart form. Red and pink sprinkles, or even small, heart-shaped candies, add the perfect crowning glory.
Easter calls for pastel perfection. Use pastel-colored sweet melts (light pink, yellow, light blue, lavender) for dipping. You might also use a contrasting shade for drizzling, making a marbled effect. Small, pastel-colored sweet eggs or sprinkles would complete the springtime look.
For a Fourth of July celebration, patriotic colors are key. Dip the peanut butter balls in white chocolate, then carefully drizzle with pink and blue melted chocolate. Small star-shaped sprinkles or edible glitter add a contact of sparkle.
Halloween presents a chance for spooky enjoyable. Use orange and black candy melts for dipping, creating an orange base with black drizzle patterns. Small, black candy eyeballs or even edible glitter in an iridescent black can add a touch of the macabre. Spider-shaped sprinkles could also add a enjoyable contact.
Beyond particular holidays, themed decorations could be adapted to any occasion. For a birthday, think about using the birthday individual’s favorite colours and sprinkles. Matching the decorations to the cake or other desserts creates a cohesive and visually appealing presentation.
The key to successful themed decorations lies in planning and precision. Ensure you have all the mandatory components and instruments (such as melting bowls, spatulas, and sprinkles) before you begin. Work in a cool surroundings to forestall the chocolate from melting prematurely. And most significantly, have enjoyable with it! Experiment with completely different colors, sprinkles, and candies to create distinctive and personalised designs.
Here are some ideas to enhance your themed peanut butter balls:
- Use several types of chocolate: Milk chocolate, dark chocolate, and white chocolate all offer different textural and visible components.
- Incorporate edible glitter for extra sparkle and shine.
- Experiment with various sorts of sprinkles: Jimmies, nonpareils, sanding sugar, and even crushed candy canes supply all kinds of textures and colours.
- Use small candies or goodies as decorations: Miniature M&Ms, chocolate chips, and even small gummy candies can add visible interest.
- Consider using food-safe markers to add personalised messages or designs.
- Don’t be afraid to get creative! Experiment with different combos of colours, textures, and decorations to create your individual distinctive designs.
With a little creativity, you’ll be able to remodel easy peanut butter balls into edible artistic endeavors, good for any special occasion.
Forget plain peanut butter balls; let’s elevate them to edible masterpieces!
The prospects are infinite when it comes to transforming these simple treats into themed decorations for a birthday bash.
First, contemplate the general theme of the get together. Is it a superhero extravaganza? A whimsical fairytale celebration? A vibrant tropical getaway?
The theme dictates the color palette and decorative components you may use.
For occasion, a superhero get together might involve vibrant major colors, fondant logos, and edible glitter.
A fairytale theme could incorporate pastel shades, delicate fondant flowers, and maybe even tiny edible crowns.
A tropical theme would name for brilliant, sunny colors like yellow, orange, and green, together with fondant pineapples, hibiscus flowers, and possibly even tiny edible umbrellas.
Let’s speak fondant. Fondant is incredibly versatile. You should purchase pre-made fondant in a variety of colors, or you probably can create your individual by combining sugar, water, and shortening (or marshmallow fluff for a softer consistency).
Rolling out the fondant is key. Aim for a consistent thickness to make sure even coverage on the peanut butter balls.
Once rolled, you need to use cookie cutters to create shapes, or you’ll be able to hand-shape the fondant into desired designs. Think miniature flowers, leaves, stars, or even small characters.
Attaching the fondant to the peanut butter balls is finest accomplished with a little bit of edible glue (a easy mixture of water and powdered sugar) to make sure a secure hold.
After applying the fondant, the true fun begins!
You can add tiny edible particulars, like sprinkles, sanding sugar, edible glitter, or even finely chopped nuts.
For added texture and dimension, consider using edible markers to add nice details, veins on leaves, and even faces on little fondant characters.
Remember to think about the size and form of your peanut butter balls when designing your decorations. Don’t overwhelm the treat with too many particulars.
Smaller balls could additionally be higher suited for less complicated designs, whereas larger balls can accommodate extra elaborate decorations.
Presentation is just as necessary as the ornament itself.
Arrange your adorned peanut butter balls on a reasonably platter or cake stand. Consider utilizing coordinating napkins, plates, and different get together provides to create a cohesive and visually appealing show.
Don’t be afraid to experiment! Try totally different shade mixtures, textures, and decorative components. The possibilities are endless, and the outcomes will be actually pleasant.
With somewhat creativity and a focus to detail, you can remodel odd peanut butter balls into gorgeous themed decorations that would be the discuss of the birthday bash.
So collect your supplies, unleash your inside artist, and prepare to create some seriously delicious and exquisite edible works of art.
Happy decorating!
Peanut butter balls, these humble spheres of creamy delight, may be reworked into elegant and romantic treats with the strategic use of themed decorations, significantly for special occasions like Valentine’s Day or anniversaries.
A classic romantic approach involves a wealthy chocolate drizzle. Using melted darkish, milk, or white chocolate, create a fragile cascading impact down the edges of each peanut butter ball. A easy zig-zag sample is visually appealing, or a extra free-flowing, artistic swirl can add a touch of caprice.
To improve the romantic theme, think about using a double chocolate drizzle. Begin with a layer of darkish chocolate, let it set barely, then add a thinner layer of white chocolate on high. This creates a pleasing distinction and provides visible texture.
Edible flowers are a classy addition that elevates peanut butter balls to a new stage of elegance. Pansies, violets, and roses are popular choices, providing a delicate sweetness and vibrant color that enhances the rich peanut butter and chocolate.
The key is to choose edible flowers that are pesticide-free and thoroughly wash them earlier than use. A single, carefully positioned edible flower on prime of every peanut butter ball offers an ideal final touch. For a more lavish look, think about arranging several smaller edible flowers artfully across the ball.
The placement of the decorations is crucial. A completely centered chocolate drizzle and a precisely positioned flower create a way of steadiness and refinement. Off-center drizzles or flowers can add a playful, rustic charm, relying on the desired aesthetic.
Beyond chocolate and flowers, consider incorporating other romantic elements. Sprinkles in coronary heart shapes or colours associated with love (red, pink, white) can be delicately sprinkled over the chocolate drizzle.
For a more personalized touch, use a piping bag with melted chocolate to write initials or a short message on the balls. This requires a gradual hand and a few practice but creates a really unique and romantic memento.
The presentation is equally important. Arrange the decorated peanut butter balls on a fantastically decorated plate or platter. Use contrasting colors or textures to make the treats stand out. A mattress of darkish chocolate shavings or cocoa powder can add an expensive contact.
Alternatively, prepare them in a decorative field lined with colorful tissue paper or ribbon. This makes them a perfect reward for a beloved one. Consider including a small card with a personal message to finish the romantic gesture.
Experiment with different varieties of chocolate – contemplate flavored candies like raspberry or mint for a unique twist. The potentialities are really infinite, allowing you to create peanut butter balls which may be as unique and special because the occasion itself.
Remember, the aim is to create a visually interesting and scrumptious treat that reflects the romantic nature of the event. By fastidiously considering the color palette, the location of decorations, and the general presentation, you’ll be able to transform simple peanut butter balls into beautiful expressions of affection.
Don’t be afraid to get creative and experiment with totally different techniques and combinations. The most necessary ingredient is a contact of affection and a focus to detail, leading to a truly memorable and romantic experience.
Advanced Techniques
Beyond fundamental dipping and drizzling, achieving a very professional end on peanut butter balls for special occasions requires mastering superior airbrushing strategies.
Airbrushing offers unparalleled control and precision, permitting for intricate designs and seamless color gradients that are impossible to copy with conventional strategies.
First, put together your workspace. Ensure enough ventilation, as airbrush paints may be quite potent. Protect your surfaces with drop cloths or newspaper.
Choose an airbrush acceptable for food-safe colors. Gravity-feed or siphon-feed techniques each work well, relying on your preference and the quantity of paint you will be using.
Select high-quality, edible airbrush colors. These are particularly formulated to be safe for consumption and provide vibrant, constant results. Avoid utilizing craft paints or other non-food grade merchandise.
Before starting in your peanut butter balls, follow your techniques on a scrap surface, corresponding to parchment paper or a silicone mat. This helps to dial in your air strain and paint consistency.
For a smooth, even base coat, skinny your edible airbrush shade slightly with the recommended thinner for your specific brand. Maintain a constant distance between the airbrush nozzle and the peanut butter ball to avoid uneven coverage.
Use a light-weight, even stroke, overlapping passes to ensure full coverage. Multiple skinny coats are preferable to 1 heavy coat, which may trigger drips and runs.
To obtain a marbled effect, use two or more colors simultaneously, carefully blending them as you airbrush. Vary the gap and angle of the airbrush for a extra dynamic effect.
Create intricate designs by utilizing stencils. These could be purchased pre-made or simply crafted from cardstock or acetate. Secure the stencil firmly to the peanut butter ball using masking tape.
For fine details and sharp strains, utilize a smaller airbrush nozzle and reduce the air strain. Practice managed movements to attain precise lines and curves.
Metallic and pearl-effect edible airbrush colors add an elegant contact. These can be used as accents or to create a shimmering, luxurious finish.
Consider adding texture to your designs. By experimenting with totally different airbrush strategies and paint consistencies, you’ll have the ability to create a spread of finishes, from clean and glossy to matte and even barely tough.
Once the airbrushing is full, permit the peanut butter balls to dry completely before dealing with or packaging. This prevents smudging and ensures an enduring, professional end.
Clean your airbrush completely after every use in accordance with the manufacturer’s directions. This is essential to maintain the longevity and efficiency of your tools.
Remember that follow is key. The extra you experiment with completely different techniques, colours, and stencils, the more adept you will turn into in creating gorgeous, airbrushed peanut butter balls for any big day.
Explore superior strategies like layering colours, creating fades, and incorporating particular results corresponding to crackle or dry brushing to elevate your designs even additional.
Don’t be afraid to experiment with totally different themes and kinds. Whether it is a vacation celebration, a birthday celebration, or a company occasion, airbrushing permits for countless artistic potentialities.
Ultimately, the important thing to knowledgeable finish lies in preparation, persistence, and a willingness to experiment. With follow and a spotlight to detail, you can rework odd peanut butter balls into edible works of art.
Beyond primary dipping, attaining truly intricate designs on peanut butter balls requires mastering superior stenciling strategies.
Start with high-quality, food-safe stencils. Laser-cut stencils offer superior detail and longevity in comparability with cheaper options.
Consider the stencil materials. Acetate is skinny and flexible, ideal for curving surfaces, whereas thicker plastic supplies more sturdiness for repeated use.
For advanced designs, layer a quantity of stencils. Secure every stencil firmly with painter’s tape, guaranteeing no gaps enable melted chocolate to seep underneath.
Employ a wide range of utility strategies. A piping bag fitted with a small, spherical tip provides precise management for thin traces and detail work.
Alternatively, use a small spoon or spatula to fastidiously unfold melted chocolate over the stencil, guaranteeing even coverage.
Practice totally different chocolate consistencies. Thicker chocolate creates bolder, more outlined lines. Thinner chocolate allows for finer particulars and smoother transitions.
Tempering your chocolate is essential. Properly tempered chocolate creates a glossy, crisp shell that holds its form beautifully.
Experiment with contrasting colors. Use white chocolate to focus on designs created with dark chocolate, or vice versa, for dramatic visual impact.
Explore totally different chocolate varieties. Milk chocolate, white chocolate, and dark chocolate each possess distinctive textures and visual properties.
Incorporate edible powders or luster dusts. Sprinkle these onto wet chocolate by way of the stencil for added shimmer and color variation.
Consider utilizing airbrushing techniques for a really unique impact. This allows for fine gradients and delicate color blends.
For large-scale designs or repeating patterns, create custom stencils utilizing cardstock or acetate and an X-ACTO knife.
Clean your stencils immediately after use. Warm soapy water and a soft brush are best to prevent chocolate from hardening and ruining the stencil.
Pre-chill your peanut butter balls earlier than stenciling. This helps the chocolate set rapidly and prevents smudging.
Experiment with totally different designs beyond easy shapes. Incorporate intricate floral patterns, geometric designs, and even customized logos.
To obtain a professional finish, permit the chocolate to totally set earlier than dealing with the peanut butter balls. Refrigeration can expedite this course of.
Practice patience and precision. Intricate stenciling takes time and a focus to detail, but the outcomes are well worth the effort.
Consider using a template or projector to assist with alignment, notably with complex repeating patterns.
Don’t be afraid to experiment and push your inventive boundaries. The prospects for adorning peanut butter balls with stencils are actually infinite.
Photograph your creations! Document your progress and share your beautiful designs with others.
Remember to all the time prioritize food security. Use clean instruments and surfaces, and retailer your finished peanut butter balls properly.
Beyond the basic peanut butter ball, reaching actually stunning outcomes requires mastering some advanced strategies.
One key element is reaching a perfectly smooth surface. This typically includes a last rolling in powdered sugar or cocoa powder, but for a very professional end, consider a quick chill within the refrigerator before the ultimate coating. This firming course of makes the balls simpler to handle and fewer prone to crumbling.
Temperature control is paramount. Work in a cool setting to prevent the peanut butter from softening excessively. If your mixture turns into too soft, briefly chill it before shaping.
Moving past simple coatings, explore the use of melted chocolate. A double boiler or microwave ensures a smooth, even melt. Dipping the balls utterly or creating a decorative drizzle provides an additional layer of sophistication.
For a really luxurious contact, incorporate edible glitter and pearls. Start with a easy, dry base. A mild dusting of edible glitter adds a delicate shimmer, best utilized with a small, gentle brush to manage the application and prevent clumping. Experiment with totally different colors to match your theme.
Larger, more dramatic glitter particles would possibly require a special approach. These could be gently pressed onto a wet floor (a thin glaze or melted chocolate) before setting. Remember to make use of solely food-safe glitter.
Edible pearls add a contact of elegance. Their size and shape supply design opportunities. They can be fastidiously positioned individually utilizing tweezers for intricate designs, or scattered extra liberally for a glamorous impact.
Consider the placement of your gildings. A single, completely positioned pearl may be more practical than a chaotic scattering. Experiment with patterns and groupings, aiming for visual balance.
The type of pearl issues. Sugar pearls offer a delicate sweetness, whereas other varieties could have a more impartial style. Choose pearls that complement the general taste profile of your peanut butter balls.
To improve the adherence of both glitter and pearls, a light-weight, sticky glaze could be strategically utilized before decoration. This prevents slippage and ensures lasting sparkle and shine.
Finally, presentation is essential. Arrange your finished peanut butter balls on elegant serving platters or in decorative bins. Consider using coordinating ribbons or other decorative parts to enrich the glitter and pearls and create a cohesive aesthetic.
Remember to work cleanly and effectively. Use separate tools for every stage to maintain up hygiene and prevent cross-contamination.
With apply, you can master these superior methods to create actually spectacular peanut butter balls that are as delightful to look at as they are to eat, excellent for any special day.
Don’t be afraid to experiment! Try combining different sorts of glitter, incorporating numerous pearl sizes and colors, and layering completely different decorations to attain a novel and personalized look.
The possibilities are countless if you combine the wealthy, comforting flavor of peanut butter balls with the dazzling effect of edible glitter and pearls.
Presentation and Packaging
For a really special event, elevate your peanut butter balls beyond a easy deal with – rework them into miniature works of art.
Consider individual packaging choices that replicate the event’s theme. Elegant cellophane bags tied with satin ribbon for weddings, festive foil cups with holiday-themed stickers for Christmas, or even small, clear packing containers crammed with colorful sprinkles for a birthday celebration.
Presentation is essential. Arrange the balls artfully on a tiered cake stand, an ornamental platter, or even inside a charming vintage tin. Consider colour coordination – matching the packaging to the overall aesthetic.
Get creative with your wrapping. Dip the peanut butter balls in melted chocolate, then drizzle with contrasting colored melted chocolate for a complicated look. Or, roll them in crushed nuts, colourful sprinkles, and even finely shredded coconut for added texture and visual enchantment.
For a rustic allure, consider using parchment paper cups or small paper baking liners. Tie them with twine and add a small personalized tag with the guest’s name or a candy message.
Think beyond the standard. Incorporate edible glitter for a contact of sparkle, or use food-safe paint pens to embellish the balls with intricate designs or festive messages.
For a very distinctive presentation, consider using miniature cupcake liners as particular person holders. This provides a touch of whimsy and allows for simple portioning.
If the occasion calls for it, create a small ‘build-your-own’ peanut butter ball bar. Offer numerous toppings corresponding to chopped nuts, sprinkles, chocolate chips, and even dried fruit. Let guests customise their very own treats!
Don’t neglect the significance of branding. If you are making these for a particular event, think about creating custom labels or stickers with a personalised message or logo.
For a complicated contact, prepare the peanut butter balls on a mattress of cocoa powder or crushed nuts within a decorative bowl. This provides a visual layer and enhances the overall presentation.
The possibilities are endless! Experiment with different textures and colors to create a presentation that’s really memorable. Consider seasonal components to match the occasion – autumn leaves, winter snowflakes, spring flowers, summer time fruits – all may encourage your decorative choices.
Ultimately, one of the best packaging and presentation on your peanut butter balls will depend upon the precise event and your private fashion. Remember to prioritize aesthetics and performance, creating a pleasant sensory expertise in your visitors.
Use high-quality ingredients and showcase them beautifully. Whether it’s a easy magnificence or a playful exuberance, the art of adorning peanut butter balls allows for boundless creativity and personalized expression.
Don’t underestimate the influence of a thoughtful presentation. It elevates a easy treat into a cherished reminiscence.
Finally, seize the beauty of your creations with pictures. A visually appealing picture enhances the overall experience and may be shared with others.
Presentation and packaging are paramount when it comes to elevating easy peanut butter balls into festive treats worthy of any special day. The aim is to rework a humble confection into one thing visually stunning that displays the celebratory temper.
Consider the occasion itself. Are you crafting these for a complicated vacation gathering, a toddler’s birthday celebration, or a casual get-together with friends? The level of ritual ought to dictate the type of your presentation.
For a complicated event, particular person peanut butter balls may be elegantly arranged on a tiered cake stand, perhaps interspersed with sprigs of recent rosemary or cranberries. A dusting of powdered sugar or a fragile drizzle of melted chocolate may add a touch of magnificence.
Clear cellophane baggage tied with ribbon, or small, intricately designed packing containers, are perfect for particular person packaging, particularly if guests might be taking some house. A small, handwritten tag with a personalized message adds a personal touch.
For a more playful, child-friendly occasion, think about shiny, colorful packaging. Small cupcake liners might function particular person holders, or you could organize the peanut butter balls in a big glass bowl, surrounded by colorful sprinkles or sweet.
Packaging for kids’s events could possibly be extra whimsical. Think brightly colored cellophane bags with enjoyable stickers, or small paper packing containers decorated with cartoon characters or festive themes.
Arranging for show is simply as essential as the packaging. For a buffet-style presentation, use engaging serving dishes. Consider utilizing contrasting colors and textures to make the peanut butter balls stand out. A darkish background will make lighter-colored balls pop, while a white or light-colored platter will improve the rich, darkish chocolate coating.
If you are making a extra elaborate dessert table, incorporate different components such as fresh flowers, candles, and decorative components that complement the general theme. Height can also be essential. Using tiered stands or varying heights of serving dishes creates visible interest.
Think about lighting. Soft, warm lighting will improve the richness of the chocolate and make the peanut butter balls appear extra inviting. Avoid harsh overhead lighting that may solid unflattering shadows.
Don’t underestimate the facility of garnishes. A easy sprinkle of sea salt, a dusting of cocoa powder, or a drizzle of melted white chocolate can dramatically elevate the looks of your peanut butter balls. Consider utilizing contrasting colours for maximum impact, similar to white chocolate drizzle on dark chocolate peanut butter balls.
For a very particular contact, contemplate making a themed display. For a Christmas party, use pink and green sprinkles and arrange the balls to resemble a Christmas tree. For a Halloween celebration, use orange and black sprinkles and prepare them within the shape of a jack-o’-lantern.
Ultimately, the art of decorating peanut butter balls for particular events lies in consideration to element and a thoughtful consideration of the general aesthetic. By fastidiously selecting your packaging, arranging your display, and including a few artistic touches, you’ll find a way to remodel a simple treat right into a memorable centerpiece.
Remember to consider the overall color scheme and cohesiveness of your presentation. Ensure the presentation complements the event and the overall theme of the occasion, creating a unified and visually interesting display that enhances the enjoyment of your delicious peanut butter balls.
Finally, take photographs! Document your onerous work and share the fantastic factor about your creation with others. The visible appeal is a key element of the general expertise, and capturing it’s going to permit you to bear in mind the big day and your delicious confectionery achievements.
The art of presenting peanut butter balls transcends simple confectionery; it’s an opportunity to craft a memorable expertise.
For particular occasions, elevating the presentation transforms a humble treat into a cherished gift.
Packaging plays a vital position, setting the tone and enhancing the overall aesthetic.
Consider the event: a holiday gathering demands a different method than a casual workplace deal with.
Gift field choices abound, offering various types and ranges of ritual.
Elegant Boxes: Deep, sturdy packing containers lined with satin or velvet supply an opulent contact, good for weddings or anniversaries. Consider utilizing a ribbon in coordinating colors for an additional contact of sophistication.
Clear Boxes: Showcase the gorgeous peanut butter balls themselves! Clear packing containers permit the vibrant colors and textures to shine, notably efficient should you’ve added ornamental elements like sprinkles or drizzled chocolate.
Kraft Boxes: A rustic and charming possibility, ideal for extra informal gatherings or items with a homespun really feel. Personalize them with handwritten labels or stamps for a unique touch.
Tin Containers: Reusable and charming, tins are an efficient way to present peanut butter balls as gifts. Choose tins in festive colours or with designs relevant to the event.
Bakery Boxes: Simple yet effective, these available packing containers are simple to make use of and supply a clean, basic presentation. Tie them with ribbon or twine for added visual curiosity.
Beyond the field itself, think about the overall presentation.
Tissue paper provides a layer of magnificence and safety, preventing the balls from shifting during transport.
Choose colors that complement the peanut butter balls and the occasion. For instance, purple and green for Christmas, pastel colors for Easter, peanut butter Balls recipe or wealthy jewel tones for a winter gathering.
Adding small ornamental elements can elevate the presentation significantly.
Sprinkles: A easy but efficient method to add shade and texture.
Chocolate Drizzle: A refined touch, particularly if you use contrasting colors of chocolate.
Edible Flowers: For a very elegant presentation, think about using edible flowers like pansies or violas.
Miniature Decorations: Small figurines or elaborations related to the occasion (e.g., miniature Christmas bushes, Easter bunnies) can add a whimsical touch.
Personalized Tags: Handmade tags with a personalised message add a private and heartfelt touch.
Remember to consider the size and form of the peanut butter balls when deciding on packaging. Ensure the packaging is appropriately sized to hold the treats securely and forestall harm.
Finally, the presentation should replicate the care and effort you have put into making the peanut butter balls themselves. A thoughtful presentation elevates a simple treat into a memorable and cherished gift.
By combining creative packaging choices with careful attention to detail, you can remodel your peanut butter balls into a really spectacular and scrumptious gift.
Tools and Materials
For the artwork of adorning peanut butter balls, the tools and supplies you choose can significantly impression the final feel and appear of your confections. Let’s explore a variety of options, from the important to the extra specialized.
Essential Tools:
1. Mixing Bowls: At least two, one for the peanut butter mixture and another for melted chocolate or different coatings.
2. Measuring Cups and Spoons: Accuracy in measuring elements is paramount for constant results. A set of each metric and imperial measurements is extremely beneficial.
3. Rubber Spatula or Wooden Spoon: For thorough mixing of the peanut butter mixture, guaranteeing a easy, consistent texture.
4. Parchment Paper or Wax Paper: Essential for lining baking sheets to stop sticking and for easy cleanup.
5. Baking Sheet(s): Provides a steady floor for rolling the peanut butter balls and setting them for adorning.
6. Small Plates or Bowls: Useful for holding melted chocolate or different coatings, sprinkles, and other decorative parts.
7. Rolling Pin (optional, but recommended): Ensures evenly sized and formed peanut butter balls for a more skilled look.
8. Forks (optional): Can be used to create a textured floor on the balls before coating.
9. Toothpicks or Wooden Skewers: For dipping the balls in melted chocolate and for intricate decorating.
Materials for Decoration:
1. Chocolate: Milk chocolate, darkish chocolate, white chocolate, or a combination, melted and prepared for dipping or drizzling.
2. Sprinkles: A wide array of colours, shapes, and sizes to add vibrant flair. Consider jimmies, nonpareils, sanding sugars, and chocolate sprinkles.
3. Candies: Crushed candy canes, mini chocolate chips, chopped nuts, or different small candies can add texture and visual curiosity.
4. Edible Glitter: Adds a touch of sparkle and glamour, significantly appropriate for festive events.
5. Food Coloring (optional): For adding colour to melted chocolate or creating custom-made sprinkles.
6. Drizzle Bottles or Piping Bags: For creating precise designs with melted chocolate or other coatings.
7. Cookie Cutters (optional): For creating unique shapes out of larger peanut butter balls.
8. Stencils (optional): For creating intricate patterns utilizing powdered sugar or cocoa powder.
9. Edible Markers (optional): For including personalised messages or designs directly onto the peanut butter balls.
10. Dried Fruits and Nuts (optional): Chopped dried cranberries, chopped pecans, or other choices for added flavor and visual enchantment. Remember to cut them into suitably small pieces.
Optional, but Highly Recommended Additions:
1. Candy Melts: These soften more easily than chocolate and offer a greater variety of colours.
2. Double Boiler or Microwave-Safe Bowl: For safely and evenly melting chocolate or candy melts.
3. Cooling Rack: Ensures even cooling and prevents sticking of the embellished peanut butter balls.
Remember to arrange your workspace beforehand, ensuring you’ve every little thing inside simple attain for a easy and Peanut Butter Balls Recipe pleasant decorating experience. Cleanliness can additionally be key to avoiding unwanted contamination.
For the art of decorating peanut butter balls, the instruments and supplies you choose can significantly influence the ultimate consequence. A smooth, even surface is essential, so think about using a parchment paper-lined baking sheet or a big, flat plate.
You’ll need a variety of bowls for melting chocolate, mixing your peanut butter filling, and holding your adorning parts. Stainless metal or glass bowls are good for melting chocolate in a double boiler or microwave.
A sturdy spatula or spoon is necessary for mixing the peanut butter filling and shaping the balls. A small offset spatula proves invaluable for spreading melted chocolate and creating clear edges.
For delicate work, such as piping or creating intricate designs, think about using small piping luggage with totally different suggestions. Alternatively, a toothpick or a thin knife can suffice for easier designs.
Sprinkles, chopped nuts, mini chocolate chips, dried fruit pieces, and even edible glitter provide ample decorating choices. Remember to choose colours and textures that complement each other and the general theme of your event.
When it comes to chocolate, each darkish and milk chocolate work well, as does white chocolate for a brighter effect. Use high-quality chocolate for a richer taste and higher melting properties.
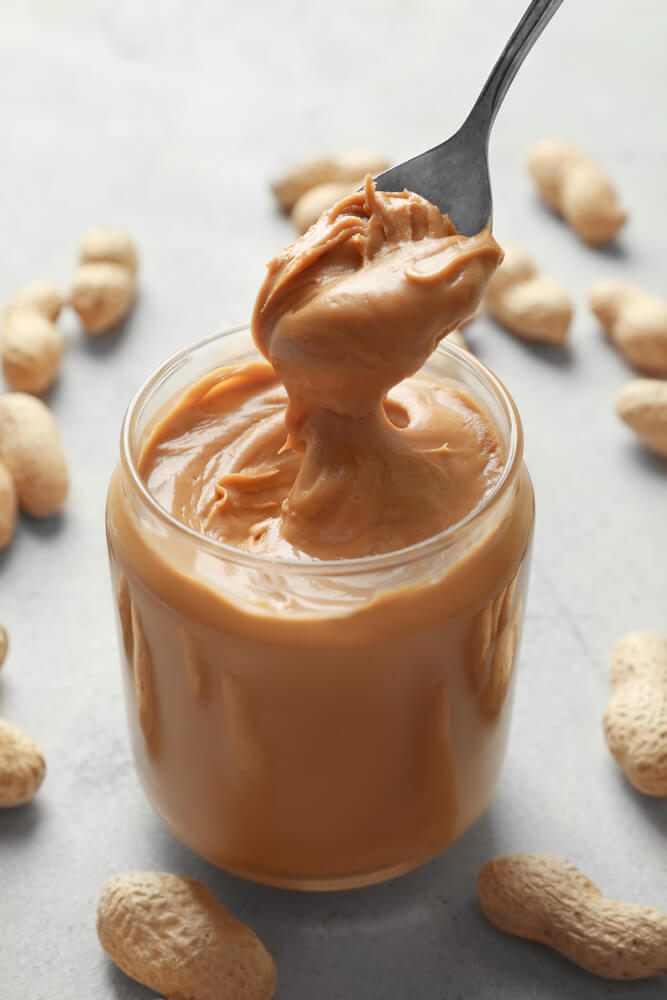
Choosing the best peanut butter is paramount to the success of your peanut butter balls. Creamy peanut butter is generally most popular for its smoother texture and simpler workability.
Natural peanut butter, whereas delicious, typically requires more effort to mix as a outcome of separation of oil. Be certain to totally stir it to make sure a consistent consistency.
The level of sweetness in your Peanut Butter Balls Recipe butter can influence the overall style of the balls. Adjust the amount of sugar in your recipe depending on the sweetness of the peanut butter you choose.
Consider utilizing a peanut butter with a strong, rich peanut taste for a more intense taste expertise. Alternatively, opt for a milder peanut butter should you choose a more delicate flavor profile.
Some brands would possibly include added components that have an effect on the texture and flavor of your peanut butter balls. Pay close attention to the ingredient listing and select a peanut butter with minimal additions for optimal outcomes.
Ultimately, one of the best peanut butter in your peanut butter balls is determined by private desire. Experiment with completely different manufacturers and varieties to find the proper one on your recipe and desired style.
To guarantee the best results, all the time use contemporary, high-quality elements. This ensures the best flavor and texture on your peanut butter balls.
Remember to fastidiously measure all ingredients to take care of consistency in your peanut butter balls. This will ensure a uniform style and texture for your creations.
Once you’ve assembled your instruments, ingredients and chosen your peanut butter, you can begin the method of creating your delectable and beautifully adorned peanut butter balls.
Don’t neglect to retailer your completed peanut butter balls in an hermetic container in a cool, dry place to take care of their freshness and forestall them from melting.
- Essential Tools: Baking sheet, bowls (various sizes), spatula, offset spatula, piping bags (optional), piping tips (optional), toothpick or knife.
- Decorating Materials: Sprinkles, chopped nuts, mini chocolate chips, dried fruit, edible glitter, dark chocolate, milk chocolate, white chocolate.
- Peanut Butter Considerations: Creamy vs. natural, sweetness degree, peanut flavor depth, added components.
For crafting truly eye-catching peanut butter balls, quite lots of tools and supplies are essential. Begin with the inspiration: a selection of high-quality peanut butter (creamy or crunchy, depending on preference), powdered sugar, and butter.
Beyond the core elements, consider these tools: a sturdy mixing bowl (preferably glass or chrome steel for simple cleaning), a wooden spoon or spatula for thorough mixing, measuring cups and spoons for precise ingredient ratios, and plastic wrap for masking the finished peanut butter mixture throughout chilling.
For shaping the balls, you may need a small scoop or spoon (an ice cream scoop works properly for uniform size), and a baking sheet lined with parchment paper to stop sticking.
The actual artistry lies in the ornamental parts. Select quite so much of coatings, similar to melted chocolate (milk, dark, or white), colorful candy melts, sprinkles (jimmies), chopped nuts (almonds, pecans, walnuts), or even finely shredded coconut.
To obtain intricate designs, consider incorporating instruments corresponding to a piping bag with varied tips for creating swirls and lines of melted chocolate or sweet melts. A toothpick could be useful for including delicate details or writing messages.
For a extra refined look, contemplate edible glitter, food coloring (for customizing melted chocolate), and even small, edible decorations like miniature candies or gumdrops.
Selecting complementary decorations relies upon heavily on the occasion. For a vacation like Christmas, pink, green, and white sprinkles or a dusting of powdered sugar mimicking snow would be acceptable. For a birthday, brightly colored candy melts and sprinkles are festive.
Consider the overall shade scheme. For example, if you are using darkish chocolate, brilliant sprinkles or colourful candy melts would supply a pleasant contrast. If utilizing milk chocolate, pastel-colored decorations might be a softer complement.
Texture can additionally be important. A clean chocolate coating may be contrasted with crunchy nuts or sprinkles. Similarly, a plain coating could be enhanced with a drizzle of melted chocolate in a contrasting shade.
Think in regards to the theme of the occasion. A rustic wedding might name for a simple dusting of powdered sugar and a few chopped nuts, while a vibrant kids’s party may gain advantage from an explosion of colors and textures.
Before starting, lay out all of your tools and materials. This organized method minimizes interruptions and promotes efficient adorning. Have a number of bowls and spoons ready if you plan on utilizing a number of forms of coatings or decorations.
Don’t be afraid to experiment! The fantastic thing about adorning peanut butter balls lies in the freedom to personalize them. Try combining totally different textures, colours, and decorative components to create distinctive and visually appealing treats that perfectly match your big day.
Remember to consider the storage of your finished peanut butter balls. Once embellished, retailer them in an airtight container in a cool, dry place to keep up freshness and stop melting.
Ultimately, the necessary thing to profitable peanut butter ball ornament lies in cautious planning, the thoughtful choice of complementary decorations, and a willingness to experiment and have fun!