Painting On Buttercream Cakes
Choosing the Right Buttercream
Choosing the proper buttercream for cake painting is essential for achieving a easy, paintable surface and vibrant colors.
American buttercream, a staple for many bakers, is a wealthy and creamy option made with shortening or butter, powdered sugar, and flavorings. Its agency consistency makes it ideal for intricate designs and holds its shape nicely, preventing the paint from bleeding.
However, its high sugar content can generally lead to a slightly grainy texture, doubtlessly affecting the smoothness of the paint utility. The heavy shortening variations may additionally be much less palatable than butter-based options.
Swiss meringue buttercream, a lighter and more refined buttercream, presents a superior style and smoother texture compared to American buttercream. Whipping egg whites with sugar creates a secure base that’s then mixed with butter.
Its clean floor supplies a superb canvas for painting, permitting the colors to mix seamlessly. The draw back is that it requires more exact method and can be more challenging for novices to grasp.
Italian meringue buttercream, one other meringue-based choice, presents comparable benefits to Swiss meringue buttercream, boasting a silky easy texture and an expensive style. The cooking strategy of the sugar syrup ensures a stable and shiny buttercream.
This type of buttercream is also extremely versatile and accepts meals coloring exceptionally nicely, making it a unbelievable choice for reaching vivid and bold hues. It’s additionally a bit more forgiving than the Swiss version if slightly over-whipped.
French meringue buttercream is much like Italian and Swiss, however the egg whites are whipped with a scorching sugar syrup that’s poured slowly in a skinny stream whereas whipping. This methodology produces a lighter, airier buttercream than the other meringue varieties, making it potentially much less secure for complicated designs.
While suitable for portray, its delicate nature would possibly require extra care and a firm hand to forestall smudging or feathering. It’s a scrumptious possibility but not all the time probably the most practical for detailed work.
Ermine buttercream uses a roux of butter and flour to create a velvety smooth texture. The course of requires cooking the flour and butter combination earlier than adding it to the whipped egg yolks and sugar. This method is thought for its stability and wealthy, creamy flavor.
The easy, secure consistency of ermine buttercream makes it a perfect base for intricate painting. It’s much less susceptible to curdling than other buttercreams and is naturally much less candy than many alternatives.
Choosing the “finest” buttercream depends largely on personal desire, skill stage, and the complexity of the portray design. American buttercream is forgiving for novices, while Swiss or Italian meringue buttercreams offer superior texture and taste for skilled cake artists looking for vibrant, flawless painted designs.
Consider elements like taste, texture, stability, and ease of software when making your selection. Experimenting with differing kinds is the best way to discover out which buttercream works finest on your portray fashion and preferences.
Regardless of your alternative, making certain the buttercream is correctly chilled earlier than painting will assist prevent smudging and maintain sharp lines. A crumb coat can additionally be essential for offering a clean, even floor on your artistic endeavors.
Finally, the standard of your meals coloring also can closely influence the vibrancy and longevity of your painted design. Invest in good quality, gel-based colors for optimum results.
Choosing the right buttercream for cake portray is crucial for attaining a easy, even floor and vibrant colours. The consistency is paramount; it needs to be agency enough to carry its form and particulars, but pliable enough for easy utility.
American buttercream, made with shortening and powdered sugar, provides excellent stability. Its thick, virtually stiff consistency makes it ideal for intricate designs and painting. However, it can generally be challenging to realize a very clean end, requiring careful smoothing strategies.
Swiss meringue buttercream, created by whisking egg whites and sugar over warmth before incorporating butter, is thought for its gentle and airy texture. While not as agency as American buttercream, its barely softer consistency lends itself nicely to smooth color application, especially with airbrushing. The barely less dense texture can make it extra vulnerable to melting in warmer temperatures or with excessive dealing with. Careful planning is important.
Italian meringue buttercream, just like Swiss meringue, makes use of a hot sugar syrup to create a stable meringue, resulting in a glossy, clean and extremely steady buttercream. This ends in a superior surface for painting, providing a wonderful sheen that enhances the vibrancy of colors. However, the method of constructing Italian meringue buttercream is extra complicated and requires a sweet thermometer for exact temperature control.
French buttercream, prepared by whipping egg yolks and sugar into a custard base before adding butter, offers a wealthy taste and a barely softer consistency compared to American buttercream. It’s much less perfect for intricate painting as it can be vulnerable to smudging. It’s more suited for smoother strategies and bigger areas of color.
The desired degree of detail in your portray will closely affect your buttercream selection. For Buttercream Frosting Chocolate extremely detailed work, American buttercream’s firmness is an asset, holding nice lines and sharp edges. For airbrushing or broader shade washes, the smoother consistency of Swiss or Italian meringue buttercream could be most well-liked.
Regardless of the chosen buttercream, achieving the right consistency is crucial. Too gentle, and your paint will bleed or smudge; too stiff, and will probably be troublesome to work with and vulnerable to cracking. Adding a small quantity of powdered sugar at a time to realize the perfect consistency is beneficial. Avoid over-mixing, as this could incorporate an extreme amount of air and have an effect on the texture.
Proper storage additionally impacts the buttercream’s consistency. Airtight containers in a cool, dry place will assist prevent it from drying out or turning into too soft. For long painting sessions, think about masking the unused portion of the buttercream with plastic wrap directly on the surface to forestall a skin from forming.
Experimentation is key to discovering the right buttercream and consistency in your painting type and choice. Start with small batches to practice earlier than committing to a big cake. Consider the local weather and expected temperature, adjusting your choice accordingly. A softer buttercream could be unsuitable for a hot summer season’s day.
Finally, the quality of ingredients used will impact your buttercream’s overall efficiency. Using high-quality butter, fresh eggs (for meringue buttercreams), and pure powdered sugar will ensure a smoother, extra steady and delicious base for your stunning cake portray.
Choosing the best buttercream for portray is essential for achieving a clean, paintable surface and vibrant colours.
American buttercream, with its excessive ratio of butter to powdered sugar, creates a very clean, easily spreadable base perfect for intricate designs. However, its larger fats content material could make it susceptible to melting in warmer temperatures.
Swiss meringue buttercream, while requiring more technique to make, presents a lighter, less sweet, and extra stable alternative. Its stability makes it higher for hotter climates and complicated work, although it would require a slightly firmer hand for preliminary software.
Italian meringue buttercream shares the steadiness of Swiss meringue but boasts a fair smoother, glossier finish, making it excellent for airbrushing or creating a flawless canvas for painting.
Cream cheese buttercream, while delicious, is usually not beneficial for painting due to its softer texture and tendency to crumble or bleed colours.
Once the buttercream sort is chosen, attaining the specified color is the next step. Using gel meals coloring is strongly advised over liquid food coloring. Gel pastes provide intense pigmentation with minimal impact on the buttercream’s consistency. Liquid colorings can thin the buttercream, making it more durable to work with and affecting the ultimate texture.
Start by including a small quantity of gel color to a portion of the buttercream and mixing completely. Gradually add more till the specified shade is reached. It is always better to err on the side of caution and add a little at a time than to over-color and ruin the batch.
For complicated designs, making a palette of various shades is really helpful. This permits for clean shade transitions and shading results. Having pre-colored portions makes the painting course of extra environment friendly and helps keep away from inconsistencies in colour depth.
When working with multiple colours, maintain them separate and forestall cross-contamination. Use clear tools and palettes to keep away from mixing colors accidentally. This is crucial to take care of the integrity of each colour and keep away from muddy or unintended hues.
Different strategies can produce varying effects. For instance, airbrushing provides a seamless, virtually watercolor effect, best for creating gradients and delicate color variations. Using small brushes for detailed designs allows for nice lines and complicated patterns. Spatulas are excellent for daring strokes and textured effects.
Consider using edible luster dusts to add shimmer and metallic highlights to the painting, enhancing its visible enchantment. These can be utilized directly to wet buttercream or mixed with a small quantity of vodka or lemon extract to create a liquid paint for finer details.
Finally, the temperature of the buttercream is necessary. Too cold, and will in all probability be troublesome to work with. Too heat, and it might turn into too soft and susceptible to smudging. Ideally, the buttercream ought to be at room temperature for optimal dealing with.
Remember to all the time test your coloring strategies and mixtures on a small sample of buttercream before applying them to the whole cake. This will allow you to avoid surprises and ensure you’re happy with the ultimate end result. Mastering buttercream portray requires apply and persistence. Experiment with completely different methods, colors, and tools to find your distinctive fashion.
Consider the cake’s overall design when choosing colours and methods. The painting should complement, not overpower, the remainder of the cake’s decoration.
Proper storage of the painted cake is crucial to take care of the quality and vibrancy of the buttercream portray. Keep the cake in a cool place and canopy it appropriately to prevent it from drying out or being uncovered to mud or debris.
Gathering Your Supplies
Before embarking in your buttercream portray masterpiece, meticulously collect your provides. This ensures a easy and efficient portray course of.
Begin with your chosen buttercream. Different recipes yield varying consistencies; experiment to search out one that pipes properly and holds its form whereas remaining paintable. Consider using a stiffer buttercream for particulars and a slightly softer one for washes or larger areas.
Next, purchase food-safe paints or dyes. Gel meals coloring offers intense color with minimal impression on buttercream consistency. Liquid meals coloring can even work but may require more cautious mixing to stop thinning.

Powdered meals coloring presents another option, although it necessitates thorough blending to keep away from streaking. Consider utilizing a mix of colours to attain the desired shades. Pre-made meals coloring sets tailored to cake decorating are available.
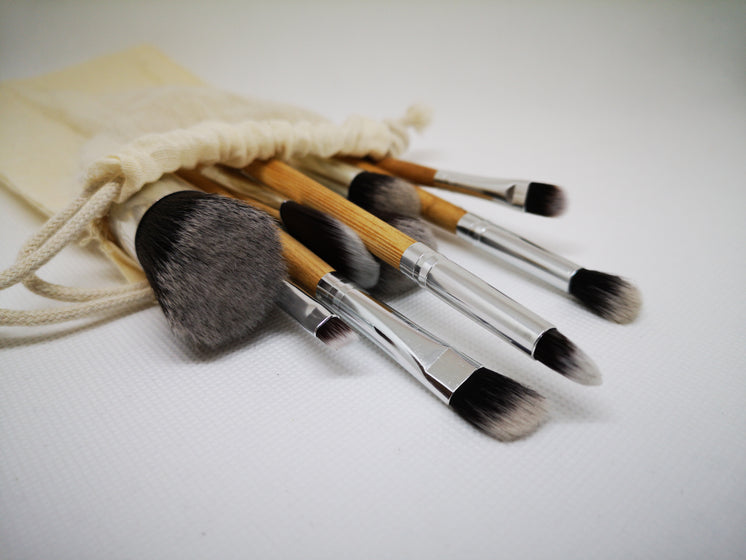
For software, small, high-quality paintbrushes are essential. Invest in a selection of brush sizes, from fine detail brushes for intricate work to larger brushes for broader strokes and washes. Natural hair brushes are favored by many for their soft texture and skill to mix easily.
Synthetic brushes offer a more inexpensive various, but their high quality can vary. Ensure your brushes are clear and well-maintained. Having a dedicated set for cake adorning helps stop cross-contamination.
Palette knives, or offset spatulas, are invaluable tools for spreading buttercream, creating texture, and manipulating color. A small palette or a clear, flat surface will serve as your workspace for mixing paints.
Toothpicks or cocktail sticks show surprisingly helpful for element work, mixing minuscule quantities of colour, or creating fantastic strains. Paper towels or clean cloths are necessary for wiping brushes and palettes.
A turntable or lazy Susan significantly aids in cake adorning, permitting for simple rotation and access to all sides of the cake. If you do not have one, a flat floor that allows for simple turning will suffice.
Consider using a piping bag and varied piping tips for adding further design parts alongside your portray. These can be used for outlining designs, adding borders or creating intricate patterns to reinforce your painted masterpiece.
For stencils, you ought to use commercially obtainable stencils or create your personal using cardstock or acetate sheets. These can be used to create repetitive patterns or to guide your painting. Don’t forget masking tape for securing stencils in place.
Finally, for clean-up, have a bowl of warm, soapy water prepared to wash your brushes and tools immediately after use. This prevents the paint from drying and ruining your brushes.
Careful planning and assembling all necessary instruments and supplies beforehand will drastically improve the overall portray process, reduce interruptions and let you totally focus on creating a shocking cake design.
Remember to always prioritize food security. Ensure all tools and surfaces are clean and sanitized before beginning. Use food-safe materials and store your completed cake properly.
Before you even think about swirling colours onto your buttercream masterpiece, assembling the proper tools is essential. This isn’t just about having some brushes; it is about choosing the suitable sorts for particular duties.
For delicate detailing, like tiny leaves or intricate lettering, you’ll want a set of fine-tipped brushes. Look for synthetic sable brushes, ranging in sizes from 000 to 2. These brushes hold their shape properly and permit for exact control, important for attaining crisp lines and fine details.
Larger areas, such as floral patterns or background washes of shade, demand larger brushes. Consider spherical brushes in sizes 4-10, once more choosing artificial sable for their resilience and ability to carry a great quantity of buttercream without splaying.
Flat brushes are additionally a priceless asset. These are good for creating broad strokes, filling in bigger spaces, and reaching a clean, even texture. A couple of flat brushes, one small (size 4-6) and one larger (size 8-12), will deal with most conditions.
Consider the type of bristles too. Synthetic sable is most well-liked by many cake decorators as a end result of it’s easier to clean and maintain than natural hair brushes, which could be extra vulnerable to shedding or damage when used with buttercream. The artificial option is durable enough to face up to repeated cleansing and nonetheless provide excellent results.
Don’t neglect angled brushes! These versatile instruments are nice for creating sharp strains, leaves, petals, and different angular elements. An angled brush in a medium size (around measurement 6) proves incredibly useful for a variety of adorning duties.
Beyond the brush types, take into consideration the handles. Longer handles provide better management and distance from the cake, preventing unintended smudges. Ergonomic handles supply greater comfort during longer decorating sessions, which could be significantly important for detailed work.
Finally, earlier than you begin, ensure your brushes are clean and dry. Any traces of previous colours can contaminate your current work, leading to muddy or unexpected hues. A quick wipe with a clean damp fabric will remove excess buttercream, making certain your brush is ready for its next task.
Having a selection of brush dimensions and shapes at your disposal empowers you to create a broader vary of designs and textures. Don’t restrict yourself to a single brush; build a group that addresses your specific wants and desired level of element.
Investing in high-quality brushes is an funding in the high quality of your cake decorating. They are the tools that bring your inventive imaginative and prescient to life, reworking a simple cake into a work of art. Choose properly, and enjoy the process!
Remember to retailer your brushes properly after every use. A devoted brush container, cleaned and dried brushes, will delay their lifespan and guarantee they remain in top situation for your subsequent project.
Consider also purchasing a brush cleaning mat. This will help you keep your workspace tidy and let you simply clean brushes without making a mess.
Having extra brushes available can additionally be a great concept. This avoids having to continually clean brushes in the course of a adorning project. Keeping a couple of clean brushes prepared for use is a good time-saver.
Ultimately, one of the best assortment of brushes is one which lets you categorical your inventive imaginative and prescient. Experiment with totally different shapes, sizes, and strategies to find what fits your fashion and preferences.
Before you even think about choosing up a brush, gathering the best supplies for painting on buttercream is crucial for a profitable, lovely outcome.
First, think about your buttercream itself. A sturdy, steady buttercream is key. Avoid overly soft or runny consistencies; a firmer buttercream will maintain the paint better and stop bleeding.
For your palette, you will need something non-porous that received’t take up the food coloring. A palette knife is a should have for mixing your colours and transferring them to your cake.
A good quality set of food-safe paintbrushes is important. Varying sizes are ideal; smaller brushes for particulars, bigger ones for broader strokes. Consider both round and flat brushes for various results.
Invest in high-quality food-grade gel or powder colorings. Liquid meals coloring can thin your buttercream, leading to bleeding and uneven color. Gel colors present vibrant, intense hues.
Powders is often a bit tricky to use, usually requiring a small amount of alcohol or lemon extract to create a smooth paste, but they provide extremely wealthy, saturated colours and are excellent for reaching fine particulars.
A small container of edible alcohol or lemon extract is important if using powdered colorings; a tiny amount helps to create a workable paste from the powder.
Clean water is crucial for cleaning your brushes between colors and to assist blend smoothly.
Paper towels or clear cloths are necessary to wipe your brushes and maintain your work space clear. Consider utilizing multiple towels to keep away from spreading shade unexpectedly.
A toothpick or small skewer could be surprisingly helpful for small particulars, including fantastic traces and dots which are inconceivable with even the smallest brushes.
Optional but helpful instruments include a turntable for simpler access to all sides of the cake, a scraper or bench scraper to smooth buttercream earlier than portray and to scrub excess paint out of your brushes.
Consider a small, clear container for holding your blended colors, maintaining them organized and easily accessible. Small ramekins and even condiment cups work perfectly.
A spray bottle crammed with alcohol (such as vodka) can be utilized to help thin your buttercream if wanted, or to mix colours easily collectively on the cake’s floor.
A reference picture of the design you propose to paint will significantly help to information your portray course of, guaranteeing accuracy and offering a visual reference to fall again on.
Finally, remember a clean, clean floor to work on, providing ample house to spread out your palette and other supplies.
Having your whole supplies organized and readily available before starting will make the portray course of way more environment friendly and gratifying, permitting you to give consideration to the inventive process itself.
Before you start painting on your buttercream masterpiece, gathering the proper provides is paramount. A smooth, constant surface is essential, so guarantee your buttercream is completely leveled and crumb-coated.
High-quality edible food coloring is important. Gel meals coloring presents the most vibrant and concentrated hues, minimizing the chance of altering the buttercream’s consistency. Liquid food coloring can be used, but may require extra to realize the specified intensity and might thin the buttercream.
Invest in a choice of small, high-quality paintbrushes. Different brush sizes might be needed for varied details; fine-tipped brushes for intricate traces and bigger brushes for broader strokes or washes.
A palette is incredibly useful for mixing colors and keeping your workspace organized. You can use a small, disposable palette or maybe a plate, but a dedicated palette keeps things clean and lets you blend seamlessly.
Small bowls or containers are wanted to hold your completely different coloured buttercream mixtures. Avoid utilizing bowls you would possibly use for non-edible gadgets to prevent cross-contamination.
Toothpicks or cocktail sticks may be surprisingly helpful for blending colours directly on the cake or including nice details.
Paper towels or clean cloths are important for wiping brushes clean between colours and removing extra buttercream.
A turntable or lazy Susan is extremely really helpful for ease of entry and painting all sides of the cake without continually repositioning it.
Consider using a piping bag and numerous ideas for creating totally different buttercream textures or outlining designs earlier than painting.
A clean, well-lit workspace is essential for precise painting. Avoid distractions and ensure you could have enough room to comfortably maneuver across the cake.
For complicated designs, consider using an edible food-safe marker to lightly sketch your design onto the cake earlier than applying the buttercream paint.
Optional but extremely useful tools embrace:
An offset spatula: For smoothing out the buttercream and creating a degree surface.
A small, clean sponge: For dabbing and blending colours softly.
A ruler or straight edge: For creating sharp traces and completely straight edges.
Stencils: To create repetitive patterns easily. Ensure they’re food-safe.
Airbrush system (optional): For creating smooth, even color washes, gradients, or fantastic particulars. Requires specialized edible food coloring and airbrush cleansing resolution.
Remember to always follow your strategies on a smaller cake and even only a dollop of buttercream earlier than working in your final project. This permits you to refine your abilities and keep away from mistakes in your primary cake.
Finally, keep in mind that patience is key. Painting on buttercream is a fragile process, and taking your time will result in a extra refined and professional-looking end result.
Preparing the Cake
Before you even take into consideration choosing up a paintbrush, the inspiration – your cake – must be perfectly prepared. This means ensuring a perfectly stage floor, free from crumbs and imperfections.
Start along with your baked cake layers. Once completely cooled, use a serrated knife to degree the tops, achieving even layers is crucial for a clean end.
Next, comes the crucial step of crumb coating. This is not a decorative step; it is a useful one. A crumb coat is a skinny layer of frosting utilized to trap stray crumbs and create a clean floor for your ultimate coat of frosting, the one you will actually paint on.
Use a small offset spatula or a bench scraper to use this skinny layer, guaranteeing you get into all the crevices and canopy every surface of the cake. Don’t worry about making it excellent at this stage; its objective is only to contain those pesky crumbs.
Once the crumb coat is utilized, chill the cake in the refrigerator for no much less than half-hour, or even longer. This permits the crumb coat to agency up, making a steady base on your final, lovely frosting layer.
After chilling, you can apply your final layer of buttercream. This shall be thicker than the crumb coat and can serve as your canvas. Again, use an offset spatula or bench scraper to create a smooth, even floor.
If you discover any imperfections, don’t panic. You can fastidiously use a clear, warm spatula or a damp material to softly clean out any bumps or ridges earlier than moving on to the painting process.
The kind of buttercream you choose matters. American buttercream is a well-liked alternative for painting because of its easy, creamy texture and ability to carry its shape. However, Swiss meringue buttercream, while delicate, can also present a wonderful clean surface for portray.
Consider the color of your buttercream. For lighter colors, you could want to use a white base buttercream to achieve vibrant hues. If utilizing food coloring gels or pastes as a substitute of liquid meals coloring, be certain that you mix them completely into the buttercream to keep away from streaks or uneven coloring.
When making use of the final layer of buttercream, think about using a turntable. This will tremendously aid in attaining a fair thickness and clean end. A bench scraper utilized in rotating motions creates a very polished look.
Once the ultimate coat of frosting is applied and smoothed, chill the cake once more for a minimum of 15 minutes before you start the painting process. This ensures the buttercream is firm sufficient to deal with the delicate software of paints.
Remember, a well-prepared cake is the important thing to a profitable painted buttercream masterpiece. Take your time, be patient, and enjoy the process of making a wonderful and scrumptious work of art!
Begin by ensuring your cake layers are utterly cool. This prevents the frosting from melting and making a soggy base in your art work.
Level the cake layers if essential utilizing a serrated knife or cake leveler. Perfectly flat surfaces are essential for a easy end and crisp lines in your painted design.
Crumb coat the cake. This skinny layer of frosting seals in crumbs, preventing them from mixing with your final frosting and ruining your painted masterpiece.
Chill the crumb-coated cake for a minimal of 30 minutes. This firms up the crumb coat, providing a secure base for the final frosting layer.
Apply a generous layer of your final frosting. Use a bench scraper or offset spatula to create clean, even sides and a wonderfully flat high. The smoother the surface, the higher your paint will adhere and the more vibrant your design will seem.
Chill the frosted cake once more for a minimum of half-hour, or ideally longer, to ensure the frosting is agency and prepared for painting. This prevents the paint from bleeding into the frosting.
Prepare your food-safe paints. These may be made from gel meals coloring combined with a small quantity of shortening or purchased pre-made. Ensure your paints are smooth and free of lumps.
Choose your painting tools. These can range from simple toothpicks and skewers for nice particulars, to small brushes for washes and bigger areas, to even airbrush strategies for advanced artists.
Consider your design. Lightly sketch your design on paper beforehand. This will assist you to plan your colour placement and forestall mistakes on your cake.
Transfer your design onto the cake. You can use a projector, a template, or freehand your design depending on your skill degree and chosen design complexity.
Begin portray, working in layers if necessary. Allow each layer of paint to dry barely before including one other to prevent mixing or smudging.
Use gentle, delicate strokes, particularly for finer details. Avoid pressing too onerous, as this will harm the frosting floor or create undesirable texture.
Clean your tools regularly to forestall colour mixing or smudging. This will keep your design sharp and clean.
Use a wide selection of methods. Explore completely different brushstrokes, colour blending, and even stencils to add depth and dimension to your cake painting.
Once your portray is full, allow the cake to sit at room temperature for a brief period to ensure the paint sets properly earlier than transporting or serving.
Protect your masterpiece! Once the paint is dry, contemplate masking the cake with a cake dome or placing it in a cake service to guard it throughout transport or storage. This will preserve the paintings’s quality and prevent unintentional harm.
For intricate designs or massive muffins, think about dividing the portray course of into manageable sections. This makes the method less daunting and permits for better control.
Remember follow makes excellent. Don’t be discouraged in case your first attempt isn’t flawless. Keep experimenting with different methods and designs to develop your expertise.
Enjoy the creative process! Painting on buttercream muffins is a fun and rewarding way to personalize your creations and impress your friends.
Before you’ll have the ability to even take into consideration painting in your buttercream masterpiece, you need a flawlessly easy floor. This starts with the cake itself.
First, guarantee your cake layers are fully cool before attempting any manipulation. A heat cake will crumble and make leveling impossible.
Use a serrated knife for the best outcomes. A skinny, versatile blade will let you comply with the contours of the cake extra easily than a stiff, thicker knife.
Place the first layer of cake on a cake board or turntable. This makes rotating the cake a lot easier in the course of the leveling process.
Holding the knife at a slight angle (about 15-20 degrees), fastidiously saw back and forth across the top of the cake layer. Don’t attempt to reduce in one swift movement; this will cause unevenness.
Use a delicate sawing motion to remove the dome, progressively leveling the highest surface. Frequently examine your progress by wanting down on the cake layer from a bird’s-eye view to assess evenness.
If you’ve any important crumbs or irregularities, flippantly brush them off with a pastry brush.
Repeat the leveling course of for every cake layer. Keep a small bowl nearby to gather the trimmings – these can be used for cake pops or different treats!
Once all layers are leveled, it’s time to stack. A small quantity of buttercream frosting between every layer will act as glue and fill any slight inconsistencies.
Crumb coat time! Apply a thin layer of buttercream frosting to the whole cake, making certain all the perimeters and prime are fully covered. This will trap any stray crumbs and create a smooth base for your final frosting layer.
Chill the crumb-coated cake within the refrigerator for a minimal of 30 minutes. This will firm up the crumb coat and forestall it from being smudged in the course of the ultimate frosting utility.
After chilling, apply your ultimate layer of buttercream. Use a bench scraper or a long, straight spatula to create a flawlessly clean surface. A rotating cake turntable is invaluable right here.
For excellent edges, hold your scraper at a 90-degree angle and use a agency, even stress as you rotate the turntable. You might need to repeat this a quantity of occasions to realize the desired smoothness.
Once completely frosted, chill the cake once more for at least another 30 minutes earlier than starting the painting course of. This will make sure the buttercream is agency and provides a secure surface on your paint.
Now that your cake is completely leveled and frosted, you’re able to unleash your artistic talents and start painting! Remember, patience and practice are key to mastering cake painting.
Tips for Success:
- Use a pointy, clean knife for leveling.
- Don’t rush the leveling course of. Take your time for greatest results.
- Chill your cake between layers to stop it from crumbling.
- Invest in an excellent quality cake turntable for simpler frosting and leveling.
- Practice makes perfect! Don’t be discouraged in case your first try is not good.
Basic Painting Techniques
Before beginning any portray on buttercream, ensure your buttercream is firm and correctly leveled. A crumb coat is important for a easy floor.
Choose your paints properly. Edible food coloring gels offer the most effective vibrancy and are much less prone to thin your buttercream than liquid extracts. Gel colors can be mixed to realize numerous shades.
Start with a palette. A clean, flat surface is ideal for mixing colors and maintaining your workspace tidy. You can use a small plate or palette knife.
For applying base coats, skinny your buttercream slightly. Too thick and will most likely be difficult to spread evenly; too skinny and will in all probability be troublesome to cover the cake adequately. Adding a tiny amount of shortening or alcohol (vodka works well) can thin buttercream.
Utilize a palette knife or offset spatula. These instruments supply a clean application and control over the buttercream’s distribution. A smoother base coat facilitates clean strains when painting subsequent details.
Work in sections. Don’t try to apply a complete base coat suddenly. Divide the cake into manageable sections for easier application and to prevent the buttercream from drying out too quickly.
Use even stress. Smooth the buttercream in a single direction to take care of consistency in thickness. Avoid going forwards and backwards excessively, which can create air bubbles and an uneven end.
Build layers for a rich shade. Instead of attempting to achieve the desired shade in a single software, apply thin layers, allowing each to set barely before including the subsequent. This prevents streaking and ensures even coverage.
For bigger areas, you might think about using a piping bag and a large spherical tip to create a easy and even base layer quickly.
Chill your cake after every layer. Refrigerating the cake between layers helps the buttercream to set, preventing the following layer from mixing or smudging the earlier one. This is particularly necessary when working with delicate shades or intricate particulars.
Consider utilizing a turntable. This rotating platform makes accessing all sides of the cake easier and more environment friendly, resulting in a extra even base coat utility.
Clean your tools incessantly. Removing extra buttercream out of your tools between colour adjustments prevents unintended mixing and keeps your colors pure.
If you’re working with multiple colours for your base coat, contemplate masking techniques. This can be achieved with stencils, painter’s tape (ensure it’s food-safe) or even by carefully making use of one shade before shifting onto the following.
Practice makes perfect! Don’t get discouraged if your first try isn’t flawless. Experiment with strategies and colors to search out what works greatest for you. Start with easy designs earlier than tackling complicated ones.
Protect your finished base coat. Once your base coat is full and chilled, you possibly can store it, covered, within the refrigerator to prevent drying or dust settling before including further details or decorations.
Remember meals security. Always practice good hygiene and use food-grade supplies for painting your cake.
Observe your buttercream’s consistency. Adjust the consistency as needed depending on the temperature and desired impact. Warm buttercream shall be easier to unfold, whereas chilled buttercream will hold its form higher.
- Choose the proper tools.
- Prepare your surface adequately.
- Apply skinny, even layers.
- Chill between coats for a smooth end.
- Practice strategies to refine your expertise.
Painting on buttercream is a pleasant method to add intricate designs and vibrant colors to desserts. The key’s to use a skinny, easy buttercream base and the proper instruments and methods.
Start with a level and smooth buttercream floor. Any imperfections will show by way of your painted design. Use a bench scraper or palette knife for a clear finish. Ensure your buttercream is agency enough to carry its form, but not so hard that it cracks if you paint.
Color selection is crucial. Choose food-safe colors that are particularly designed for buttercream. Gel food coloring presents essentially the most vibrant and intense hues with minimal impact on the consistency of the frosting. Liquid food coloring can work, but use it sparingly to avoid thinning the buttercream too much.
For blending colors, there are several strategies. One effective method includes utilizing a palette. Create small swimming pools of different colors on a palette (even a small plate will do) after which steadily mix them collectively utilizing a toothpick, small brush, or palette knife.
Wet-on-wet blending is a well-liked method for creating seamless shade transitions immediately on the cake. Apply one shade, and earlier than it units, apply the adjoining color next to it and gently blend the 2 colors together using a brush, toothpick, or a clean offset spatula.
Dry brushing is great for creating texture and delicate highlights. Dip a stiff-bristled brush into your colour, wipe off a lot of the paint onto a paper towel, then lightly drag the comb throughout the surface to create a pale or speckled impact. This is right for creating highlights on flowers or adding a sense of motion.
For sharp lines and detailed work, use small brushes with fine suggestions. These are perfect for creating outlines, fantastic particulars, or lettering in your cake. Practice creating totally different strokes – thin lines, thick lines, dots, and dashes to achieve numerous results.
Airbrushing is a extra advanced technique that allows for very fine control and smooth transitions. An airbrush can create gradients, detailed designs, and even photographic quality photographs. This, nevertheless, requires a devoted airbrush system and some follow.
When working with multiple colors, let each layer dry slightly before adding the next. This prevents colors from bleeding or mixing unintentionally. A fan might help pace up the drying course of. You can also use a hairdryer on a low setting, holding it at a distance to keep away from melting the buttercream.
Cleaning your brushes between colour adjustments is crucial to maintain clear lines and forestall shade contamination. Use a humid cloth or paper towel to remove extra paint after which rinse with heat water. Remember to fastidiously dry your brushes to stop mould.
Practice is key! Start with simple designs earlier than tackling more complicated initiatives. Use scrap buttercream to experiment with totally different methods and blending strategies earlier than applying them to your cake.
Consider utilizing edible markers to add nice particulars or outlines after the painting is complete. They are helpful for adding intricate designs or text that may be tough to achieve with a brush.
Finally, remember to protect your finished cake from the weather. A cake dome or airtight container is a great way to maintain your beautiful buttercream painting contemporary and stop it from drying out or being damaged.
Begin with a clear, crumb-coated cake. This provides a smooth floor for your portray.
Use edible food-safe paints. These are often present in gel or powder kind, offering different consistencies and opacities.
Thin your paints with a little vodka or lemon extract for smoother software and to stop cracking.
Start with a light-weight base coat if needed, permitting it to completely dry earlier than including subsequent layers.
Employ various brushes relying on the impact desired. Fine-tipped brushes are excellent for intricate details, whereas larger brushes create broader strokes.
Practice your strokes on a separate piece of parchment paper or a practice cake earlier than applying them to the principle cake.
For sharp lines and exact details, use a toothpick, scribe, or the tip of a clean knife.
Layer your colors steadily. Building up color depth slowly prevents muddy results and allows for better management.
Allow each layer to dry fully before adding the following. This prevents colours from bleeding into each other.
Use a dry brush method for textural results. This involves using a barely-moistened brush to create a dry-brushed look.
Wet-on-wet mixing can create softer transitions between colours, but requires a quick and deft touch.
Use stencils for repeating patterns or intricate designs, making certain even software and consistency.
Consider utilizing airbrushing for big areas of even shade and easy gradients. This requires specialized gear and follow.
For including highlights, use lighter shades of your colors to intensify curves and details, giving the portray depth.
To create shadows, make use of darker shades, strategically placed to add dimension and realism.
Use a fine-tipped brush or toothpick to add small details such as eyes, whiskers, or small floral elements.
If creating an image, consider outlining your subject with a darker shade for definition.
Remember that less is usually extra. Overworking the buttercream can smudge your details and damage the general impact.
Practice persistence. Buttercream painting takes time and skill; do not be discouraged in case your first attempts aren’t perfect.
Protect your completed painting with a lightweight coating of edible luster mud or a clear edible spray sealant to protect the colors and prevent smudging.
Clean your brushes totally after every use with warm water and mild soap to maintain their integrity.
Experiment with numerous methods and instruments to find what works greatest in your style and the complexity of your design.
Consider utilizing edible markers for adding very fantastic particulars or text.
Remember to work in a cool, dry setting to stop the buttercream from melting or changing into too delicate.
Utilize photographs for reference, but don’t be afraid to add your personal creative touches.
Take photographs of your progress to trace your work and be taught from any errors.
Most importantly, have fun and enjoy the inventive process!
Buttercream provides a wonderfully smooth floor for painting, but its texture requires particular techniques.
Begin with a crumb coat. This thin layer of buttercream seals in crumbs and creates a degree base on your portray.
Chill the cake thoroughly after the crumb coat. This companies up the buttercream, making it easier to work with and stopping smudging.
Choose your paints. Edible meals coloring gels or pastes are greatest; they are highly pigmented and do not skinny the buttercream excessively.
Mix your paints with a small quantity of buttercream to attain the desired consistency. It should be thick sufficient to carry its form but thin enough to use smoothly.
For massive areas of shade, use a palette knife or offset spatula for even application.
Work in thin layers, allowing each layer to dry slightly before applying the following. This prevents bleeding and ensures vibrant colours.
If utilizing a number of colours, enable every color to dry utterly before making use of adjacent colours to avoid muddying the hues.
For finer particulars, switch to small brushes. Different brush shapes (round, flat, fan) provide various ranges of management and texture.
Use a delicate contact to avoid damaging the buttercream floor. Overworking the buttercream can lead to smudging or tearing.
Stencils provide a convenient approach to add intricate designs without requiring superior portray skills.
Select a sturdy stencil made of food-safe materials, ideally plastic or acetate.
Secure the stencil firmly onto the chilled buttercream cake using small quantities of buttercream or edible glue.
Use a dry brush technique to flippantly mud powdered food coloring onto the stencil. Tap the comb gently to avoid smudging.
Alternatively, use a small offset spatula or palette knife to apply thin layers of colored buttercream by way of the stencil openings.
Carefully lift the stencil, revealing a crisp design.
If using buttercream, frivolously smooth the edges with a clean, dry brush or small spatula to blend the design into the cake.
For more intricate stencils, consider using an airbrush for a nice mist of colour. This gives a delicate, even application.
Experiment with completely different stencil designs and layering techniques to create distinctive and visually interesting effects.
Protect your completed cake from humidity and temperature fluctuations to preserve its look.
Remember to make use of only food-safe supplies and coloring throughout the whole process.
Practice on a scrap piece of buttercream before making use of strategies to your final cake.
Clean your tools instantly after use to stop meals coloring from drying and hardening.
Consider using a turntable to easily rotate the cake whereas painting and applying stencils, permitting for even application of color and design.
Store any leftover paints properly, ensuring they continue to be usable for future projects.
With persistence and apply, you possibly can create stunning painted buttercream muffins.
Advanced Painting Techniques
Wet-on-wet, also identified as alla prima, is a charming technique for painting on buttercream muffins, offering a novel fluidity and blendability not achievable with different methods. It depends on the buttercream’s consistency and the artist’s swift, assured strokes.
Before starting, ensure your buttercream is at the excellent consistency. Too stiff, and the colours will not mix seamlessly; too delicate, and the picture will lack definition and the colours would possibly bleed uncontrollably.
Start with a easy, even base coat of buttercream in a light-weight, neutral colour. This creates a steady basis for your painting and helps prevent the underlying colours from displaying via.
Choose your colors strategically. Use food-safe gel pastes or liquid meals coloring for vibrant hues that may blend fantastically. A restricted palette typically yields the most effective outcomes for wet-on-wet; start with major colors and blend to realize secondary and tertiary shades.
Employ a spread of instruments. Small offset spatulas and palette knives are excellent for blending and creating textural effects. Fine-tipped brushes allow for delicate particulars and exact lines, but work shortly before the buttercream sets.
Begin by laying down the larger areas of color, concentrating on the overall composition. Work rapidly and confidently; hesitation results in streaking and unevenness. Allow colors to gently blend into one another, creating gentle gradations.
Introduce darker shades and particulars progressively. The wetter the buttercream, the better will most likely be to blend darkish and lightweight colors together. Remember, you are working with a medium that modifications as it sits, so pace is important.
Consider utilizing a damp, clear brush to softly feather the sides of your colours and soften any harsh lines. This helps to create a seamless transition between completely different areas of the portray.
Don’t be afraid to experiment with completely different strategies. Try dragging a knife via the buttercream to create interesting textures, or dabbing the surface with a sponge to attain a stippled impact.
For intricate details, you can use a toothpick or maybe a skinny needle to make very exact marks. However, as a outcome of wet nature of the buttercream, be certain to work gently.
Control your stress. Applying mild pressure creates gentle, delicate blends, while agency strain yields more outlined strains and shapes.
Practice is paramount. Mastering wet-on-wet on buttercream requires follow to get a feel for the speed, pressure, and blending wanted for optimal outcomes. Start with simple designs and progressively move towards more complicated compositions.
Clean your instruments instantly after use. Buttercream can rapidly harden and turn into tough to take away.
Once you are satisfied along with your painting, refrigerate the cake to set the buttercream. This will prevent smudging and protect your paintings.
Remember, wet-on-wet on buttercream is an improvisational approach. Embrace the sudden blends and enjoy the process of making something unique and delightful.
Here’s an inventory of useful suggestions:
- Use high-quality, edible meals coloring.
- Work in a cool setting to slow down the setting of the buttercream.
- Keep a sprig bottle of water nearby to add moisture if essential (use sparingly).
- Consider utilizing stencils for easier designs or as a guide for extra complex ones.
- Take photos of your progress to track your methods and determine areas for enchancment.
Dry brushing is a fantastic approach for adding texture and refined detail to buttercream-iced muffins, particularly when creating practical results or delicate highlights.
It entails using a very dry brush – barely dampened with paint – to create a wispy, virtually scratchy impact.
The secret is to make use of little or no paint in your brush. Too a lot paint will result in a muddy, vague utility, defeating the aim of the approach.
Start by choosing your colours rigorously. For delicate highlights, select shades a number of tones lighter than your base buttercream shade. For shadows or extra pronounced texture, choose barely darker shades.
Using edible food-safe paints is crucial for safety and regulatory compliance. Many manufacturers offer a range of colours particularly designed for cake decorating.
Select a stiff-bristled brush; a fan brush, a element brush, or even a small, dry, flat brush can work relying on the impact you are aiming for.
Lightly dip the bristles into the paint, then wipe off a lot of the paint onto a paper towel or palette. You should barely see any color on the brush, just a trace.
Practice on a piece of parchment paper or a scrap of buttercream first to gauge the amount of paint and strain wanted.
Gently drag the comb across the buttercream surface, using light, feathery strokes. Avoid urgent down hard; the objective is to barely graze the floor, selecting up solely a small amount of buttercream to create a fragile, translucent effect.
For creating highlights on flowers, dry brushing can subtly mimic the finest way light displays off petals. Use a lighter shade and gently brush along the perimeters and high factors of the petals.
To create a textured impact on bark, for example, use a darker brown and apply quick, uneven strokes to mimic the tough texture. Vary the strain and course of your strokes for realism.
To create a stone impact, use varied shades of gray, beige, and brown, layering the dry brushing techniques to construct up depth and texture. Use a mix of quick strokes and longer strokes to construct up a realistic look.
To achieve a fake fur or fleece impact, make use of brief, wispy strokes with a lighter color to create the phantasm of individual strands. Use a slightly extra damp brush for this effect to allow for more shade deposition.
Remember to work in skinny layers, permitting each layer to dry slightly earlier than adding more. This prevents the colours from muddying and ensures the texture remains outlined.
Clean your brushes thoroughly after every use with warm water and delicate soap. Thoroughly dry your brushes earlier than storing them to prevent mildew growth.
Experiment with totally different brush types, colors, and pressure ranges to find the myriad of effects achievable with this easy but efficient technique.
Dry brushing is particularly suited to adding subtle particulars, texture, and realism to your cake adorning, and with apply, you’ll find a way to grasp it to create actually gorgeous designs.
- Tip 1: Use a rotating cake stand for simple access to all sides of the cake.
- Tip 2: Work in a well-ventilated area.
- Tip three: Consider utilizing stencils to assist guide your dry brushing for more exact designs.
- Prepare your cake with a smooth layer of buttercream.
- Choose your colors and brushes.
- Practice on a scrap surface.
- Apply the dry brushing method gently.
- Allow to dry and repeat layers as wanted.
- Clean your brushes meticulously.
Airbrushing presents unparalleled precision and control for decorating buttercream muffins, permitting for clean gradients, fine particulars, and complicated designs unimaginable with traditional methods.
Before starting, ensure your cake is correctly crumb coated and frosted with a clean layer of buttercream. This offers a clean, even surface for the airbrush to work on.
Choosing the best airbrush is essential. Gravity-fed airbrushes are excellent for beginners because of their simplicity, whereas siphon-feed airbrushes offer bigger capacity for in depth projects.
Compressor selection matters too. A quiet, high-volume compressor will stop inconsistent spray patterns and supply easy, consistent airflow. A moisture entice is crucial to forestall water droplets from ruining the finish.
Airbrush cleaning is paramount after every use. Failing to take action can lead to clogged nozzles and ruined colors. Use acceptable solvents, following the manufacturer’s directions, to take away all traces of paint.
Selecting edible airbrush colors is crucial. Look for specifically-designed food-grade paints, as non-food-grade paints are toxic when ingested and will by no means be used.
Practice is essential before making use of paint to your cake. Test varied pressures and distances to attain the desired effect on a practice surface, corresponding to parchment paper or a spare piece of cardboard.
Begin with thin coats of shade. Multiple thin coats will yield a extra even finish and stop pooling or streaking. Allow every coat to dry before making use of the subsequent.
Mastering totally different techniques similar to wet-on-wet blending, stencilling, and masking opens up a world of design possibilities. Wet-on-wet mixing permits for seamless transitions between colors, whereas stencilling and masking provide sharp, outlined lines and shapes.
Stencilling involves putting a stencil on the cake and spraying over it, creating precise shapes and patterns. Experiment with totally different stencil materials and designs to achieve unique effects.
Masking entails utilizing tape or other supplies to guard areas of the cake from paint, permitting for intricate designs and clear traces. This technique is especially useful for creating sharp edges or detailed borders.
Controlling the distance between the airbrush nozzle and the cake is vital. A nearer distance will produce a denser, more saturated colour, whereas a farther distance leads to a softer, extra diffused impact.
Air strain regulation considerably impacts the paint’s software. Higher pressure creates finer detail, whereas decrease stress provides broader coverage.
Cleaning your airbrush after each use entails disassembling the nozzle, eradicating paint residue, and cleaning with suitable solvent and water.
Beyond fundamental colours, experiment with metallic and pearlescent paints to add depth and shine to your cake designs. These paints can add an expensive and eye-catching element.
Consider utilizing different nozzle sizes to attain various levels of element. A smaller nozzle is right for fantastic strains and complex details, whereas a larger nozzle is better suited to broader protection.
Explore the usage of different types of edible mediums that can be utilized with airbrushing to realize various textures and finishes. These mediums can modify the consistency and look of the paint.
Remember to always work in a well-ventilated area when utilizing airbrushing equipment, as the compressed air and paint fumes may be irritating to the respiratory system.
With apply and persistence, you can grasp airbrushing techniques to create truly stunning and professionally finished buttercream cakes. The potentialities are countless.
Creating sensible and visually appealing textures on buttercream muffins requires mastering a number of superior portray methods. The key’s to grasp how buttercream behaves as a canvas and adapt your approach accordingly.
Understanding Your Medium: Buttercream is not a steady surface like canvas or paper. It’s delicate, yielding, and susceptible to smudging. Knowing this is essential. Using too much pressure will lead to unwanted dents and imperfections. Gentle, feather-light strokes are often necessary.
Color Preparation: Food-grade paints are important. Liquid food coloring is a versatile choice, readily mixable with buttercream to create various shades. Gel food coloring is extremely concentrated, providing intense colors with much less danger of thinning the buttercream.
Tools of the Trade: The proper tools are paramount. A variety of brushes is essential: fine-tipped brushes for particulars, medium brushes for blending, and larger brushes for masking larger areas. Airbrushing can create extremely easy gradients and nice details, especially for large-scale desserts. Spatulas, palette knives, and even toothpicks can be used to add texture.
Techniques for Texture Creation:
Dry Brushing: Using a dry brush with a small quantity of paint creates a light-weight, textured effect, perfect for suggesting fur, grass, or tough surfaces. This is particularly efficient when using a stiff-bristled brush.
Wet-on-Wet: Applying moist paint to a moist buttercream floor allows for lovely mixing and soft gradients. This method works finest for creating hazy backgrounds, skies, or clean transitions between colors.
Stippling: Dabbing the brush repeatedly onto the surface creates a speckled, dotted impact. Useful for rendering textures like stone, wooden grain (when combined with different techniques), or including delicate highlights.
Dragging/Scumbling: Dragging the brush lightly across the floor in a random pattern creates a textured look. This method allows for the creation of delicate patterns that mimic fabrics, weathered wooden or tough stone.
Impasto: Applying thick layers of paint to create raised textures. This approach is good for creating dimensional effects, adding texture and depth to parts such as tree bark or rocks. Requires more secure buttercream.
Sponge Techniques: Sea sponges can be utilized to create unique textural effects, mimicking clouds, porous surfaces, or including a mottled look. Different sized sponges create varying textures.
Airbrushing: Airbrushing permits for incredibly fine control and clean gradients. It’s glorious for creating refined washes, gradients, and nice particulars. It can be utilized to create practical shadows and highlights, including depth and dimension to the cake.
Combining Techniques: The most sensible results typically come from combining several methods. For example, you might use dry brushing to create the bottom texture of wood, then stippling to add knots, and eventually, wet-on-wet blending for creating shadows and highlights.
Practicing Patience: Mastering these methods takes time and apply. Start with easier designs and gradually work in the course of more complicated textures. Experiment with completely different brushes, paint consistencies, and techniques to find what most intently fits your fashion and the particular design of your cake.
Protecting Your Work: Once your painting is complete, enable it to dry fully before transporting or serving the cake. Consider using a food-safe sealant to protect the paintings from smudging or harm.
Inspiration: Look to nature and different artworks for inspiration. Observe textures in real life – bark on trees, the fur of an animal, the ripples in water – and try to replicate those textures on your buttercream canvas. The extra you observe and practice, the more skilled you’ll become.
Troubleshooting and Tips
Troubleshooting widespread issues when painting on buttercream is vital to success.
Bleeding colours could be brought on by too much water in your paints or insufficiently dried buttercream. Use gel food coloring for vibrant, much less watery results and guarantee your buttercream is firm before portray.
Streaking typically signifies uneven utility of paint or buttercream inconsistencies. Use easy, even strokes with a fantastic brush and think about using a stage cake board for a constant surface.
Uneven colour saturation could stem from inconsistent paint mixing or utility strain. Mix your paints thoroughly and apply pressure consistently to keep away from blotchy results. Multiple thin coats are better than one thick coat.
Color inconsistencies may result from using totally different brands of food coloring or buttercream. Stick to one brand for consistent pigmentation.
Cracking buttercream would possibly mean your buttercream is simply too dry or the cake itself is not correctly supported. Use a moist, well-hydrated buttercream and guarantee your cake layers are even and moist, not overly dry.
Difficulty with detail work could be due to utilizing too thick paint or an unsuitable brush. Opt for fine-tipped brushes, and thin your paint with a tiny little bit of vodka or lemon extract for smoother utility.
Smudging is a common drawback, particularly with wet paint. Allow ample drying time between coats and handle the cake fastidiously to forestall unintentional smudges.
Fading colors are often a result of utilizing low-quality meals coloring or improper storage. Use high-quality gel colours and store your completed cake correctly, avoiding direct daylight and excessive temperatures.
Tips and Tricks for profitable buttercream painting:
Practice on a separate floor before portray in your ultimate cake. This lets you experiment with methods and color mixtures without risking your masterpiece.
Use high-quality ingredients. Investing in good quality buttercream, gel meals coloring, and brushes will make a noticeable difference within the final product.
Properly put together your surface. Ensure your buttercream is degree, smooth, and utterly agency before you start painting. Crumb coat and chill your cake.
Start with a light hand. It’s simpler to add more colour than to remove it. Begin with thin coats and construct up colour steadily.
Use totally different brush sizes and techniques. Experiment with completely different brushstrokes, from fine lines to broad washes, to realize various results.
Clean your brushes frequently. Regularly clean your brushes to stop color mixing and guarantee clean traces.
Let the paint dry completely between coats. This prevents smudging and ensures vibrant colors.
Use edible markers for nice details. These can add crisp traces which might be troublesome to realize with paint.
Consider utilizing stencils for intricate designs. Stencils may help achieve consistent and precise patterns.
Plan your design beforehand. Sketch out your design on paper earlier than transferring it to the cake. This will help you visualize the process and avoid mistakes.
Embrace imperfections. Don’t be discouraged by minor mistakes. Often, these imperfections add character to the design.
Take your time. Rushing the method can result in mistakes. Relax and benefit from the artistic process.
Experiment with totally different techniques. There are many various methods to paint on buttercream, so experiment to search out the methods that work finest for Buttercream Frosting Chocolate you.
Fixing Mistakes is inevitable. Don’t despair!
Minor smudges can usually be mounted by carefully using a clear, dry brush or toothpick to gently carry the excess paint.
Larger mistakes would possibly require more drastic measures, similar to carefully scraping off the affected space and reapplying the buttercream.
Color corrections can typically be achieved by adding complementary colors to neutralize unwanted hues.
A final coat of buttercream can usually camouflage minor imperfections.
Consider incorporating the mistake into your design. A artistic eye can typically flip a mistake into a singular function.
Troubleshooting widespread points when painting on buttercream muffins requires a multi-pronged approach, addressing both the painting course of and the cake’s storage.
Troubleshooting Painting Issues:
Uneven Color Application: Ensure your buttercream is the best consistency – not too thick (which causes streaks) nor too skinny (resulting in watery washes). Practice your brushstrokes on a separate surface first. Consider utilizing a layering method for richer colours.
Color Bleeding: Use food-safe edible paints designed for buttercream. Avoid utilizing watercolors or acrylics, as they will bleed into the buttercream and ruin the design. Allow each layer of paint to fully dry before adding one other layer.
Brushstrokes Showing: This typically happens with thick buttercream or a heavy hand. Use lighter stress and thinner layers of paint. Smoothing methods using a palette knife or clean, dry brush can help blend imperfections.
Cracking or Peeling Paint: This usually indicates the buttercream is simply too dry, the cake isn’t correctly chilled, or the paint layers are too thick. Ensure your buttercream is sufficiently hydrated and that every layer of paint is skinny and allowed to dry fully earlier than adding one other layer.
Color Transfer: If the colors are smearing or transferring to other areas of the cake, let the painted areas dry utterly earlier than transporting or handling. Consider using a lightweight dusting of edible cornstarch or powdered sugar to assist set the paint.
Paint settling or separating: Make certain your paints are properly blended and that you’re not using a very oily or watery medium. Gentle agitation would possibly help earlier than portray, but avoid vigorous stirring that would incorporate air bubbles.
Tips for Successful Cake Painting:
Practice makes perfect: Practice your design on a spare piece of buttercream or parchment paper earlier than tackling the actual cake. Experiment with different brush strategies and paint consistency.
Use high-quality provides: Invest in food-safe edible paints, good quality brushes (various sizes), and clean, simply leveled muffins. The quality of your supplies significantly affects the finish result.
Chill the cake: Chill your cake for no less than 30 minutes before portray to agency the buttercream. This prevents the paint from sinking or bleeding into the frosting.
Use a turntable: A cake turntable makes it a lot simpler to paint the cake evenly and access all sides comfortably.
Clean your brushes: Clean your brushes totally with warm water between color modifications to stop colour mixing and maintain the vibrancy of every color.
Patience is vital: Allow adequate drying time between layers. This ensures a clean, even finish and prevents smudging or cracking.
Consider utilizing stencils: Stencils are an effective way to create intricate designs, especially for newbies. They can information your portray process and provides clean, consistent results.
Protect your work: Once the painting is dry, think about using a transparent edible sealant spray to guard the design and prevent smudging throughout transportation or storage.
Storing Painted Cakes:
Proper Container: Store the painted cake in an airtight container to stop moisture loss and contamination. A cake provider with a lid is good. Avoid storing it in a refrigerator unless absolutely essential, as this can cause condensation that may harm the paint.
Room Temperature Storage (ideal): Painted cakes are finest stored at room temperature, away from direct sunlight or warmth, for optimal paint preservation.
Refrigerator Storage (last resort): If room temperature storage is inconceivable, refrigerate the cake, but take it out an hour or two before serving. Ensure it’s completely coated to stop condensation.
Shelf Life: The shelf life of a painted cake is determined by the components and storage circumstances, but typically, it is best consumed inside 2-3 days for optimal quality and colour vibrancy.
Freezing Painted Cakes: Freezing is usually not recommended for painted muffins. The paint might crack or bleed upon thawing.
Remember to always prioritize food security and adhere to proper hygiene practices throughout the process.
Troubleshooting and Tips: Common Problems and Solutions in Painting on Buttercream Cakes
Problem: Buttercream is simply too gentle or runny.
Solution: Increase the amount of powdered sugar or butter in your buttercream recipe. Chill the buttercream for 30-60 minutes to firm it up before painting. Consider utilizing a special buttercream recipe, such as Swiss meringue buttercream or Italian meringue buttercream, which are naturally firmer. If utilizing American buttercream, ensure your butter is correctly chilled earlier than creaming it with the sugar.
Problem: Buttercream is too thick or stiff.
Solution: Add a small amount of milk, cream, or perhaps a little softened butter to skinny the buttercream. Beat with a mixer till clean and creamy. Be careful to not add too much liquid directly; begin with a teaspoon and add extra as wanted.
Problem: Colors are too pale or dull.
Solution: Use gel meals coloring as a substitute of liquid food coloring. Gel colours are highly concentrated and will produce more vibrant hues. Start with small amounts of color and add more progressively till you achieve your required shade. Also think about using a white buttercream base to assist colours pop.
Problem: Paint is bleeding into the buttercream.
Solution: Ensure your buttercream is correctly chilled and firm earlier than painting. Use a skinny layer of buttercream as a base. Avoid using too much paint or making use of it too heavily. Let every layer of paint dry earlier than applying another. Consider utilizing edible meals markers for sharper traces and fewer bleed.
Problem: Brushstrokes are seen or uneven.
Solution: Use a easy, high-quality brush designed for food use. Use light, even strokes. Consider using a smaller brush for finer particulars. Smooth the floor of the buttercream with a spatula earlier than portray to create a more even base. Alternatively, a small, offset spatula can be utilized to gently clean paint.
Problem: Paint is cracking or flaking.
Solution: This usually occurs if the buttercream is just too dry or the paint layer is simply too thick. Ensure the buttercream is properly chilled and use skinny, even coats of paint, allowing every layer to dry fully earlier than adding another. A small amount of alcohol (vodka or lemon extract) added to the paint can typically assist it circulate extra simply and prevent cracking, but use this sparingly.
Problem: Difficulty attaining fine particulars.
Solution: Use fine-tipped brushes, toothpicks, and even edible food markers for intricate details. Practice on a separate piece of parchment paper or a cake scrap before engaged on the main cake. Consider using stencils to create extra complex designs.
Problem: Colors are inconsistent or muddy.
Solution: Mix your colours in small batches to take care of consistency. Clean your brushes thoroughly between colors to keep away from muddying the shades. Use a palette to keep your colours organized and stop contamination.
Problem: Cake is crumbly or the buttercream is absorbing into the cake.
Solution: Apply a skinny crumb coat of buttercream to seal within the crumbs before making use of the final layer of buttercream for portray. Ensure the cake layers are properly leveled and moist. A slightly stiffer buttercream is preferable for stopping absorption.
Tips for Success:
Chill your cake: A cold cake is much easier to work with and prevents the buttercream from melting or changing into too soft.
Use the proper instruments: Invest in high-quality brushes, palettes, and other instruments particularly designed for cake decorating.
Practice: Practice your painting techniques on a check floor earlier than decorating your final cake.
Patience: Painting on buttercream takes time and endurance. Don’t rush the process, and allow each layer of paint to dry totally earlier than adding one other.
Clean your brushes: Clean your brushes totally after each use to maintain up their form and stop colours from mixing.
Have enjoyable: Cake decorating should be gratifying. Don’t be afraid to experiment and have enjoyable with the process!
Inspiration and Design Ideas
The delicate fantastic factor about floral designs lends itself completely to the creamy canvas of a buttercream cake. The medium permits for a exceptional stage of element and texture, providing a novel opportunity for creative expression.
Inspiration may be drawn from numerous sources: a stroll by way of a vibrant garden, a favourite botanical illustration, a broad ranging bouquet, or perhaps a single, exquisitely shaped petal.
Consider the seasonality of your design. Spring may encourage pastel hues and delicate blossoms like cherry blossoms or tulips, whereas autumn could evoke richer tones and the textures of dahlias or sunflowers.
Color palettes are essential. Monochromatic schemes can be elegant and complex, using varying shades of a single colour to create depth and visual interest. Alternatively, complementary or analogous colour palettes can create vibrant and thrilling designs.
Think concerning the overall style you are aiming for. A romantic design would possibly characteristic free, flowing traces and delicate pastel shades, while a modern design could incorporate geometric shapes and bold, contrasting colours.
For beginners, beginning with easy, particular person flowers is really helpful. Roses, daisies, and pansies are comparatively easy to recreate, permitting you to practice your piping techniques and build confidence.
As your abilities progress, you possibly can explore more complex designs, such as incorporating leaves, stems, and complicated particulars. Consider utilizing different piping tips to obtain various textures and petal shapes.
Textural elements can elevate your design. Adding delicate variations in piping strain, incorporating edible glitter or luster mud, or using contrasting buttercream colours can add depth and visible enchantment.
Placement of the floral designs is key. Consider the overall shape and measurement of the cake, and plan the arrangement strategically to create a balanced and visually pleasing composition. Symmetry may be putting, while asymmetrical arrangements can feel extra organic and eccentric.
Reference images are invaluable. Collect photos of floral arrangements that inspire you, taking notice of the colour combos, petal shapes, and total composition. These can function guides as you create your personal buttercream masterpieces.
Don’t be afraid to experiment. Try totally different techniques, colour combinations, and flower sorts. The great thing about buttercream painting lies in its flexibility and the flexibility to create distinctive and customized designs.
The use of stencils can simplify complicated designs and add precision, permitting for intricate patterns and shapes to be simply reproduced. This is particularly useful for creating repeating parts or detailed backgrounds.
Isomalt flowers supply a stunning alternative or addition to buttercream flowers. Their crystalline clarity and skill to hold intricate detail create an expensive and skilled finish.
Edible paints can improve your designs, including fine details and refined shade variations that may be tough to achieve with buttercream alone. These paints enable for incredibly fine lines and shading.
Remember to practice your piping abilities frequently. The extra you practice, the extra confident and skilled you’ll become, allowing you to create more and more intricate and exquisite floral designs.
Finally, enjoy the process. Buttercream portray is a creative and rewarding endeavor. Let your imagination run wild and permit your distinctive type to shine by way of in your creations.
Geometric patterns offer a incredible basis for painting on buttercream desserts, offering structure and visible curiosity.
Simple shapes like squares, circles, and triangles may be arranged to create intricate designs, from tessellations to radiating patterns.
Consider using stencils to attain crisp, clear strains, particularly for advanced geometries like hexagons or octagons.
Isometric projections, with their three-dimensional phantasm, can add depth and sophistication to a cake design.
For a contemporary really feel, explore minimalist geometric patterns: a single daring form repeated against a contrasting background.
Incorporate negative space successfully; the areas left unpainted may be simply as impactful as the painted components.
Experiment with completely different colour palettes. Bold, major colors create a vibrant look, while pastel shades offer a softer aesthetic.
Metallic paints, like gold or silver, can add a touch of luxury and magnificence to geometric designs.
Vary the dimensions of your geometric shapes; a combine of large and small components creates visual rhythm and excitement.
Think about incorporating texture: piped buttercream borders or edible glitter can enhance the three-dimensionality of the design.
For a novel strategy, use gradient fills within your geometric shapes; a smooth transition between colours provides visual depth.
Consider the cake’s general form and size when designing your geometric sample. A complicated sample might be overwhelming on a small cake.
The style of the cake will also influence your alternative of geometric patterns. A rustic cake may suit a barely imperfect, hand-painted geometric design, whereas a proper cake might require precise, stencilled patterns.
Play with overlapping shapes and creating optical illusions. A clever association of shapes can create the phantasm of depth or movement.
Use edible markers to add fine details or outlines to your geometric shapes for a elegant finish.
Explore completely different portray techniques. A dry brush method can create a textured, virtually watercolour impact, while a wet-on-wet approach yields a extra blended, fluid look.
Inspiration could be drawn from varied sources: Islamic artwork, Art Deco designs, mid-century modern aesthetics, or even natural formations like honeycombs.
Before committing to the cake, follow your design on a bit of parchment paper or a smaller test cake to excellent your approach and ensure the pattern is balanced and visually appealing.
Remember, the secret is to have fun and experiment. The potentialities with geometric patterns in cake decorating are countless.
Don’t be afraid to mix completely different geometric shapes to create your individual distinctive and memorable design.
Use masking techniques to create intricate patterns with multiple colours and shapes. This allows for sharp traces and precise placement.
Consider including delicate variations inside a repeating sample to avoid monotony. A slight change in colour or measurement could make an enormous distinction.
For an additional contact of refinement, use a food-safe sealant to guard your painted masterpiece and ensure its longevity.
Ultimately, the best geometric patterns in your buttercream cakes will be those who mirror your private style and the overall theme of your design.
The untamed beauty of landscapes offers a boundless supply of inspiration for buttercream cake portray.
Imagine the vibrant hues of a Tuscan sunset, translated into swirling shades of apricot, orange, and deep rose buttercream.
The textural contrast of rolling hills, rendered with cautious piping techniques, creating a sense of depth and movement.
A serene lakeside scene might be depicted with clean, glassy buttercream surfaces, reflecting the delicate shimmer of edible glitter.
The stark beauty of a snow-capped mountain range may be captured with the precision of fastidiously sculpted peaks of white buttercream, contrasted by the deep blues and greens of a wintery valley below.
Consider the expanse of a desert panorama – the good and cozy, sandy tones captured through meticulous blending of caramel and beige buttercreams.
The refined variations in texture and colour could be achieved through the utilization of different piping tips and airbrushing strategies, creating a practical and detailed representation.
Abstract landscapes provide a special approach, releasing the artist to experiment with colour palettes and strategies.
Bold, sweeping strokes of buttercream can evoke the vitality and emotion of a storm-swept coast.
Subtle colour washes can create a sense of calm and serenity in a minimalist panorama design.
Think about incorporating edible elements to enhance the landscape: miniature fondant bushes, sugar flowers, or even chocolate rocks can add gorgeous details.
The scale of the landscape is essential. A vast panorama might require a bigger cake, permitting for larger detail and visual impact.
Conversely, a smaller cake can concentrate on a specific element of a landscape, such as a close-up view of a flowering meadow.
The lighting inside the panorama scene is key to creating realism and temper. Highlights and shadows can be created by fastidiously applying buttercream of various consistencies and shades.
The use of edible paints can add additional element and refinement, allowing for the creation of finer traces and refined gradations in colour.
Experiment with totally different techniques, from easy washes to textured impasto effects, to attain a singular and expressive fashion.
Research and research different landscapes, paying close consideration to color palettes, composition, and the interaction of sunshine and shadow.
Gather reference images of landscapes that encourage you. Pinpoint the elements you need to emphasize in your cake design, and consider the way to translate them into buttercream.
Remember, the secret’s to let your creativity flow. Don’t be afraid to experiment and push your boundaries. The prospects are actually endless.
The finished product ought to be a delicious and visually beautiful work of art, a testomony to the ability of inspiration and the artistry of buttercream cake portray.
Inspiration can strike anyplace: a stroll via a botanical garden, a vintage postcard, a putting piece of cloth, or even a fleeting dream. For cake painting, think about the cake’s overall theme.
A rustic marriage ceremony may inspire a watercolour wash of muted greens and browns, depicting wildflowers or leafy branches. A kid’s birthday cake might characteristic vibrant, cartoonish characters rendered in a bold, graphic style.
Pinterest and Instagram are treasure troves of visual inspiration. Search for terms like “buttercream cake art,” “cake painting strategies,” or specific themes (e.g., “floral buttercream cake,” “landscape buttercream cake”).
Consider the shopper’s preferences. Do they’ve a favorite colour palette, flower, animal, or hobby? Incorporate these elements into the design for a truly personalized effect.
Mood boards are invaluable instruments. Collect images representing the specified aesthetic – colors, textures, patterns, and kinds – and prepare them visually to ascertain a cohesive design course.
Character design is essential for themed desserts. Begin with a clear concept: a friendly bear, a mischievous fairy, a superhero, etc. Sketch a quantity of variations, experimenting with completely different poses, expressions, and clothing.
Consider the cake’s dimension and shape when designing characters. A tiny character on a big cake may look lost, whereas an enormous character on a small cake may seem overwhelming.
Simplify the design for simpler execution. Focus on key features, utilizing daring outlines and restricted colour palettes. Intricate particulars can be challenging to color on buttercream.
Reference images are useful for correct illustration. Find clear pictures of your chosen characters or parts (flowers, animals, landscapes) to make sure realism or stylized accuracy.
Experiment with different portray strategies. Wet-on-wet blending creates delicate transitions, whereas dry brushing provides texture and detail. Consider using stencils for intricate patterns or repeating elements.
Practice on a practice cake before tackling the ultimate product. This allows you to refine your method, experiment with colors, and make certain the design interprets well to buttercream.
Develop a powerful understanding of colour theory. Complementary colors create vibrant distinction, whereas analogous colors produce a harmonious impact. Use a color wheel to information your palette selections.
Don’t be afraid to interrupt the rules. Experiment with unusual color mixtures, unconventional kinds, and surprising elements to create unique and memorable cake designs.
Think in regards to the overall composition. Where will the primary character be placed? How will the background components complement the subject? A well-balanced composition enhances the visual attraction.
Consider the cake’s surroundings. Will it be displayed on a cake stand, a desk, or a buffet? The setting may affect the design’s scale and complexity.
Document your process. Take photographs at each stage of the design process – from preliminary sketches to the finished cake – to track your progress and study out of your experiences.
Always prioritize food safety. Use edible paints and tools, and preserve hygiene all through the painting process. Proper storage is crucial to protect the cake’s integrity and visible enchantment.
Remember that the cake itself is a canvas. The texture and color of the buttercream can significantly impression the general look of the portray. Choose buttercream that provides a easy, secure floor for portray.
- Sketching and Planning: Begin with detailed sketches to solidify the design before committing to buttercream.
- Colour Palette Selection: Choose colours that complement each other and the general cake theme.
- Buttercream Preparation: Ensure your buttercream is clean, agency, and correctly tinted for optimal portray outcomes.
- Tool Selection: Select appropriate brushes, spatulas, and different instruments primarily based on the complexity of the design.
- Technique Selection: Determine the portray methods that best suit the design and your ability degree.
- Execution and Refinement: Carefully paint the design, layering colours and particulars as wanted.
- Finishing Touches: Add final details, such as highlights and shadows, to boost the realism and visual impression.
Most importantly, have fun! Let your creativity circulate and enjoy the course of of remodeling a plain cake into a masterpiece of edible artwork.
Maintaining Your Tools
Maintaining your tools is paramount when painting on buttercream muffins. Cleanliness prevents cross-contamination of colors and ensures the longevity of your equipment.
For brushes, the sort of brush considerably impacts cleansing procedures. Synthetic brushes, usually used with edible paints, are usually extra sturdy and easier to clean than natural hair brushes.
Immediately after portray, rinse your brushes under lukewarm running water. Avoid scorching water, as it can harm the bristles.
Gently work the bristles between your fingers to loosen any stubborn paint. A mild dish soap, particularly one designed for delicate objects, can be used to take away extra paint.
For intricate detail brushes, an old toothbrush could be helpful for gently cleansing the fine bristles.
Rinse completely until all traces of cleaning soap and paint are gone. The water ought to run clear.
Reshape the bristles rigorously earlier than setting the comb apart to dry. Avoid placing brushes bristle-down, as this can warp them over time. Instead, lay them flat or stand them upright in a jar with the bristles facing upwards.
For cussed, dried paint, soaking the brushes in a bowl of warm, soapy water for a few minutes might help loosen the paint. You may must repeat this process several occasions.
Never use harsh chemical compounds or abrasive cleaners on your brushes, as this will ruin the bristles.
Regular cleansing extends the life of your brushes considerably. A fast rinse after every use is always recommended.
Beyond brushes, think about the palettes you utilize. Disposable palettes are convenient, eliminating the necessity for intensive cleansing. If utilizing reusable palettes, wash them immediately after use with warm soapy water.
For airbrushes used with edible food coloring, observe the producer’s directions carefully. Disassembly and thorough cleaning is crucial to stop clogging. Use applicable airbrush cleaning solutions designed for food-safe purposes.
Proper storage can also be vital. Keep your brushes in a cool, dry place away from direct daylight and warmth. This prevents the deterioration of the bristles and handles.
Protecting your funding in high quality brushes involves constant cleaning and cautious handling. This diligent approach ensures clean, detailed painting on your buttercream desserts for projects to return.
Consider investing in a spread of brush sizes for different painting methods. Different sizes allow for extra versatility and precision in your cake decorating.
Periodically check your brushes for any signs of harm or wear. Replace broken brushes promptly to avoid uneven software of paint and potential frustration.
Remember that the quality of your tools considerably impacts the ultimate appearance of your painted Buttercream Frosting Chocolate desserts. Taking care of your brushes will lead to cleaner strains, vibrant colours, and a professional end.
Cleanliness and upkeep are key to producing high-quality, visually gorgeous buttercream muffins. Don’t underestimate the significance of caring on your tools – it’s an investment in your success.
Maintaining your instruments for painting on buttercream cakes is essential for reaching clear traces, vibrant colors, and a professional end. Regular cleaning and correct storage forestall the build-up of hardened buttercream, which can wreck your instruments and compromise your work.
Brushes are your most dear asset. After each use, immediately wash them with warm, soapy water. Gently swirl the bristles within the water, working the buttercream free. Avoid harsh scrubbing, which may damage the delicate hairs. Rinse totally and reshape the bristles earlier than laying them flat to dry. Avoid leaving them upright in a container as this can warp the comb head.
For intricate details, think about using smaller, extra exact brushes like liner brushes or detailers. These require much more meticulous cleaning due to their delicate nature. You would possibly wish to think about using a brush cleaner specifically designed for water-based paints to successfully take away cussed residue. Allow these brushes to air dry completely before storing.
Spatulas, offset spatulas and palette knives additionally want cleaning after each use. Wipe them down instantly with a humid material to take away extra buttercream. Then, wash them with warm soapy water, ensuring to remove all traces of buttercream from crevices and edges. Dry them totally with a clear cloth to stop rust or staining.
Storing your tools correctly prolongs their lifespan. Keep brushes in a case or container to guard the bristles from harm and dirt. Avoid storing them in closed containers while nonetheless wet, as this will trigger mildew and injury the hairs. Spatulas and knives could be stored in a drawer lined with a delicate material, or held on a wall-mounted rack.
Proper paint storage is equally important. Using high-quality edible paints is a must. Store your paints in a cool, dark place away from direct sunlight and warmth. Exposure to gentle and warmth could cause the paints to degrade and lose their vibrancy over time.
Airtight containers are good for storing your edible paints, preventing them from drying out and becoming unusable. Label each container clearly with the paint colour and date to assist you track their freshness. Regularly examine your paints for indicators of separation or thickening. If you notice any points, you could need to add a small quantity of edible alcohol or water to revive their consistency, but be cautious not to dilute them excessively.
For small amounts of paint, buttercream Frosting Chocolate you should use disposable palette cups. These are nice for one-time use and scale back the danger of cross-contamination between colours. However, if you discover yourself consistently using the same colors, investing in a palette with separate wells helps keep your colours organized and prevents drying.
If you’re working with a big amount of paint and anticipate leftovers, think about using an hermetic container with a silicone gasket to hold up optimum freshness. This will prolong the usable lifetime of your paints and save you money on replacements.
Regular upkeep of your tools and paints is important for producing persistently high-quality buttercream cakes. Taking a quantity of further minutes to clean and retailer your provides correctly will considerably influence the longevity of your gear and the general success of your cake adorning tasks.
Remember to always check your instruments for any harm before every use and replace any worn or damaged gadgets promptly. This will forestall accidents and ensure the high quality of your work remains persistently excessive.
Finally, consider investing in a great high quality cleansing resolution particularly designed for food-safe tools and paints. This will help take away any cussed residue more successfully without damaging the delicate surfaces of your brushes and different instruments.
Maintaining your tools is crucial for reaching persistently easy and professional-looking buttercream finishes on desserts. This extends beyond simply your piping bags and ideas; it encompasses everything out of your spatulas to your airbrushes (if used).
Spatulas and Scrapers:
Immediate Cleaning: After each use, wipe your spatulas and scrapers clean with a moist cloth. Removing extra buttercream immediately prevents it from hardening and turning into tough to remove.
Thorough Washing: Wash your tools with warm, soapy water. A mild dish cleaning soap is ideal. Avoid abrasive cleaners which may scratch the floor.
Drying: Dry totally with a clean material or permit to air dry fully to forestall rust or mildew.
Storage: Store your spatulas and scrapers in a clear, dry place, ideally in a protecting case or sleeve to forestall harm.
Piping Bags and Tips:
Immediate Cleaning: Immediately after use, rinse piping baggage and ideas with heat water. If the buttercream is especially cussed, soak them in heat, soapy water.
Thorough Cleaning: Use a piping bag cleaning brush to thoroughly clean the within of the piping bag, removing all traces of buttercream. You can also use a bottle brush for smaller piping suggestions.
Drying: Air dry piping luggage and tips utterly earlier than storing. Stuffing the piping bag with a clear towel can help velocity up the drying course of.
Storage: Store piping tips in a chosen container to guard them from harm and to maintain them organized. Store piping bags flat to forestall warping.
Couplers:
Disassembly: Disassemble couplers after every use to make sure thorough cleansing of all parts.
Cleaning: Wash all coupler parts in heat, soapy water and use a small brush to remove any cussed buttercream.
Drying and Storage: Dry all parts totally and store in a clear, dry place.
Airbrushes (If Applicable):
Immediate Cleaning: Immediately after every use, flush the airbrush with heat water and a gentle detergent, then rinse totally with clear water. This prevents the paint from drying and clogging the system.
Disassembly: Disassemble the airbrush in accordance with the producer’s instructions. This allows for a more thorough cleansing of all elements.
Specific Cleaning Solutions: Use an airbrush cleansing solution to remove cussed residue. Follow the answer’s instructions rigorously.
Drying: Allow all parts to air dry fully. Avoid using compressed air to dry the airbrush, as this could introduce dust and particles.
Lubrication: Some airbrushes require occasional lubrication; check with your manufacturer’s directions for specifics.
Storage: Store the airbrush in a clear, dry place. A protective case is really helpful to forestall damage.
Regular Maintenance: Periodically disassemble and clean your airbrush, even if you have not used it lately, to forestall buildup.
General Tips:
Avoid utilizing harsh chemicals or abrasive cleaners, as these can harm your instruments.
Inspect your tools often for any injury or put on and tear. Replace damaged instruments as wanted.
Properly cleansing and storing your tools will lengthen their lifespan and ensure persistently high-quality outcomes.
By following these guidelines, you’ll find a way to keep your instruments and maintain them in top condition for years to return, ensuring completely easy and exquisite buttercream muffins.