How To Layer Different Buttercream Colors For Designs
Preparing Your Buttercream
The success of a multi-colored buttercream cake design hinges entirely on the standard of your buttercream itself. Choosing the proper recipe is the first essential step.
American buttercream, a basic alternative, is known for its creamy texture and intensely candy taste. Its excessive butter-to-sugar ratio creates a light-weight and fluffy consistency, ideal for piping intricate details and attaining easy surfaces. However, it might be vulnerable to melting in warmer temperatures.
Swiss meringue buttercream provides a subtly sweet flavor profile and a remarkably steady structure. The egg whites are cooked with sugar, making a meringue base that’s then whipped with butter. This methodology yields a buttercream that’s much less prone to melting and holds its form superbly, perfect for delicate work and layering.
Italian meringue buttercream, much like Swiss meringue, boasts distinctive stability and an opulent texture. The sugar syrup is cooked to the next temperature and poured into whipped egg whites, resulting in a shiny and incredibly smooth buttercream. Its intense flavor might be less suited to delicate pastel shades the place the style needs to be much less dominant.
Ermine buttercream is a much less common but extremely steady possibility. It entails creating a custard base which is then combined with butter. This results in a buttercream that’s terribly stable, resistant to melting, and ideal for warmer climates or cakes that must be transported.
Once you’ve got chosen your buttercream recipe, meticulously observe the directions. Using a stand mixer will prevent time and guarantee consistent texture.
Begin with room temperature butter – this is crucial for reaching a clean and totally emulsified buttercream. Cold butter will lead to a grainy texture. Cream your butter till it is gentle and fluffy. Gradually add your sugar, making certain it is totally included before adding any liquids.
If utilizing a meringue-based buttercream, ensure your egg whites are properly whipped to stiff peaks earlier than incorporating the butter. Over-whipping can lead to curdling, whereas under-whipping will end in a less stable ultimate product.
For flavoring, add extracts or different flavorings at the finish of the mixing process to prevent them from interfering with the emulsification. Consider using gel meals coloring for intense, vibrant hues. Gel colours won’t affect the texture of your buttercream like liquid extracts.
Once the bottom buttercream is made, divide it into separate bowls for every shade. Add your food coloring to every portion steadily, mixing until you attain the specified shade. Be cautious to not overmix, which could incorporate too much air and create a much less secure consistency.
Taste-testing your buttercream at this stage is extremely beneficial. You would possibly need to adjust sweetness or taste depending on your cake’s other elements.
Proper preparation, from choosing the right recipe to fastidiously adding the food coloring, is essential to reaching a flawlessly layered and beautifully designed cake. The stability of your chosen buttercream will instantly impression how nicely your colors maintain and the way simply you can create your design.
Remember to retailer your coloured buttercream in airtight containers to prevent drying out and to keep up vibrant colours. If making the buttercream prematurely, it’s essential to ensure it is saved appropriately.
With careful preparation and attention to element, your layered buttercream design might be a surprising success.
Achieving flawlessly layered buttercream colors requires careful preparation and a methodical strategy. Begin with a high-quality buttercream recipe, making certain it is completely easy and on the best consistency for piping and layering.
Over-beating can lead to a grainy texture, whereas under-beating will result in a much less secure frosting.
Once your buttercream is ready, divide it into separate bowls, one for every colour you intend to make use of. The variety of bowls will depend in your design’s complexity.
For accurate color matching, think about using a color chart or reference image. This helps guarantee consistency across completely different batches of buttercream.
Select your food coloring wisely. Gel meals coloring offers vibrant, concentrated hues with minimal impact on the buttercream’s consistency, while liquid food coloring may require extra and might thin the frosting.
Powdered food coloring can also be used, but remember to mix thoroughly to avoid pockets of concentrated colour.
Start with a small amount of coloring and progressively add extra until you obtain your required shade. It’s at all times simpler to add extra colour than to take it away.
Mix every colour totally utilizing a spatula or a mixer on low velocity. Avoid over-mixing, which can incorporate too much air and make the buttercream fluffy.
Use a bench scraper to ensure each colour is evenly blended and scraped down the perimeters of the bowl, preventing color variations.
For intricate designs, think about using multiple shades of the identical colour to create depth and dimension. A gradient effect could be achieved by steadily including extra shade to subsequent batches.
If you’re utilizing multiple colors which may bleed into one another, think about using a small quantity of neutral buttercream between layers to forestall this.
Store your coloured buttercream in hermetic containers to prevent drying or discoloration. Label every container clearly to keep away from confusion.
Before layering, ensure your cake is crumb-coated and chilled to provide a firm base on your frosting. This prevents the colors from bleeding or mixing prematurely.
Consider the order of layering based in your design. Begin with darker or extra saturated colors as a base in case your design includes a gradual transition of shades.
Use piping baggage fitted with completely different tricks to obtain varied textures and designs. This permits for precision and management when making use of the different coloured buttercreams.
Clean your piping suggestions thoroughly between shade changes to prevent unwanted mixing or discoloration.
For crisp, outlined lines, use a piping approach that suits your design, similar to a star tip, spherical tip, or even a spatula for a country look.
Once all layers are applied, contemplate chilling the cake once more to set the buttercream and improve the visual impact of your layered design.
Practice makes perfect! Don’t be discouraged if your first try is not flawless. Experiment with different strategies and shade combos to develop your unique style.
Consider utilizing a turntable to ensure even utility and simpler entry to all sides of the cake, particularly for multi-layered designs.
Remember to at all times work in a clean and arranged area, which helps maintain the neatness of your design and prevents undesirable shade contamination.
To obtain sharp edges and crisp lines between colours, use a bench scraper or a clean, sharp knife to smooth out the layers after application.
For exceptionally easy transitions between colours, think about using an airbrush to create a delicate ombre effect instead of distinct layers.
Successfully layering totally different buttercream colours for gorgeous cake designs hinges totally on reaching the perfect consistency in every batch.
Start with high-quality ingredients. Use unsalted butter, at room temperature but not melted, for optimal creaminess and ease of blending. This prevents a grainy texture.
Gradually add your powdered sugar, sifting it to avoid lumps. A sifter ensures a smoother, more homogenous buttercream.
Beat your butter until it’s gentle and fluffy. This incorporates air, resulting in a lighter, much less dense ultimate product. The creaming stage is crucial.
Add your powdered sugar in phases, alternating with your liquid (milk, cream, or perhaps a little buttermilk), beating properly after every addition. This prevents a sudden surge of dry elements from seizing the butter.
The liquid you choose influences your buttercream’s texture. Milk creates a softer, barely runnier consistency; cream results in a richer, barely firmer texture. Buttermilk can add tang and a little extra body.
For layering, you want a medium-firm consistency. It should hold its form but nonetheless be pipeable. Too stiff and it will be troublesome to work with; too gentle and it will bleed into other colors.
If your buttercream is just too stiff, add a teaspoon of liquid at a time, beating till integrated. Check the consistency incessantly to stop it from changing into too gentle.
If your buttercream is simply too gentle, add a tablespoon of powdered sugar at a time, sifting it in as you go. Mix until clean and examine once more for desired consistency.
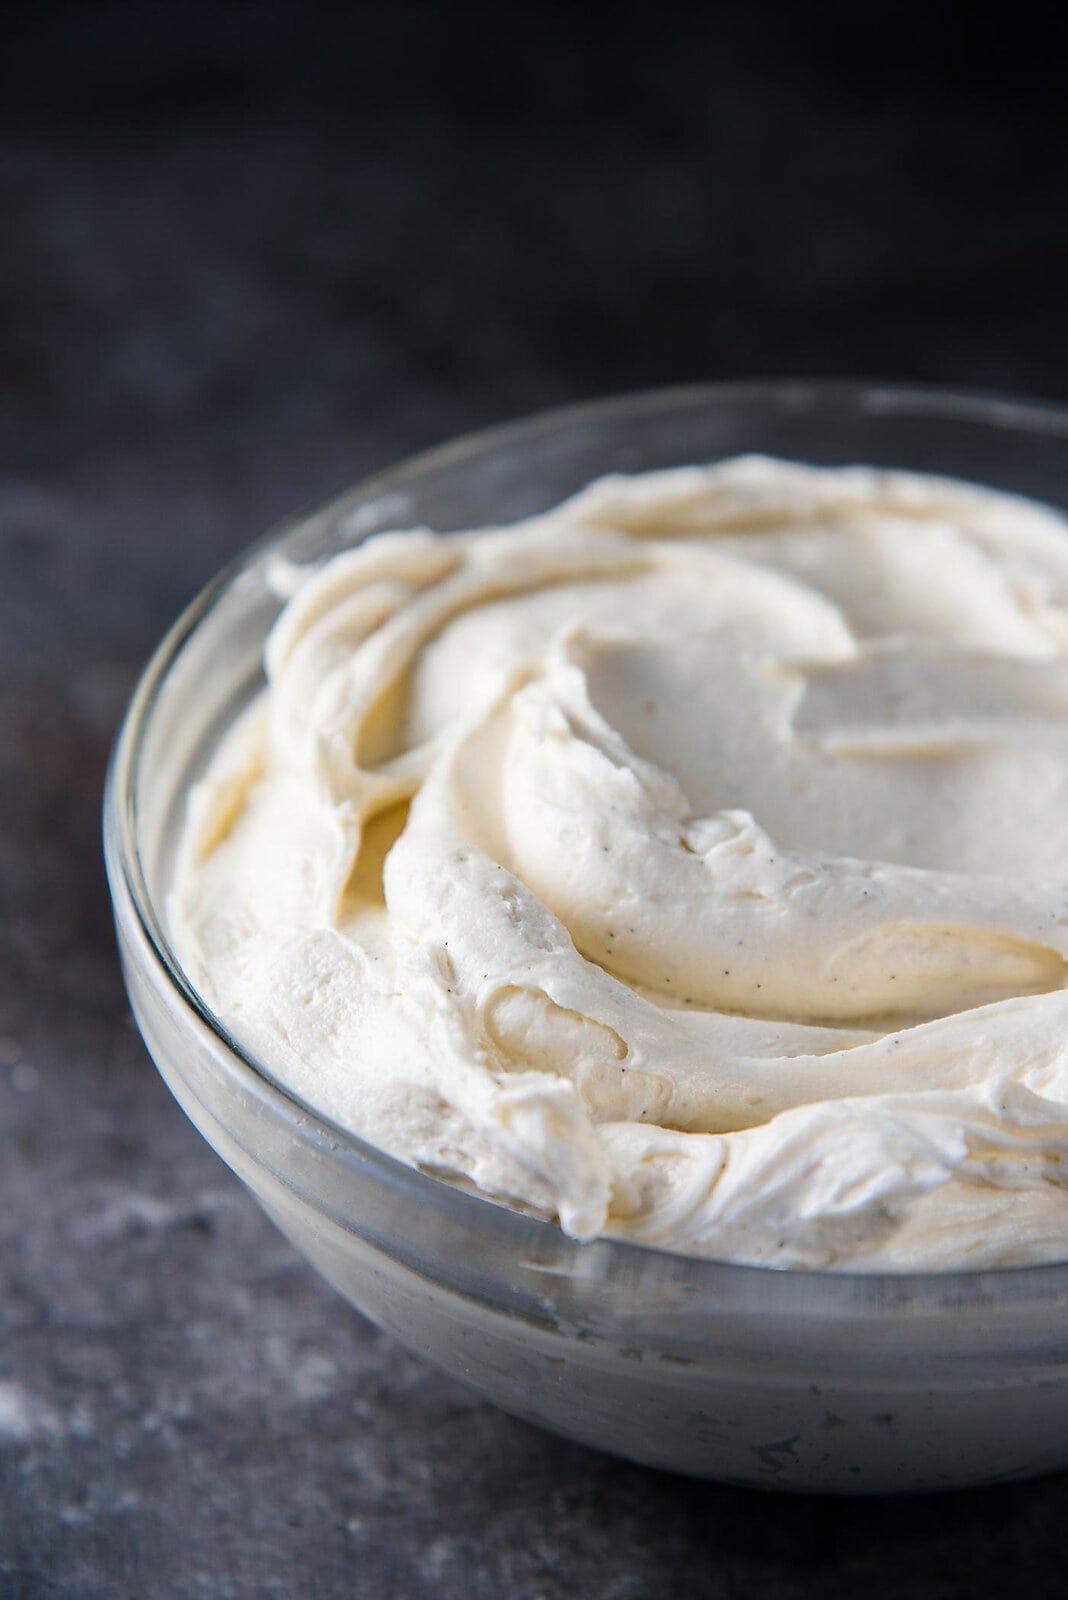
Achieving the right consistency is a matter of feel. The buttercream must be smooth, with none noticeable lumps or grains, and hold its form when you raise your whisk or spatula.
Once you have achieved the best consistency in your base buttercream, divide it into separate bowls for coloring. Use gel food coloring for the most vibrant hues with out altering the consistency. Liquid meals coloring can thin your buttercream, requiring extra powdered sugar to correct.
Once colored, make sure each color is on the same consistency. If one is merely too gentle or too stiff, regulate it accordingly earlier than layering.
For clear layers, use a piping bag or spatula to use each color evenly. A level cake is important for even layers. Use a cake leveler or serrated knife to ensure a flat floor.
Chill the cake layers briefly between including each color to assist stop the layers from mixing. This step permits the buttercream to agency up slightly and creates a sharper separation between the colors.
Finally, consider your design. Some designs require firmer buttercream, while others work well with a barely softer consistency. Experiment and find what works greatest in your chosen style.
Mastering buttercream consistency is key to successful layering and exquisite cake designs. Practice makes perfect!
Layering Techniques
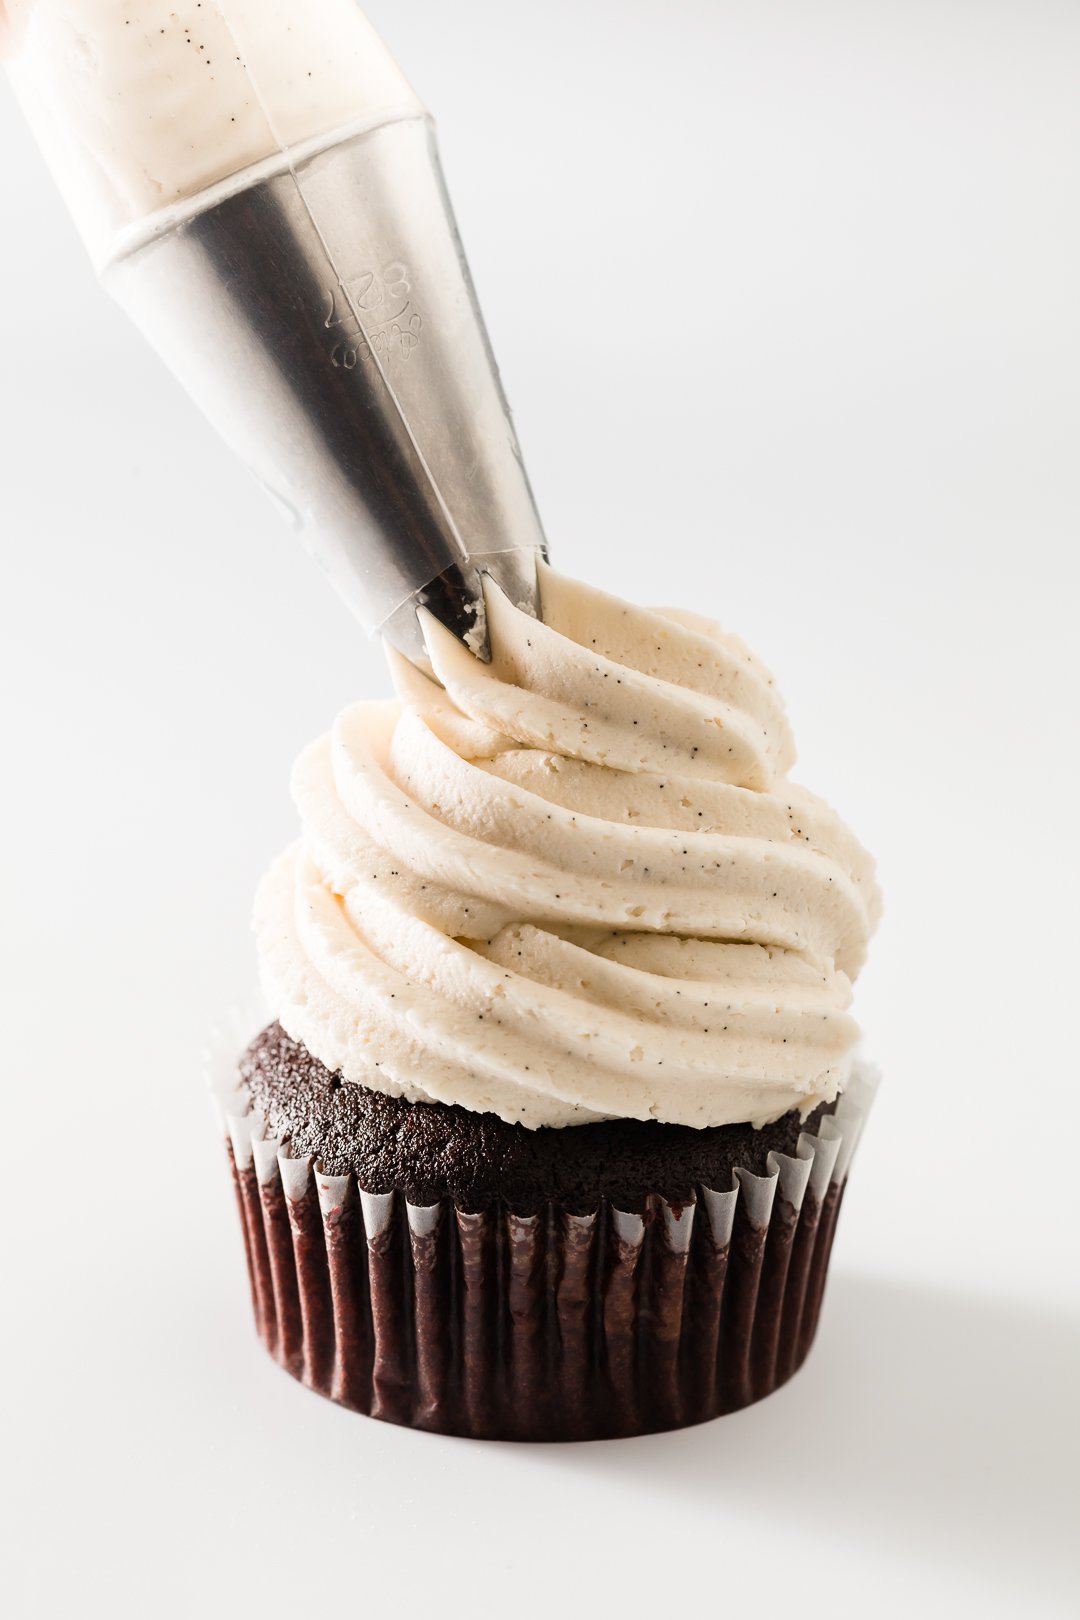
Layering buttercream colours successfully is crucial for creating beautiful cake designs. The offset spatula technique is a well-liked and versatile method for achieving clean, even layers and sharp color transitions.
Begin with a crumb coat. This skinny layer of frosting seals in the crumbs and offers a secure base in your subsequent layers. Use a contrasting shade to your preliminary design for simpler visualization of coverage.
Choose your colours strategically. Select shades that complement one another and consider the general design aesthetic. Plan the order of application – lighter shades are normally utilized first, adopted by progressively darker colors for depth and dimension.
Prepare your buttercream. Ensure it is on the proper consistency – neither too stiff nor too soft. Too stiff will create drag and uneven utility; too delicate will lead to shade bleeding and blurring.
The Offset Spatula: This specialized tool is important for this technique. Its angled blade permits for precise control and easy utility of frosting. Hold it at a snug angle – sometimes round forty five levels.
Applying the First Layer: Start with a generous quantity of your base shade buttercream. Apply it smoothly to the cake using the offset spatula, working from the middle outward in even strokes. Ensure complete protection of the crumb coat.
Creating a Smooth Surface: Use a rotating turntable to ensure constant protection. Keep the cake turning slowly and apply even pressure with the spatula, smoothing out any inconsistencies. Pay close attention to the sides to create a clean, straight end.
Adding Subsequent Layers: Once the first layer is perfectly clean, it’s time for the next shade. Apply a smaller amount of the second colour, overlapping slightly with the primary. Use the spatula to blend the sides gently, creating a soft transition or a pointy line depending on your design.
Achieving Sharp Lines: For outlined lines and patterns, use a clean offset spatula for every shade. Don’t over-blend the colours at the edges, permitting them to meet cleanly. You can use a bench scraper or palette knife to create completely crisp edges if wanted.
Working with Multiple Colors: When utilizing a number of colours, plan your layering fastidiously. Start with the lightest shade first and steadily work towards the darkest, allowing every layer to set barely before adding the following.
Using Stencils: Stencils can be invaluable for intricate designs. Place the stencil on the cake and apply your chosen shade with the offset spatula, gently urgent to transfer the design. Remove the stencil rigorously earlier than the buttercream units.
Piping Techniques: Incorporate piping techniques for added element. Use piping tips to create flowers, borders, or different ornamental parts to boost the layered design.
Practice Makes Perfect: Mastering this technique requires practice. Start with simple designs and steadily increase complexity as you achieve expertise. Don’t be afraid to experiment with totally different colors and methods.
Clean-Up: Keep your offset spatula clear by wiping it frequently with a humid cloth. This will forestall shade bleeding and guarantee crisp lines all through your layering course of.
Refrigeration: Once you’ve completed the layering, refrigerate the cake briefly to allow the buttercream to set earlier than adding any ultimate particulars or decorations. This prevents smudging and keeps your design pristine.
Consider the Cake’s Shape: Adapt your method primarily based on the cake’s shape. Round desserts are relatively simple, but layered designs on square or tiered desserts would require additional attention to detail and potentially completely different utility techniques.
Ultimately, the key to successful buttercream layering is patience, precision, and a little practice. With the right tools and techniques, you’ll find a way to create really breathtaking cake designs.
Layering buttercream colours successfully is essential for creating stunning and intricate cake designs. The piping bag methodology provides glorious control and precision for this technique.
Before beginning, guarantee your buttercreams are at an ideal consistency – neither too stiff nor too runny. A stiff, but nonetheless pipeable, consistency is ideal for clean layering and prevents bleeding.
The easiest layering technique involves using a number of piping baggage, each crammed with a different color buttercream. Start with your base shade, filling the bag about midway. This allows room for the following layers.
For the next colour, fastidiously insert a smaller piping bag filled with the second shade into the larger bag containing the bottom shade. Ensure the tip of the smaller bag protrudes barely from the tip of the bigger bag.
This creates a layered effect within a single piping bag. When you pipe, the colors will emerge aspect by side, permitting for straightforward management over color placement and mixing.
Alternatively, you can use a coupler system. This includes using a single piping bag with a coupler at the end. Different suggestions are connected to create numerous piping results. You can then use smaller baggage fitted with couplers and completely different suggestions for every shade, altering them as wanted throughout your design.
To achieve a easy transition between colors, use a clean, offset spatula to gently mix the colors on the cake floor after piping. This method is finest when a more ombre effect is desired.
For sharp, defined traces between colors, avoid mixing. Instead, carefully pipe each color subsequent to the opposite, making certain the colours do not overlap an excessive quantity of whereas piping.
Practice is vital to mastering this technique. Start with easy designs using two or three colors earlier than making an attempt extra advanced patterns. Experiment with totally different piping tips to achieve various results.
Consider the color wheel when selecting your color combinations. Complementary colours create a vibrant distinction, whereas analogous colors offer a extra harmonious mix.
Properly chilled buttercream holds its shape better and prevents bleeding. Refrigerating your buttercream briefly before piping will enhance the crispness of your layered designs.
When using multiple colors, begin with the lightest shade first and work your method to the darkest. This allows for easier mixing and prevents darker colors from overpowering lighter ones.
Clean your piping bags and ideas thoroughly after each use to forestall shade contamination in future initiatives. This will assist preserve the integrity of your designs.
Beyond easy side-by-side layering, you’ll find a way to create extra intricate designs through the use of completely different piping strategies such as rosettes, swirls, or stars, with every element in a special shade.
For intricate designs, use painter’s tape to part off components of the cake if you should create specific areas for every color. This offers a clean guideline for piping and prevents colors from overlapping by chance.
Remember to make use of food-safe coloring pastes or gels for intense shade saturation and to prevent the buttercream from changing into too skinny.
With careful planning, apply, and a spotlight to element, mastering the piping bag methodology for layering buttercream colors opens up a world of inventive prospects for gorgeous and complex cake designs.
Layering buttercream colours successfully is vital to attaining gorgeous cake designs. Success hinges on proper consistency, cautious utility, and understanding colour mixing.
Begin with a crumb coat. This thin layer of frosting seals in the crumbs, providing a clean base for your subsequent layers. Let it chill briefly to agency up.
For reaching crisp strains and defined shapes, the stenciling methodology is invaluable. Choose a food-safe stencil manufactured from plastic, acetate, and even laser-cut wood.
Ensure your stencil is firmly secured towards the chilled crumb-coated cake. Use small amounts of buttercream to keep away from seepage beneath the stencil.
Different buttercream consistencies work higher for various layering techniques. A stiffer buttercream is better for piping and stenciling, holding its form nicely and stopping bleeding.
A medium consistency works nicely for creating clean transitions between colors, particularly when utilizing a palette knife or spatula for mixing.
Load your piping bag along with your chosen shade, making certain the tip is appropriately sized for the stencil design. Use a gentle hand and even stress to avoid inconsistencies in application.
For intricate stencil designs, utilizing multiple smaller piping baggage with different colours will be preferable to refilling a big bag repeatedly.
When stenciling, work in sections. Don’t try to cover the whole stencil at once, as this can lead to uneven coverage and smudging. Start from one aspect and methodically work your method throughout.
Use a scraper or offset spatula to gently remove extra buttercream immediately after applying it to the stencil. This removes any extra frosting and helps create clean edges.
For creating gradients or ombré effects, use a palette knife to delicately blend colors together on the cake’s floor. Begin by applying one color after which gently feather the subsequent shade into it, mixing on the edges.
If using a number of colours, let each layer set barely earlier than applying the next, especially with thinner buttercreams. This prevents colours from bleeding into one another.
Consider using a food-safe mud or edible luster to add shimmer and depth to your layered design, significantly efficient on top of dried buttercream layers.
For more complex designs, think about using multiple stencils in layers. Apply one stencil, let it set, then fastidiously position another over it. This technique works best with stencils with overlapping or complementary designs.
Practice makes perfect. Start with less complicated designs and steadily enhance the complexity as you achieve experience and confidence. Experiment with different piping tips and stencil patterns to discover varied textures and aesthetics.
Clean your stencils immediately after use with warm soapy water, guaranteeing no buttercream residue stays. This prevents the buildup of dried frosting which can trigger inaccuracies and potentially injury the stencil.
Properly stored stencils will final much longer; hold them flat to avoid warping and buttercream frosting store them in a protecting sleeve or container.
Remember to all the time chill your cake between layers to help the buttercream set, preventing smudging and offering a stable base on your subsequent layer.
Consider the color wheel when deciding on your colour palette. Complementary colours create a vibrant and visually appealing contrast, whereas analogous colours provide a extra harmonious and subtle impact.
Experiment with various techniques similar to dry brushing, wet-on-wet mixing, or even airbrushing along side stenciling for a fair wider array of inventive prospects.
By mastering these layering strategies and the stenciling methodology, you will unlock a world of design possibilities, creating visually beautiful and scrumptious cakes that impress.
Color Combination Ideas
Layering buttercream colours to realize stunning cake designs is all about mastering the ombre impact and understanding shade concord. Successful layering depends on a gradual transition between shades, avoiding harsh lines.
Start with a base color. This might be your foundation, typically a lighter shade that varieties the largest portion of your design. For example, should you’re making a sundown cake, your base might be a pale yellow or a soft orange.
Next, choose your transition colors. These shades bridge the gap between your base and your accent colors. For the sunset cake, you might use a peachy orange and a deep coral. The variety of transition colours is decided by the complexity of the desired ombre. More colours result in a smoother, extra gradual blend.
Finally, select your accent colors. These are the boldest, most saturated shades that add depth and interest. In our sunset instance, a rich purple or a vibrant magenta could serve as accent colours.
Color harmony plays an important role. Complementary colours (opposite each other on the colour wheel) create vibrant contrasts, whereas analogous colors (located subsequent to every other) present a more delicate, harmonious impact. Consider utilizing a shade wheel as a guide.
The ombre impact itself can be achieved through several methods. One methodology is to create particular person batches of buttercream in progressively darker shades, beginning along with your base colour. Pipe or unfold each shade in overlapping layers, making certain smooth blending at the edges.
Another method entails using an airbrush to steadily transition between colors. This creates exceptionally smooth gradients, best for delicate designs. You can thin your buttercream slightly with a touch of milk or cream for easier airbrushing.
For a more textured ombre effect, consider using a palette knife or offset spatula to create swirling patterns or marbled designs. This is an efficient way to add visual curiosity and dimension to your cake.
Consistency is key. Your buttercream must be of the same consistency for each shade to prevent uneven layering or sagging. Using a stand mixer ensures uniform texture. Too delicate, and the colors will bleed; too stiff, and layering will be difficult.
Consider the design itself. An ombre effect can be utilized to the complete cake, creating an attractive gradient throughout the floor. Alternatively, you would possibly use it to brighten individual flowers or different components on the cake.
Practice makes good. Start with simpler ombre designs and gradually enhance the complexity. Experiment with different shade combos and strategies to find your most popular methods.
Cleanliness is essential. Ensure your tools are clear between colours to keep away from unintentional mixing. Use separate piping baggage or bowls for each shade to take care of the integrity of your colours.
Remember to chill your cake layers after applying every shade to help prevent bleeding and allow the buttercream to set. This is especially necessary with lighter shades, that are extra prone to showing through darker layers.
When combining colors, consider the psychological effects. Certain colours evoke specific emotions. For a romantic cake, pastels may be suitable. For a vibrant celebration, bold and saturated colors are a better choice. The possibilities are endless.
Finally, don’t be afraid to experiment. The most beautiful cake designs often come from unexpected colour combinations and creative techniques. Let your imagination run wild!
Layering buttercream colours successfully is key to creating visually gorgeous cake designs. The process entails cautious consideration of colour theory and the specified aesthetic.
Start with a base coat of a impartial color, like white or a pale shade, to supply a clean canvas. This prevents underlying colours from muddying the ultimate impact and ensures vibrant outcomes.
For a basic look, think about a monochromatic scheme. Use various shades of a single color, from gentle to dark, for a classy and chic impact. For instance, graduating shades of blue, from a pale sky blue to a deep navy, can create a mesmerizing impact.
Alternatively, explore analogous colour schemes, using colors adjoining to one another on the color wheel. This creates a harmonious and cohesive look. A mixture of blues, greens, and teals would exemplify this strategy.
Complementary colours, these opposite one another on the color wheel (e.g., pink and green, blue and orange), provide a putting contrast. However, use them strategically; a big space of 1 colour might overpower the other. A refined use of complementary colours as accents may be extremely efficient.
Triadic colour schemes, using three colors evenly spaced on the colour wheel (e.g., red, yellow, and blue), provide a vibrant and vigorous really feel. This requires cautious balancing to forestall any single shade from dominating.
Geometric patterns provide wonderful constructions for layered buttercream purposes. Start with a simple grid or striped pattern as a foundation, then add more complicated shapes.
Stripes can range from broad bands to skinny, intricate lines. Experiment with variations in width and spacing to add visual interest. Consider using totally different piping tricks to create textured stripes.
Checkerboards offer a clear, traditional sample. Alternate squares of contrasting colors to create a daring effect. Using slightly completely different shades within each colour can add depth and dimension.
Chevron patterns, created utilizing V-shaped strains, offer a extra dynamic and trendy feel. The sharp angles create a visually partaking texture. Experiment with varying the size and angles of the chevrons for a singular look.
For extra intricate designs, think about incorporating geometric shapes like circles, triangles, and squares. These can be arranged in repeating patterns or used extra randomly for a less structured look. Consider using a stencil to assist obtain completely aligned shapes.
To create a textured effect, think about using completely different piping techniques. A star tip can create a raised, textured floor, while a round tip can produce clean, even layers. The combination of both strategies can add depth and visible curiosity.
Remember to make use of constant strain when piping to take care of even traces and shapes. Practice on parchment paper or a scrap cake earlier than making use of the design to your ultimate product.
Clean strains are essential for geometric designs. Use a palette knife or smoother to create sharp edges and remove any excess buttercream. A slight chilling between layers helps maintain shape and prevent smearing.
Consider utilizing edible markers or dusts to add further detail and highlight the geometric patterns. These additions can significantly enhance the overall aesthetic attraction.
For a truly unique approach, contemplate combining totally different geometric patterns. Overlapping stripes and chevrons, or incorporating smaller shapes within larger ones, can create a fancy and visually gorgeous outcome.
Finally, remember that follow makes excellent. Experiment with completely different shade combinations and geometric patterns to find your own distinctive type. Don’t be afraid to strive new things and push your creative boundaries.
The prospects are infinite when layering buttercream colors and incorporating geometric patterns. With a bit of practice and creativeness, you’ll find a way to create breathtaking cake designs that are positive to impress.
Achieving beautiful buttercream floral designs often relies on the skillful layering of different colours. Mastering this method allows for depth, dimension, and realism in your creations.
Start with a foundational understanding of shade principle. Analogous colours (those sitting subsequent to one another on the colour wheel, like blues and greens) create a harmonious and tranquil really feel, excellent for delicate floral arrangements or a romantic bouquet.
Complementary colors (opposite one another on the colour wheel, like pink and green or blue and orange) provide a bolder distinction. This could be successfully used for highlighting particular petals or creating a striking centerpiece, corresponding to a poppy with its vibrant purple petals towards deep green foliage.
Triadic colour schemes (three colors evenly spaced on the colour wheel, like red, yellow, and blue) offer vibrant yet balanced compositions. Imagine a sunflower design the place the yellow heart is accented by purple and blue highlights within the petals to mimic shadow and light.
Before you start, guarantee your buttercream is properly prepared. A easy, consistent texture is crucial for clear layering. Consider utilizing completely different piping tips to obtain variations in texture and petal shapes; a round tip for the middle of a rose, a leaf tip for delicate foliage.
For a simple rose, start with a darkish pink or purple base colour piped right into a spiral. Using a lighter shade of pink or a peachy tone, pipe smaller, concentric spirals on prime, leaving the darker color peeking via on the edges for a pure depth.
For extra complex designs, similar to a backyard rose, you might use as much as four or 5 shades. Start with the darkest shade within the middle, progressively transitioning to lighter hues as you move outwards. Remember to blend the colors subtly at the edges of every layer to forestall harsh traces.
When creating leaves, think about using different shades of green. A darker green for the bottom and shadows, and a lighter, almost yellow-green for highlights can create a lifelike effect. Use a leaf tip or a small round tip to create the leaf veins and texture.
For flowers like daisies, begin with a brilliant yellow middle. Then, pipe white or cream petals around the center. For a extra intricate design, use a pastel shade of purple or pink for the outer layer of petals, making a graduated impact.
Don’t be afraid to experiment! Try adding a touch of metallic luster dust to sure areas to create a shimmering impact. You can even use edible paints to achieve distinctive shades or to add nice particulars such as veins in the petals.
Practice completely different strategies. Consider using the “ombre” method the place you progressively blend colors together on the piping bag, making a seamless transition. Alternatively, strive a “wet-on-wet” technique the place you pipe one shade onto one other slightly damp layer to create a delicate, blended look.
Proper storage can additionally be essential. Once your design is full, cowl it to forestall drying and keep shade vibrancy. Refrigeration may help maintain the buttercream agency and prevent melting, significantly in warmer temperatures.
Ultimately, the vital thing to profitable buttercream floral layering is endurance and follow. Experiment with different colour combinations, piping techniques, and floral designs to develop your individual unique fashion and create truly breathtaking cake masterpieces.
Remember to at all times use food-grade supplies and comply with meals security pointers when working with buttercream frosting.
Consider utilizing a colour chart or shade wheel to assist plan your color palettes before beginning your project, this allows for a more cohesive and professional-looking final product.
Don’t be discouraged by preliminary makes an attempt. Mastering buttercream flower layering takes time and consistent effort, but the outcomes are actually rewarding.
Troubleshooting and Tips
Troubleshooting inconsistent colours when layering different buttercream colors for cake designs often boils down to a few key areas: the buttercream itself, the coloring course of, and the applying strategies.
Buttercream Consistency: Inconsistent color depth can stem from utilizing buttercreams of varying consistencies. Ensure all your buttercreams have the identical, ideally stiff, consistency earlier than including colors. Over-whipped buttercream can incorporate an excessive quantity of air, leading to lighter shades, whereas under-whipped buttercream can seem denser and darker. Aim for a consistency that holds its shape properly but is not overly firm or stiff.
Colorant Type and Quality: Different meals colorings behave in a different way. Gel meals coloring offers the most vibrant and constant outcomes as a result of it is extremely concentrated and would not add extra liquid. Liquid meals coloring can thin out your buttercream and will trigger uneven shade distribution. Powdered meals coloring could be dusty and exhausting to blend uniformly, potentially creating patches. Opt for high-quality brands known for his or her vibrant hues and constant efficiency.
Color Measurement and Mixing: The precision of your colour mixing is paramount. Use a kitchen scale to weigh your buttercream and colorant for accurate and repeatable outcomes. Start with small quantities of color and progressively add more till you attain the specified shade. For complex shades, use a color wheel as a guide. Over-mixing can even lead to inconsistencies, creating lighter spots as a outcome of aeration; under-mixing leaves seen streaks of color.
Color Bleeding: Certain colours, especially darker or extremely saturated ones, can bleed into lighter-colored buttercream layers. This is particularly true in case your buttercream layers aren’t fully agency or if there is a delay between applying layers. To stop bleeding, ensure each layer is totally chilled earlier than making use of the next. You can use a skinny layer of chilled buttercream or maybe a skinny dam of white chocolate between layers as a barrier.
Application Techniques: The way you apply the buttercream significantly impacts the ultimate look. Use a smooth, even technique to avoid creating streaks or patches. For intricate designs, think about using smaller piping tips to create a more precise and controlled software. A bench scraper is invaluable for smoothing out layers and making a clear, constant finish. Ensure your instruments are clean and freed from leftover buttercream from earlier colors to forestall contamination.
Temperature Control: Both the buttercream and the encompassing environment affect colour consistency. Warm buttercream is simpler to work with but would possibly show inconsistent color more easily. Working in a cool setting helps the buttercream to remain agency and reduces the prospect of color bleeding or inconsistencies. If your kitchen is particularly sizzling, contemplate chilling your buttercream for brief durations between software levels.
Troubleshooting Tips:
- Test batches: Always make small test batches to perfect your shade combos and guarantee consistency earlier than making use of them to your cake.
- Embrace white buttercream: Start with a white base buttercream. It creates a constant backdrop for the colours, stopping uneven pigmentation.
- Chill between layers: Never rush the layering process; each layer wants sufficient chilling time to firm up earlier than the subsequent is utilized.
- Use parchment paper: Work on parchment paper to simply switch and stack cake layers, preventing smudging.
- Use a turntable: A cake turntable makes it simpler to apply frosting evenly and achieve a flawless, consistent finish.
- Practice makes perfect: The extra you practice, the higher you’ll turn into at reaching consistent colour in your layered buttercream designs.
By fastidiously considering these factors and employing these techniques, you can achieve vibrant, constant, and professional-looking layered buttercream designs.
Layering buttercream colors effectively requires careful planning and execution to achieve clean, vibrant designs. Here’s tips on how to troubleshoot widespread problems and stop bleeding:
1. Choosing the Right Buttercream Consistency:
Using a buttercream that’s too delicate will lead to vital color bleeding. Aim for a firm but not stiff consistency. If it is too delicate, chill it for a quick while to agency it up. If it’s too stiff, add a small quantity of milk or cream, a teaspoon at a time, until it reaches the specified consistency. This is crucial, especially for delicate designs.
2. Preventing Color Bleeding:
Use a dam: Create a barrier between colors using a contrasting colour buttercream or a skinny layer of white to forestall colors from working into each other. This works well for sharp color transitions.
Color separation with parchment paper: When layering multiple colours, use parchment paper to create a bodily barrier between layers in your piping bag to maintain each shade separated.
Chill between layers: Chill the cake briefly after each layer to set the buttercream. This prevents the following layers from mixing with the previous layers. Five to ten minutes within the refrigerator must be sufficient.
Use food-safe shade barriers: For extremely delicate work, you ought to use acetate sheets or food-safe plastic to create obstacles between color sections.
Proper piping method: Apply even strain while piping to prevent bleeding or inconsistent thickness. Avoid over-piping.
3. Troubleshooting Common Issues:
Bleeding on the edges: This usually occurs if the buttercream is too gentle or if the preliminary layer isn’t properly chilled earlier than including the next shade. Chill the cake for longer between layers or add a dam.
Muddy Colors: This sometimes results from utilizing an extreme quantity of color gel or utilizing colours that aren’t absolutely integrated. Mix your colors thoroughly until they’re uniform before piping. Start with small quantities of food coloring and progressively add extra till you obtain the desired shade.
Uneven Coverage: This can stem from inconsistent buttercream application or uneven frosting of the base layer. Ensure that your base layer is clean and evenly frosted earlier than making use of subsequent colours.
Cracking: If your buttercream cracks, this will likely point out it’s too stiff. Add a small quantity of milk or cream to melt it slightly earlier than attempting to repair the cracks.
4. Buttercream Recipes and Colorants:
The type of buttercream you employ impacts its consistency and the way prone it is to bleeding. American buttercream tends to be softer and more susceptible to bleeding than Swiss meringue or Italian buttercream. Experiment to seek out what works best in your most well-liked design and local weather. Also, the standard and type of meals coloring can have an effect on the end result. Liquid gels are extra intensely pigmented and less likely to dilute the buttercream compared to powder colorings.
5. Practice Makes Perfect:
Don’t be discouraged in case your first makes an attempt aren’t perfect. Layering buttercream takes apply. Start with simple designs and progressively work your method as much as more complicated ones. Practice with totally different consistencies and techniques to find what works best for you.
6. Proper Storage:
Proper storage is crucial. Properly chilled muffins are far much less vulnerable to bleeding. Avoid storing in heat areas. Use hermetic containers or cowl your cake to prevent the buttercream from drying out or absorbing odors.
Layering buttercream colors successfully requires precision and planning. Begin with a steady, crumb-coated cake to forestall the colors from bleeding into one another.
Ensure your buttercreams are on the similar consistency. Too delicate a buttercream will mix, whereas too stiff a buttercream will create cracks and uneven surfaces.
Use a piping bag with a coupler to easily change between totally different colors without cleaning. This permits for swift transitions and clear lines.
Start together with your base shade, applying it easily and evenly across the cake. Consider using a bench scraper for a perfectly smooth end earlier than adding other colors.
For sharp lines, use masking tape to create borders earlier than piping on another color. Carefully remove the tape before the buttercream sets.
If using multiple colours side-by-side, use a small offset spatula to mix the sides very barely for a more seamless transition between colors, reaching a gentle ombre effect if desired.
For intricate designs, consider using stencils. Place the stencil on the cake and thoroughly pipe the buttercream via the openings. Again, a constant buttercream consistency is vital.
Practice your piping strategies on parchment paper earlier than applying them to the cake. This helps you excellent your pressure and management.
Consider using food-safe shade dusts for delicate highlights or shading effects. These add dimension without altering the buttercream consistency.
Keep your work space clear and organized. This will prevent unintentional colour mixing and guarantee a professional finish.
For smoother shade transitions, use an airbrush to use very fine layers of shade. This method is best for extra experienced decorators.
If colours bleed, it is likely because of the buttercream being too soft or the cake not being correctly crumb-coated. Try refrigerating the cake briefly to agency it up earlier than proceeding.
Chill the cake between layers of buttercream to assist stop the colours from blending, notably with lighter colors. Allow it to return to room temperature barely earlier than including the final details.
Use a turntable for even utility of buttercream and easy rotation throughout decorating. This makes the method smoother and more environment friendly.
Clean your piping tips totally after each use to stop color contamination in subsequent projects.
Experiment with completely different piping strategies, buttercream frosting such as rosettes, swirls, and stars, to create a big selection of textures and patterns.
Remember, persistence is crucial. Take your time, and do not be afraid to make errors – learning from them is part of the method.
To ensure your cake remains recent and exquisite, retailer it in an hermetic container within the refrigerator. Allow it to return to room temperature earlier than serving.
Clean your tools immediately after use to forestall buttercream from hardening and turning into tough to remove.
If using pure meals colorings, bear in mind that their depth might differ. Test your colours on a small amount of buttercream earlier than applying them to the cake.
For a extra vibrant color, use gel meals coloring instead of liquid. Gel meals coloring is extra concentrated and fewer likely to alter the buttercream’s consistency.
- Use high-quality elements for a smoother, more flavorful buttercream.
- Don’t overmix the buttercream, as this could incorporate an excessive amount of air and end in a less secure product.
- Consider the colour wheel when choosing your colour mixtures to create visually interesting results.
Advanced Techniques
Achieving intricate buttercream designs usually depends on mastering the art of layering different colored buttercreams. This goes past merely piping one colour on prime of one other; it’s about creating depth, texture, and visible interest.
One basic technique is the utilization of thin, consistent layers. This is essential for stopping colour bleeding and sustaining clear traces between colors. Start with a crumb coat of your base colour, allowing it to sit back barely before applying subsequent layers. This ensures a steady basis.
Using totally different consistencies is vital to attaining diversified textures. A stiffer buttercream, piped with a round tip, can create raised particulars and outlined shapes. A thinner, more fluid buttercream can be utilized for smoother transitions or delicate washes of shade, creating refined gradients.
The ‘wet-on-wet’ technique permits for a wonderful mixing of colors. Apply a slightly moist layer of one colour, then immediately pipe or unfold a contrasting moist colour on high. Gentle blending with a toothpick or offset spatula creates delicate, marbled results, best for ombré or watercolor-like designs.
Reverse layering is a less intuitive but extremely efficient method. Instead of build up from the underside, begin along with your final, topmost layer and work your method down. This allows you to precisely control the visibility and placement of every shade, creating clear traces and complicated patterns without worrying about smearing earlier layers.
Using stencils and masks provides an entire new dimension to layering. Stencils can be utilized to create repeating patterns, while masks can be used to protect areas from being coloured, permitting for sharp, clean edges and complicated designs. Remember to carefully safe the stencil or masks to stop slippage.
Employing completely different piping techniques dramatically impacts the ultimate texture. Using a star tip for a textured surface, a round tip for smooth strains, or a leaf tip for delicate particulars allows for exact management over the final feel and appear. Experimenting with pressure and pace of piping additionally provides to the feel variations.
Incorporating textured surfaces before layering can present a really distinctive look. Consider utilizing a textured silicone mat to create an embossed sample on the cake before applying buttercream. Alternatively, you must use a textured rolling pin on a fondant base earlier than masking it with buttercream.
Adding dimension with contrasting colours and shades is a powerful tool. Using lighter shades on raised areas and darker shades in recessed areas creates depth and shadow, making the design seem more three-dimensional. This works significantly nicely in strategies like highlighting and shading.
The use of edible glitter, luster mud, or meals coloring powders enhances the textural side and adds visual aptitude. These can be applied on to the buttercream layers, or combined into the buttercream itself for a extra subtle effect, including sparkle and shimmer to the design.
Practice is paramount. Mastering these methods requires persistence and experimentation. Start with easy designs and steadily increase complexity as you acquire confidence. Don’t be afraid to make mistakes—they are valuable studying alternatives.
Proper chilling is a crucial step. Allowing each layer to chill slightly before adding the next prevents color bleeding and keeps the design sharp and defined. Over-chilling could make the buttercream too hard to work with, so find the proper stability on your climate and buttercream recipe.
Ultimately, layering buttercream colors is an artwork form. By combining these methods and embracing your creativity, you probably can craft beautiful, multi-textured cakes that are as delicious as they’re visually fascinating.
Achieving seamless color transitions and complicated designs with airbrushed buttercream requires mastering a quantity of superior techniques. Proper preparation is vital to success.
First, guarantee your buttercream is completely clean and constant. Use a high-quality buttercream recipe, ideally one designed for airbrushing, as its texture is crucial for even software.
Next, skinny your buttercream to the right consistency. This is commonly achieved by gradually including a small quantity of alcohol, similar to vodka or clear vanilla extract. Test incessantly on a scrap floor to keep away from overly skinny or thick buttercream. The best consistency should be pourable but not runny; it should circulate smoothly from the airbrush but not drip excessively.
Color choice and mixing are pivotal for successful layering. Start with a small amount of buttercream for every colour, creating a number of small batches somewhat than making an attempt to mix large portions.
Using gel food coloring is really helpful, because it allows for vibrant, intense colours without affecting the buttercream’s consistency. Avoid liquid food coloring as it can skinny the buttercream excessively.
For exact colour control, utilize a shade chart or swatches to discover out the proper shades wanted. This helps keep consistency throughout the layering process.
Once your colors are prepared, start with the lightest shade first. Apply a thin, even base coat to your cake or surface. Allow this layer to dry fully before proceeding to the following colour.
Use low air strain for the base coats, steadily rising strain for subsequent layers as needed to construct intensity and depth. This minimizes the danger of blowback and ensures a easy application.
For sharp traces and defined edges, use masking strategies. This involves fastidiously applying stencils, painter’s tape, and even parchment paper to protect areas from the airbrush spray. Ensure the masking is secure to stop bleed-through.
Practice mixing methods to realize soft gradients and transitions. Overlap slightly adjacent colours, progressively lowering pressure on the edges to soften the traces.
Consider utilizing totally different nozzle sizes in your airbrush to regulate the width and intensity of the spray. A smaller nozzle is ideal for nice details and complicated work, whereas a larger nozzle offers broader protection for base coats.
Clean your airbrush thoroughly after every color change to forestall colour contamination. Use an airbrush cleansing answer particularly designed for food-safe purposes.
For complex designs, consider breaking down the method into smaller, manageable sections. This reduces the possibilities of errors and permits for cautious layering and mixing.
Practice often. Airbrushing buttercream takes follow to perfect. Start with simple designs and progressively improve the complexity as your skills enhance.
Experiment with different methods and approaches. Don’t be afraid to try new things and find what works greatest for you.
Always maintain a clear and arranged workspace. This helps decrease the chance of contamination and ensures a easy and environment friendly course of.
To obtain a refined end, consider applying a final layer of clear, skinny buttercream as a sealant. This will shield the design and add a subtle sheen.
Remember to maintain constant strain and distance from the cake for even color application.
- Color Layering Strategy: Lightest to darkest, permitting every layer to dry absolutely.
- Air Pressure Control: Low pressure for base coats, gradual increase for deeper tones.
- Masking Techniques: Stencils, tape, parchment for defined areas.
- Nozzle Selection: Vary nozzle size for detail and protection.
- Cleaning: Thorough cleansing between shade modifications.
- Practice: Essential for mastering approach and precision.
Mastering multi-colored buttercream designs hinges on understanding color consistency and utility methods. Begin with perfectly clean, consistent buttercream in each desired colour. This avoids texture issues in the last product.
Using separate piping luggage for each shade is essential. Pre-filling bags allows for seamless transitions between colors. Consider using coupler methods for straightforward colour adjustments without cleansing and refilling.
For layered effects, like ombre or colour blocking, the secret’s precise application. Start with a base coat of your lightest colour. Allow it to totally set before adding subsequent layers.
Consider using a bench scraper or offset spatula to create clean, even layers. This is especially useful when creating geometric patterns or sharp lines between colours.
For delicate designs requiring precise shade placement, a small, fine-tipped piping tip is vital. Experiment with completely different tip sizes to attain varied line thicknesses and textures.
The “wet-on-wet” approach entails making use of one color directly onto one other whereas it’s still moist. This creates an attractive mix and delicate shade transitions, ideal for floral designs or marbling results.
Conversely, the “wet-on-dry” technique allows for crisp traces and distinct color separation. It involves permitting the earlier layer to totally set before making use of the next, stopping colors from bleeding.
Temperature control considerably impacts buttercream consistency and shade blending. Work in a cool setting to prevent the buttercream from softening too shortly, hindering precision.
Employing stencils can tremendously simplify complex multi-colored designs. Place a stencil on the cake and pipe the colours by way of the openings. This ensures consistent sample repetition.
Practice numerous piping methods – swirls, dots, traces, stars – to realize totally different visual results together with your chosen colors. Experiment with pressure and speed to manage the move of buttercream.
Consider the colour wheel when choosing your palette. Complementary colors create vibrant contrasts, whereas analogous colours supply a extra harmonious and refined look.
For intricate designs, sketching your design onto parchment paper beforehand is invaluable. This serves as a guide, ensuring correct colour placement and preventing errors.
Using meals coloring gels, somewhat than liquid food coloring, produces richer and more intensely saturated colours, enhancing the visual impact of your design.
Clean your piping tips totally between shade changes to avoid color contamination. This maintains the purity and vibrancy of every particular person color.
Don’t be afraid to experiment! Try completely different combinations of colors, strategies, and piping tricks to uncover your individual unique type and develop superior multi-colored buttercream artistry.
To achieve a perfectly easy finish, use a palette knife or bench scraper to softly easy out any imperfections after layering multiple colors. This creates a polished and skilled look.
Consider incorporating edible glitter or luster mud to add shimmer and sparkle to your multi-colored masterpiece, adding a contact of magnificence and class.
Remember to always prioritize meals security. Use clean utensils, and ensure all surfaces are sanitized earlier than dealing with your buttercream to prevent contamination.
Finally, persistence and follow are key. Mastering multi-colored buttercream designs takes time and dedication, but the outcomes are well worth the effort.