
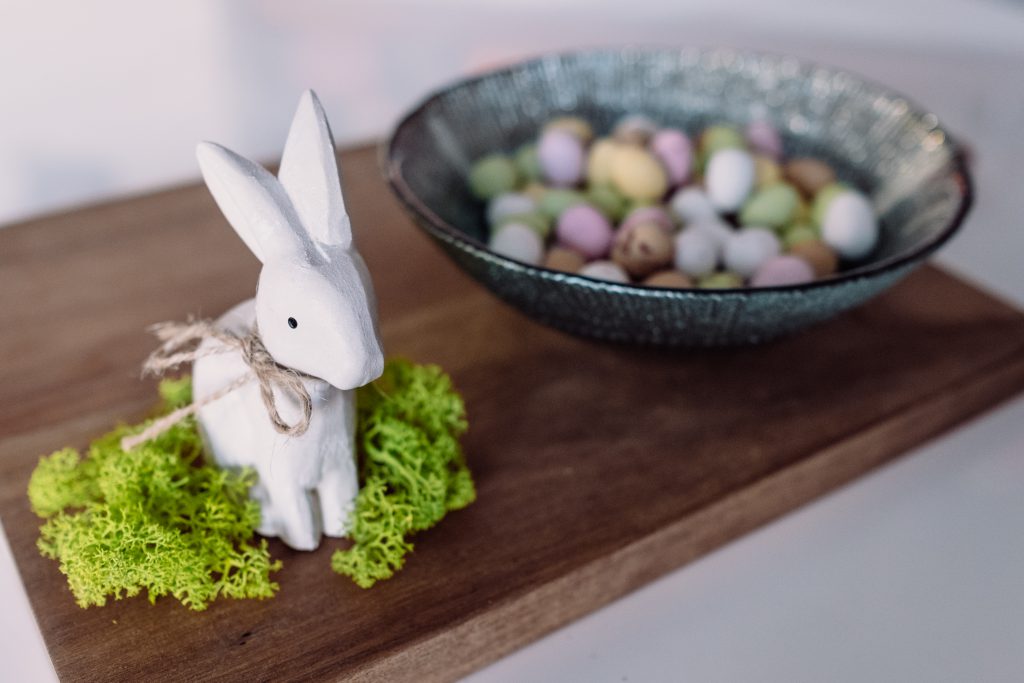
How To Create Layered Keto Desserts Using Chocolate Mousse
Choosing Your Keto-Friendly Ingredients
Choosing the right ingredients is paramount for a successful keto dessert, especially one as delicate as a layered chocolate mousse.
Firstly, your chocolate choice is essential. Look for dark chocolate with a high cocoa proportion (70% or higher) – the higher the proportion, the decrease the sugar content material.
Avoid milk chocolate and white chocolate, as these are typically loaded with sugar and dairy, both of which are restricted on a ketogenic food regimen.
Read labels meticulously; even dark chocolate can include added sugar, so opt for unsweetened varieties every time possible.
Consider the cacao type – some have more bitter notes than others, affecting the general style of your mousse.
Experiment with completely different manufacturers to discover your preferred taste profile.
Beyond chocolate, your fats supply is equally essential. Heavy cream is a basic alternative; its high fat content supplies richness and contributes to the mousse’s creamy texture.
Full-fat coconut milk may additionally be used, offering a subtly completely different taste that enhances chocolate beautifully.
Avoid low-fat or skim variations of these; they will not create the identical creamy consistency.
Sweeteners should be keto-friendly. Erythritol and monk fruit are popular options, providing sweetness with out significantly impacting blood sugar ranges.
Stevia is another possibility, although its intensely candy taste may require cautious calibration.
Remember that completely different sweeteners have various levels of sweetness, so modify accordingly to your taste desire.
For layering, think about keto-friendly additions like raspberries or other low-sugar berries.
Nut butters (almond, cashew, or peanut) can add texture and flavor, notably when utilized in a thin layer between mousse sections.
Cocoa powder can deepen the chocolate taste without including important carbs, if used sparingly.
A pinch of salt enhances the chocolate flavor, creating a balanced style.
Xanthan gum or guar gum might help stabilize the mousse, making certain it holds its shape and avoids turning into watery.
Use these stabilizers sparingly; an excessive quantity of can alter the texture negatively.
When deciding on your components, contemplate the overall flavor profile you desire – whether or not you favor a rich, intense chocolate taste or a more nuanced, complicated style.
Planning your elements fastidiously, with a strong give attention to high-fat, low-carb choices, will assure a scrumptious and profitable keto chocolate mousse layered dessert.
Don’t hesitate to experiment and modify recipes to go properly with your private preferences and dietary wants.
High-quality components invariably result in a superior last product.
Remember to always double-check vitamin labels before incorporating any ingredient into your keto dessert.
Choosing the right sweetener is essential for a successful keto-friendly chocolate mousse, guaranteeing each sweetness and minimal influence on your blood sugar.
Erythritol, monk fruit, and stevia are well-liked keto-friendly options, every with its personal distinct characteristics.
Erythritol boasts a clear, mild sweetness, closely resembling sugar in taste and texture. It’s generally well-tolerated, with a decrease probability of inflicting digestive upset in comparability with other sugar alcohols.
However, consuming very large portions of erythritol can have a laxative effect.
For a chocolate mousse, its delicate sweetness would possibly require a slightly greater amount in comparability with other sweeteners to realize desired sweetness levels.
Monk fruit, extracted from the monk fruit plant, is very candy. A little goes a good distance, making it economical.
It usually has a barely unusual aftertaste which some find nice, whereas others may understand as barely bitter or medicinal.
This aftertaste may be masked considerably by the richness of the chocolate in a mousse, however careful consideration is important.
Stevia, one other pure sweetener derived from the stevia plant, can be intensely sweet. It’s identified for its clean sweetness and lack of aftertaste, a big benefit over monk fruit.
Stevia’s intense sweetness necessitates careful measuring; even a small amount can add appreciable sweetness to your mousse.
Some find that stevia has a slightly licorice-like aftertaste at greater concentrations, so reasonable use is usually beneficial.
When layering your keto chocolate mousse, consider the specific properties of each sweetener in relation to the other components.
A mixture of sweeteners might provide the optimum stability of sweetness and desired texture; for example, mixing erythritol for bulk and a contact of stevia to boost sweetness and counteract any lingering aftertaste from different elements could be advantageous.
The layering course of might affect your selection – a sweeter layer would possibly benefit from a less intensely candy sweetener, permitting the flavour profiles to face out individually.
Always start with smaller amounts of sweetener and regulate to style, particularly with intense sweeteners like monk fruit and stevia.
Remember to contemplate the potential influence of each sweetener on the general texture of your mousse. Some sweeteners can affect the whipping course of or the final consistency.
Testing your recipe with small batches, utilizing completely different sweetener mixtures, will let you find the proper stability in your layered keto chocolate mousse.
Ultimately, the best sweetener in your keto chocolate mousse is the one which best suits your style preferences and dietary wants. Experimentation is vital to discovering your excellent recipe.
Pay shut consideration to the kind of chocolate you choose, its inherent sweetness, and the opposite elements which might be utilized in your mousse to correctly steadiness the sweetness ranges and create a harmonious flavor profile.
Don’t be afraid to experiment and tailor your sweetener choice to create a keto-friendly layered chocolate mousse that you will absolutely love.
Creating layered keto desserts requires cautious consideration of ingredients, particularly the fats sources, to achieve the specified creamy texture and rich taste without sacrificing the low-carb principles of the ketogenic food regimen.
Heavy cream is a cornerstone ingredient in many keto recipes due to its excessive fat content material and ability to create a luxuriously smooth and secure base for mousses and different desserts. Its richness contributes significantly to the general decadent texture. When selecting heavy cream, go for varieties with a minimal of 36% milkfat for the best outcomes; higher fats percentages yield even richer mousses.
However, the high fat content of heavy cream can generally result in a mousse that’s barely much less airy than desired. The fats molecules can hinder the incorporation of air during whipping, leading to a denser ultimate product. This is where methods like gently folding in the whipped cream, quite than vigorously mixing it, turn out to be crucial.
Coconut cream, derived from the thick, creamy part of coconut milk, provides a singular flavor profile and texture. It offers a big quantity of wholesome fat, contributing to the creamy consistency of the mousse. Unlike heavy cream, coconut cream typically imparts a subtle sweetness and a slightly thicker, denser texture to the dessert.
Using coconut cream necessitates cautious consideration of its potential to impart a distinct coconut taste. While some appreciate this tropical notice, others would possibly find it overpowering in a chocolate mousse. Therefore, mixing coconut cream with heavy cream may help steadiness the flavor and achieve a desired stage of richness and creaminess.
Choosing the proper type of coconut cream is essential. Full-fat coconut cream, typically present in cans, is superior to coconut milk or mild coconut cream in reaching a creamy texture. The cream ought to be refrigerated beforehand to allow the fat to separate and solidify, making certain that solely the thickest portion is used for the mousse.
Avocado oil, while not directly integrated into the mousse itself, performs a vital function in creating keto-friendly chocolate for the dessert layers. Its neutral taste profile ensures that it does not intrude with the delicate chocolate style, while its high monounsaturated fat content provides well being benefits with out contributing to important carb counts.
When using avocado oil for melting chocolate, it is vital to use a high-quality, refined version to avoid any grassy or bitter notes that might conflict with the chocolate. Its excessive smoke level additionally permits for protected melting of chocolate with out compromising its quality or flavor. The oil helps create a clean, shiny, and simply spreadable chocolate layer, good for layering inside the mousse.
In a layered keto dessert, the interaction between these fats sources is important. Combining heavy cream for ethereal lightness with coconut cream for richness and physique, and utilizing avocado oil within the chocolate component allows for a perfectly balanced and decadent experience that stays true to the ketogenic principles.
Experimentation is essential to discovering your most well-liked combination. Consider the specified degree of creaminess, the depth of flavor, and the general texture when selecting and mixing these key elements. Each fat source contributes distinctive properties, leading to a variety of textural and flavor possibilities in your layered keto chocolate mousse creation.
Choosing the best keto-friendly elements is paramount for a profitable layered dessert. For the chocolate mousse base, opt for high-quality darkish chocolate with a excessive cocoa content material (70% or higher). The higher the cocoa percentage, the decrease the sugar content material.
Full-fat coconut milk is a incredible keto substitute for heavy cream, offering richness and creaminess with out the carbs. Look for canned coconut milk, making certain the cream is thick and separated from the watery liquid.
Erythritol or monk fruit sweetener are most well-liked decisions for keto baking, offering sweetness without considerably impacting blood sugar levels. Experiment with the quantity to attain your desired sweetness, bearing in mind that totally different brands have varying levels of sweetness.
Unsweetened cocoa powder provides depth of chocolate taste with out added sugar. Be aware of brands, as some could include hidden sugars or components.
For a touch of additional taste, vanilla extract adds fragrant complexity and complements the chocolate beautifully. Pure vanilla extract is greatest.
When layering your dessert, contemplate keto-friendly alternate options for frequent dessert additions. For a berry layer, use fresh raspberries or strawberries sparingly, as their carb depend can accumulate shortly. A small amount provides a nice contrasting taste and colour.
Alternatively, a layer of whipped coconut cream, sweetened with erythritol and flavored with a hint of almond extract, provides a lighter, much less intensely chocolatey element. This creates a textural contrast and prevents the dessert from being overly wealthy.
Nut butters, such as almond butter or peanut butter (ensure it is sugar-free!), supply a dense and flavorful layer. Their pure fats and proteins contribute to the dessert’s satisfying texture and nutritional profile.
Chia seeds or flaxseed meal, while containing some carbs, can add a refined texture and dietary enhance in small portions. They contribute to a slightly thicker mousse consistency.
For a crunchy layer, consider finely chopped nuts like pecans, almonds, or macadamia nuts. These add a satisfying textural factor and contribute wholesome fats.
Consider using sugar-free chocolate chips sparingly for a extra decadent chocolate element within the mousse or as a topping for added texture.
To create a truly layered effect, use clear acetate sheets or silicone molds. This lets you simply create distinct layers with out the danger of them blending collectively. The layers must be chilled adequately between additions for optimal structure.
Remember to always verify the vitamin labels of all ingredients to ensure they fit inside your day by day keto macro targets. Pay shut attention to internet carbs (total carbs minus fiber) to stay in ketosis.
Experiment with different combos of flavors and textures to create your distinctive keto-friendly layered chocolate mousse dessert. The key is to balance richness, sweetness, and contrasting textures for a delightful and satisfying experience.
Don’t be afraid to get creative! The beauty of keto baking lies in its adaptability. You can simply modify recipes and add private touches to create a dessert that fits your particular person preferences and dietary needs.
Building the Base Layer
Building the base layer for a layered keto dessert featuring chocolate mousse requires careful consideration of texture and taste to complement the mousse.
A keto-friendly crust is essential; avoiding grains and high-sugar components is paramount.
One glorious option is a nut-based crust. Almonds, pecans, or macadamia nuts, finely floor, present a pleasant crumbly texture.
Combine the ground nuts with a keto-friendly sweetener like erythritol or monk fruit sweetener. The amount will depend in your desire for sweetness.
A binding agent is critical to hold the crust collectively. Unsweetened shredded coconut works properly, including each texture and moisture.
For added richness and taste, incorporate melted coconut oil or unsweetened cocoa powder.
The exact proportions will depend on the type of nut you employ and your desired consistency. A good starting point is a ratio of 2 elements nuts to 1 half sweetener and ½ part coconut.
Mix all of the dry components thoroughly in a bowl.
Then, add the melted coconut oil (or other fat) and blend till a crumbly dough varieties.
Press the combination firmly into the bottom of your chosen dessert dish. A springform pan works well for easy removal.
For a truly decadent crust, contemplate including a thin layer of dark chocolate, melted and spread evenly over the nut crust earlier than chilling.
Chill the crust in the refrigerator for a minimum of 30 minutes to allow it to firm up earlier than including the chocolate mousse layer.
This chilling step is essential for preventing the crust from changing into soggy when the mousse is added.
Another possibility for a keto crust is to make use of cream cheese. Combine softened cream cheese with a keto sweetener and a pinch of salt.
This creates a denser, cheesecake-like base. You can add cocoa powder to align with the chocolate theme.
Press this mixture into your dish and chill earlier than including the mousse. This possibility is particularly useful when you favor a smoother, much less crumbly crust.
Regardless of the chosen crust, ensuring it is totally chilled is key to a successful layered keto dessert that avoids a messy, soggy backside.
Experiment with different nut combos and additions like spices (cinnamon or nutmeg) to create your excellent keto crust.
Remember to make use of a high quality keto-friendly sweetener to keep away from undesirable aftertastes.
Proper chilling time prevents the next layers from affecting the texture of the bottom layer.
The rigorously constructed base will provide a pleasant contrast in texture and flavor to the rich and creamy chocolate mousse.
The base layer of your layered keto dessert is essential; it sets the foundation for the complete creation’s texture and flavor profile. A robust, steady base prevents sogginess and ensures a visually appealing finished product.
For a no-bake choice, contemplate a keto-friendly crust. This could probably be created from almond flour, coconut flour, or a mix thereof, blended with melted butter, sweetener (erythritol or monk fruit are excellent choices), and a pinch of salt. Press this combination firmly into the underside of your chosen serving dish—a springform pan or individual ramekins work nicely.
The texture of the no-bake crust may be varied. Adding chopped nuts (pecans, macadamia nuts) supplies added crunch. A sprinkle of cocoa powder infuses a refined chocolate flavor, complementing the mousse layer beautifully.
For a baked base layer, you’ve more versatility. You might create a shortbread-style crust using almond flour, butter, and sweetener, baked until lightly golden. This option produces a more solid, less crumbly base.
Alternatively, a brownie-inspired base is a wealthy and decadent choice. A keto brownie recipe normally incorporates almond flour, cocoa powder, eggs, melted butter, and sweetener. Baking time and temperature changes are needed to stop over-baking and preserve moisture. Ensure the brownie layer is fully cooked by way of but not dry.
The baked base layer can incorporate additional flavors. A hint of vanilla extract provides warmth, while a pinch of cinnamon introduces a comforting spice notice. Adding chopped dark chocolate (high cacao percentage) creates an intensely chocolatey base.
Regardless of whether or not you select a no-bake or baked base, contemplate pre-baking or chilling the layer before adding the chocolate mousse. This prevents the mousse from becoming too gentle or watery, compromising the overall structure. A fully chilled base will also permit the layers to meld seamlessly together.
For a visually stunning impact, consider using contrasting colours or textures in your base layer. A lighter coloured crust contrasts well with the darkish chocolate mousse. A swirled or patterned base can elevate the aesthetic enchantment of the dessert.
Remember to make sure your chosen base recipe is totally keto-compliant, paying close consideration to the web carb depend of ingredients. Adjust sweetness levels to your desire, making an allowance for that the mousse layer may even contribute to the general sweetness.
The preparation methodology of the bottom layer ought to complement the chocolate mousse. A delicate, ethereal mousse pairs nicely with a less dense, crumbly crust. A richer, denser mousse requires a base with comparable texture and weight to keep up balance.
Properly executed, the base layer varieties not just a basis but an integral part of the layered dessert’s general flavor and textural expertise.
Experiment with different recipes and techniques to search out your excellent base layer, maintaining in thoughts the overall stability of flavors and textures throughout the finished dessert. Consider utilizing food-safe silicone molds or baking parchment to facilitate easy launch and maintain a clear end.
Finally, remember to permit enough time for cooling and setting before adding subsequent layers. Patience is essential to making a beautifully layered and delicious keto dessert.
Begin with a rich and stable base. For a keto chocolate mousse, this often means a meticulously whipped heavy cream, ideally a minimal of 35% fat content.
Chill the heavy cream completely earlier than whipping. This ensures a firmer, extra stable peak.
Use a clean, grease-free bowl and whisk for optimum whipping outcomes. Any trace of fats or water can inhibit the cream from whipping properly.
Whip the heavy cream till soft peaks form. Don’t overwhip, or it’s going to turn into grainy.
Gradually incorporate a keto-friendly sweetener, similar to erythritol or monk fruit, making certain it’s finely powdered to dissolve simply.
A touch of vanilla extract provides depth and enhances the creamy texture. Don’t overdo it, a number of drops suffice.
For the chocolate component, use high-quality unsweetened cocoa powder. Dutch-processed cocoa powder provides a richer, less bitter taste.
Slowly sift the cocoa powder into the whipped cream, folding it gently to keep away from deflating the combination.
Melt high-quality dark chocolate (70% cacao or higher) utilizing a double boiler or microwave in brief bursts, stirring continuously.
Let the melted chocolate cool slightly earlier than incorporating it into the whipped cream. This prevents the cream from melting.
Gently fold the melted chocolate into the whipped cream combination until a homogenous, dark brown colour is achieved.
Avoid overmixing; gentle folding preserves the airiness of the whipped cream.
For a extra intense chocolate taste, add a tablespoon or two of robust brewed espresso or coffee.
A pinch of sea salt balances the sweetness and enhances the chocolate notes. It’s a delicate however impactful addition.
Optional additions to the base layer may include a teaspoon of prompt espresso powder for a mocha mousse or a splash of almond extract for a refined nutty taste.
Once the bottom is complete, fastidiously switch it to individual serving glasses or a bigger serving dish.
Chill the bottom layer in the refrigerator for a minimum of 30 minutes to allow it to set and firm up before adding subsequent layers.
The next layer would possibly encompass a berry compote made with low-carb berries and a contact of sweetener, including a pleasant tartness and shade contrast.
Alternatively, a layer of crushed nuts (almonds, pecans, or macadamia) supplies textural interest and a nutty complement to the chocolate.
A layer of keto-friendly caramel sauce, made with heavy cream and erythritol, creates a rich and decadent distinction to the mousse’s bitterness.
Remember to sit back every layer briefly earlier than including the following to stop melting or unwanted mixing.
Top with a dusting of unsweetened cocoa powder, shaved dark chocolate, or fresh berries for an elegant end.
The last contact could contain a garnish of whipped coconut cream for a lighter, fluffier texture on top.
Allow the entire dessert to sit back for at least another hour before serving to allow the flavors to meld and the layers to set completely.
Experiment with completely different taste mixtures to create unique and scrumptious layered keto desserts.
Crafting the Chocolate Mousse Layer
Crafting the chocolate mousse layer requires precision and patience to realize the proper texture and richness.
Begin by ensuring your bowl and whisk are impeccably clear and utterly dry – any hint of water will inhibit the correct whipping of the cream.
Melt your chosen dark chocolate (at least 70% cacao for optimal keto-friendliness) gently in a double boiler or microwave, stirring incessantly to avoid scorching. Allow it to cool slightly but remain fluid.
In a separate bowl, gently whip your heavy cream till gentle peaks type. Avoid over-whipping, as this can result in a grainy texture. The cream must be light and fluffy, but still hold its form.
Gradually fold the cooled melted chocolate into the whipped cream, utilizing a gentle folding movement to prevent deflating the cream. This incorporates the chocolate evenly while sustaining the ethereal texture of the mousse.
Add a touch of keto-friendly sweetener similar to erythritol or monk fruit, to taste, folding it in gently. A pinch of sea salt enhances the chocolate flavor.
For an additional decadent touch, contemplate adding a teaspoon of vanilla extract or a tablespoon of unsweetened cocoa powder. Always fold these elements in delicately.
Once fully incorporated, the chocolate mousse ought to be easy, shiny, and have a lightweight and ethereal consistency. Avoid over-mixing; the less you deal with the mixture after the ingredients are combined, the higher.
To obtain the proper whip for the cream, begin with very chilly heavy cream. The colder the cream, the better it’ll whip and the extra secure the peaks shall be.
Use a stand mixer or a hand mixer with clean, dry beaters. Begin whipping on low pace, gradually increasing to medium-high as the cream thickens.
Watch carefully as the cream transitions from liquid to soft peaks, then to stiff peaks. Over-whipping will result in a clumpy, buttery texture. Stop whipping when the cream holds stiff peaks, however still has a barely gentle texture.
The whipped cream must be glossy, not dry or crumbly. It ought to hold its form whenever you carry the beaters however shouldn’t be so stiff it is troublesome to fold into different elements.
If utilizing the whipped cream as a separate layer, gently fold in any desired flavorings, such as vanilla extract or powdered sweetener, after it reaches the specified consistency.
Remember to fastidiously switch the chocolate mousse and the whipped cream to your dessert layers, avoiding shaking or jarring the combination to maintain the ethereal texture.
Refrigerate the dessert for a minimum of 2 hours to permit the layers to set earlier than serving.
Begin by deciding on a high-quality dark chocolate with a minimum of 70% cacao for the richest taste and optimum keto-friendliness.
Chop the chocolate into small, roughly equal-sized pieces. This ensures even melting and prevents scorching.
Choose your preferred melting method: a double boiler is ideal for mild, even melting, minimizing the chance of burning. Alternatively, a microwave can be utilized in short bursts (15-20 seconds), stirring regularly to forestall uneven heating and seizing.
If utilizing a double boiler, fill the underside pot with about an inch of water and convey to a simmer. Place the chopped chocolate within the top pot, ensuring it does not touch the water.
If utilizing a microwave, place the chopped chocolate in a microwave-safe bowl. Microwave in short intervals, stirring completely after every burst. The objective is to soften the chocolate slowly and utterly.
Once melted, the chocolate must be smooth and glossy with no visible lumps. If any lumps persist, proceed melting gently till a totally clean consistency is achieved.
For optimal texture in your mousse, allow the melted chocolate to cool slightly earlier than incorporating other ingredients. This prevents the other parts from curdling or separating.
The next step includes incorporating different parts, which is determined by your particular recipe. Common additions include heavy cream, unsweetened cocoa powder, keto-friendly sweetener (e.g., erythritol, monk fruit), and vanilla extract.
To combine the components, gently fold them into the cooled melted chocolate utilizing a spatula or whisk. This incorporates air into the combination, creating a light-weight and ethereal mousse. Avoid vigorous mixing, as this could incorporate too much air, resulting in a less stable mousse.
The folding approach involves utilizing a spatula to gently scoop the combination from the underside and turn it excessive, repeating the motion until all the ingredients are totally integrated and the combination is smooth and homogenous.
Be cautious to not overmix, which may finish up in a dense and fewer ethereal mousse. The goal is to create a velvety smooth texture.
Once the chocolate mousse is completely blended, carefully transfer it to your ready dessert layers. A piping bag can create a neat and professional end.
After layering, refrigerate the dessert for no less than 2-4 hours to allow the mousse to set fully before serving. This allows the flavors to meld and the mousse to realize its optimum texture.
The final outcome must be a wealthy, decadent, and flawlessly smooth chocolate mousse layer ready to be part of your beautiful layered keto dessert.
Begin with a high-quality darkish chocolate, at least 70% cacao, for essentially the most intense flavor and minimal added sugar.
Finely chop the chocolate to make sure even melting and forestall lumps within the last mousse.
Heat heavy cream, or a keto-friendly various like full-fat coconut milk, gently in a saucepan. Avoid boiling; a simmer is adequate.
Once heated, remove the cream from the warmth and pour it over the chopped chocolate. Allow it to sit for a minute or two to soften the chocolate barely.
Gently whisk the mixture till the chocolate is totally melted and integrated into the cream, creating a smooth, shiny ganache.
For sweetness, use a keto-friendly sweetener like erythritol, monk fruit, or stevia. Start with a small amount and taste as you go, adjusting to your choice.
Consider including a pinch of sea salt to enhance the chocolate’s taste and steadiness the sweetness. The salt accentuates the richness.
For further flavor complexity, incorporate extracts similar to vanilla, almond, or peppermint. A teaspoon of every goes a good distance.
If utilizing coffee-flavored mousse, add a shot of strong espresso or instant coffee granules dissolved in a tablespoon of hot water.
Once the sweetener and flavorings are added, gently whisk them into the chocolate ganache till thoroughly mixed.
To incorporate air and create a light and ethereal mousse, gently fold in whipped heavy cream (or a keto-friendly alternative) using a spatula, performing a sluggish and delicate folding movement to prevent deflating the whipped cream.
Be cautious to not overmix; a couple of light folds are enough to incorporate the whipped cream without dropping the mousse’s delicate texture.
For a richer, denser mousse, reduce the quantity of whipped cream added. For a lighter mousse, improve the quantity of whipped cream.
Spoon the prepared mousse right into a prepared dessert ring or mildew, guaranteeing a good layer in your layered dessert.
Refrigerate the mousse layer for at least 2-3 hours, or ideally in a single day, to permit it to set completely earlier than adding subsequent layers.
To forestall crystallization of the sweetener, guarantee your ingredients are at room temperature before combining them.
Experiment with different percentages of cacao in the chocolate to adjust the intensity of the chocolate taste to your liking.
If using coconut milk, be aware of its potential coconut taste and regulate the other flavorings accordingly.
For a truly decadent experience, add a teaspoon of cocoa powder to the whipped cream earlier than folding it into the chocolate ganache.
Taste and adjust the sweetness and flavorings throughout the process to achieve your required steadiness of flavors.
Remember to use high-quality components for one of the best flavor and texture in your keto chocolate mousse.
The success of a layered keto dessert, notably one featuring chocolate mousse, hinges significantly on reaching the right mousse consistency.
Begin with high-quality darkish chocolate, a minimum of 70% cacao for optimum keto-friendliness and wealthy flavor. Avoid using chocolate chips, as they often comprise added sugars and stabilizers that compromise the texture.
Finely chop the chocolate; smaller items soften more evenly, preventing grainy lumps in the final product. Aim for roughly pea-sized fragments.
Choose your fats supply fastidiously. Heavy cream is a traditional and provides a luxurious mouthfeel, however full-fat coconut milk provides a barely completely different, almost tropical observe. Ensure your cream or coconut milk is thoroughly chilled for optimal whipping.
The ratio of chocolate to cream/coconut milk is crucial. Experiment to search out your desire, but a general guideline is to use approximately 2 elements cream/coconut milk to 1 half chocolate by weight. Weighing components ensures accuracy.
Melt the chocolate gently using a double boiler or microwave in short bursts, stirring frequently to forestall scorching. Overheating can lead to a grainy or seized mousse.
Whip your chilled cream or coconut milk till delicate peaks type. This stage is essential. Under-whipping leads to a runny mousse; over-whipping creates a stiff, dense texture that lacks the airy lightness of a well-made mousse.
Gently fold the melted chocolate into the whipped cream, working in small increments to maintain the airiness. Use a spatula and perform a folding movement, quite than vigorous stirring, to keep away from deflating the whipped cream.
Incorporate any additional flavorings at this stage. A touch of vanilla extract, espresso powder, or even a pinch of sea salt can enhance the complexity of the mousse. Add them sparingly and gently fold them in.
Check the consistency. It ought to be gentle and fluffy, yet maintain its form. If it is too runny, chill it in the refrigerator for 15-30 minutes to permit the fats to solidify slightly. If it is too thick, gently whisk in a small amount of additional cream/coconut milk.
Transfer the mousse into your layered dessert container. If creating a quantity of layers, ensure every layer is evenly distributed and gently smoothed to create a neat look.
Refrigerate the dessert for at least 2-4 hours to permit the mousse to set fully. This permits the flavors to meld and creates a firmer, extra secure mousse layer.
Before serving, allow the dessert to take a seat at room temperature for about 10-15 minutes to melt barely, enhancing its texture and pleasure. This prevents an incredibly cold and overly firm mousse.
Remember, practice makes excellent. Don’t be discouraged by initial attempts that might not meet your required consistency. Experiment with completely different ratios and techniques to find your best chocolate mousse recipe for excellent layered keto desserts.
Adding Subsequent Layers (Optional)
Adding subsequent layers after your chocolate mousse base opens a world of textural and flavor prospects within the constraints of a keto-friendly dessert.
A simple yet elegant addition might be a layer of whipped cream, stabilized with a touch of powdered erythritol or one other keto-friendly sweetener. This adds lightness and a contrasting texture to the richness of the mousse.
For a extra complex profile, consider a layer of keto-friendly cheesecake mousse. This could be a lighter, tangier counterpoint to the chocolate, or maybe a different flavored mousse altogether (like coffee or vanilla).
A layer of crunchy texture may be achieved with finely crushed nuts, like macadamia nuts or pecans, toasted for added depth. Ensure these are finely crushed to maintain an even layer and avoid overwhelming the other parts.
Consider incorporating a thin layer of chocolate ganache, both darkish or milk chocolate depending on the general taste profile you aim for. This offers an intensely chocolatey experience in a small quantity.
Introducing a berry coulis or puree provides a vibrant shade distinction, a burst of freshness, and a welcome tartness to offset the chocolate’s richness. This may be strategically placed between layers of mousse or as a topping.
To make a berry coulis, simply mix recent or frozen berries (raspberries, strawberries, blueberries, or a combination) till easy. Strain the combination by way of a fine-mesh sieve for a smoother consistency, if desired. Sweeten sparingly with a keto-friendly sweetener like stevia or erythritol to balance the tartness; typically the berries’ natural sweetness is sufficient.
The coulis can be layered immediately onto the mousse, permitting it to softly settle earlier than including the following layer. Alternatively, it may be piped into ornamental swirls for a visually appealing presentation.
For a thicker layer, think about decreasing the berry puree on low heat till it thickens slightly. This will end in a extra substantial layer and stop it from working into the other layers.
Remember to chill the dessert thoroughly between adding every layer to allow them to set properly and forestall them from mixing. This is particularly crucial for the mousse layers, as they are typically lighter and more vulnerable to blending.
The order of layering is necessary in influencing the final style and look. Experiment with totally different sequences to find your favourite combinations. A potential sequence could presumably be: chocolate mousse, berry coulis, whipped cream, crushed nuts, and a last drizzle of ganache.
The key to success is planning and precise execution. Using chilled bowls and tools will assist maintain the mousse’s construction. Furthermore, utilizing small, layering-friendly serving dishes will showcase the magnificence of the multi-layered dessert.
Don’t be afraid to experiment with totally different taste profiles and textures. The prospects are endless in relation to making a layered keto dessert, and the berry coulis adds an important factor of brightness and distinction.
Ensure all ingredients used are keto-friendly to take care of the low-carb facet of the dessert. This contains utilizing sugar substitutes and ensuring berries are used in moderation because of their pure sugar content.
Finally, presentation is key! Consider garnishing the final layer with recent berries, a dusting of cocoa powder, or a quantity of mint leaves to reinforce the overall aesthetic appeal of your creation.
Adding subsequent layers after your chocolate mousse base opens up a world of keto-friendly dessert prospects. The key is to ensure every layer enhances the mousse with out compromising the low-carb integrity.
A popular choice is a layer of keto-friendly whipped cream. This supplies a light and ethereal distinction to the richness of the mousse. To guarantee it holds its form, use heavy cream with a excessive fats content and whip it till stiff peaks type. Sweeten sparingly with a keto-friendly sweetener like erythritol or monk fruit.
Another elegant addition is a berry compote. Berries are naturally low in carbohydrates, but be mindful of portion measurement. Macerate the berries (strawberries, raspberries, blueberries) gently with slightly bit of sweetener and lemon juice to reinforce their taste without including excessive carbs.
For a more decadent choice, consider a skinny layer of keto-friendly caramel sauce. This can elevate the dessert to another degree. Creating a keto-friendly caramel sauce requires cautious attention to components and process. Traditional caramel depends closely on sugar, so substitutes are wanted.
A successful keto caramel sauce typically uses erythritol or a blend of keto-friendly sweeteners. The process entails slowly caramelizing the sweetener over medium warmth, then incorporating heavy cream and a touch of salt. The key’s persistence and constant stirring to forestall burning. Be cautious of utilizing too much sweetener, as it can crystallize and wreck the texture.
You may also think about a layer of chopped nuts, such as pecans or almonds. These add texture and healthy fat, contributing to satiety. Keep in thoughts that while nuts are keto-friendly, they’re calorie-dense, so use them sparingly.
A less widespread, however extremely efficient layer is a skinny layer of keto-friendly cheesecake filling. This could be made utilizing cream cheese, sweetener, and vanilla extract. The texture contrasts fantastically with the mousse, including a creamy, tangy component.
When layering, it’s essential to permit each layer to set utterly earlier than adding the subsequent. Refrigeration is essential for this process, ensuring the layers remain distinct and do not combine collectively. Chilling occasions will range primarily based on the elements and the ambient temperature.
Finally, contemplate the visible appeal of your layered dessert. A contrasting shade scheme can enhance the presentation. For example, a dark chocolate mousse might be layered with a bright berry compote and a light-colored whipped cream, creating a gorgeous and scrumptious dessert.
Remember to at all times calculate the net carbohydrates for every layer to ensure your dessert remains keto-friendly. Enjoy experimenting with totally different combinations to create your individual signature layered keto dessert masterpiece.
The great thing about layered desserts lies of their adaptability. Don’t be afraid to get creative and discover various taste combos and textures, all while staying throughout the ketogenic guidelines.
Adding a layer of nut brittle or crunch provides a delightful textural distinction to the graceful, creamy chocolate mousse, elevating the dessert to a brand new stage of indulgence.
The secret is to choose a brittle or crunch that enhances the chocolate taste without overpowering it. A basic almond brittle, with its subtly sweet and nutty notes, works exceptionally well.
For a richer, more intense taste profile, consider a pecan brittle, whose deeper, more strong style stands up superbly to dark chocolate.
Alternatively, a hazelnut brittle supplies a singular, slightly earthy counterpoint to the chocolate’s sweetness.

Cashew brittle presents a creamier texture and a milder, sweeter taste that pairs well with milk chocolate mousse.
When incorporating the brittle, remember that much less is commonly more. A thin layer strategically positioned between mousse layers will maximize the textural distinction with out overwhelming the chocolate taste.
To prevent the brittle from turning into soggy, ensure your mousse layers are completely set earlier than adding the brittle. Refrigerate the mousse for no less than half-hour to an hour to permit it to firm up.
You can create your own brittle from scratch, fastidiously controlling the ingredients and sweetness levels to perfectly match your mousse. Recipes are available online, and customization is simple.
Alternatively, pre-made brittle from respected manufacturers offers a convenient option, guaranteeing constant quality and saving useful preparation time.
If utilizing pre-made brittle, ensure it’s coarsely crushed to maximize the textural contrast. Avoid overly fine crumbs, as they could blend too seamlessly into the mousse.
Consider layering the brittle between the mousse layers to create a visually interesting and texturally exciting dessert. You can even sprinkle some finely crushed brittle on high for extra flair.
For a more refined contact, incorporate various varieties of nuts into your brittle, creating a medley of textures and flavors. A mixture of almonds, pecans, and hazelnuts could be exceptionally pleasant.
Remember to consider the overall sweetness of the mousse when choosing the brittle. If your mousse is already very sweet, opt for a much less candy brittle to maintain up stability.
Experiment with various varieties of chocolate mousse, from darkish and intense to lighter and milkier, to discover the right brittle pairings. Each mixture will provide a novel taste experience.
The addition of a nut brittle or crunch layer is not merely a textural enhancement; it’s a strategic transfer to create a more advanced and memorable dessert expertise. The rigorously chosen distinction elevates the simplicity of the mousse into one thing extraordinary.
To ensure successful layering, use a piping bag or spoon to rigorously distribute the brittle, avoiding extreme stress which may compact it and diminish its crispiness.
Finally, remember presentation. The contrasting colors and textures between the smooth mousse and the crunchy brittle will make your layered dessert visually stunning, promising a delightful taste experience before even the primary chew.
Assembly and Finishing Touches
Creating a surprising layered keto dessert requires careful attention to meeting and ending touches. The aim is not only deliciousness, but also visible attraction, showcasing the contrasting textures and colors of each part.
Begin with a sturdy base. For a chocolate mousse layered dessert, a keto-friendly crust is essential. This could be a crushed almond flour crust, a coconut flour base, or even a thin layer of solidified chocolate ganache. Ensure the crust is completely chilled before continuing to prevent it from changing into soggy.
Next comes the layering process. Start with the most delicate part, often a lighter-colored factor for visual distinction. This may be a whipped cream layer infused with vanilla or a subtly sweetened berry puree (using keto-friendly sweeteners). Use a piping bag or a spoon for even distribution, making certain a smooth, constant floor. Gently chill this layer to allow it to set barely before adding the following.
The star of the show—the chocolate mousse—should be piped or carefully spooned onto the chilled layer. To keep away from disturbing the underlying layer, use a spatula to softly easy the surface of the mousse. Be mindful not to overfill the container, leaving enough area for any additional layers or topping.
Depending on the complexity of the dessert, extra layers would possibly embody extra mousse (perhaps with different flavor infusions like espresso or mint), additional fruit purees, and even thin layers of keto-friendly cake or brownies (ensure these are cut into suitably sized pieces before incorporating them into the layering).
Each layer should be chilled for at least 30 minutes to allow it to agency up before adding the following one. This will forestall layers from mixing and will help preserve the general construction of the dessert.
The last layer typically serves as an ornamental factor. It could probably be a skinny layer of melted dark chocolate, elegantly drizzled or swirled on prime. Alternatively, you might garnish with contemporary berries, shredded coconut, cocoa powder dusting, chocolate shavings, or even edible flowers for an extra contact of class.
After the final layer is added, chill the whole dessert for no less than 2-4 hours, or ideally overnight, to permit the flavors to meld and the layers to completely set. This chilling time is crucial for reaching the optimal texture and preventing the dessert from falling aside.
Before serving, carefully remove the dessert from its mold or container. A warm knife or the facet of the container gently run around the edge will usually suffice. If utilizing a springform pan, carefully launch the edges.
Presentation is essential. Place the dessert on a serving plate or cake stand, and think about including extra garnishes or accompaniments such as contemporary mint sprigs or a dusting of powdered sugar substitute. A simple, elegant presentation enhances the overall eating experience.
Remember to utilize contrasting colours and textures for optimal visual enchantment. A gentle layer followed by a dark layer creates a wonderful visual effect. Carefully think about the order of your layers and the general visual influence you want to achieve. Experimentation with totally different textures and flavors is encouraged!
Proper chilling is crucial in making a stable, visually appealing, and scrumptious layered keto dessert. Patience and attention to detail will reward you with a panoramic creation perfect for any occasion.
Creating layered keto desserts with chocolate mousse requires cautious consideration to meeting and finishing touches, chilling, and setting to attain a visually appealing and texturally pleasing result.
Assembly and Finishing Touches:
Layer Selection: Begin by deciding on your keto-friendly layers. This could embrace issues like whipped coconut cream, berry coulis (strained berries sweetened with erythritol or stevia), almond flour cake layers, or even a crunchy almond brittle. The key’s to choose layers with contrasting textures and flavors. Consider a lightweight and airy whipped layer alongside a richer, denser chocolate mousse.
Base Layer: If utilizing a crumbly base like a keto almond crumble or a skinny layer of cake, start by pressing it firmly into the bottom of your serving glasses or a bigger trifle bowl. Ensure a good layer for stability.
Mousse Application: Carefully spoon or pipe the chocolate mousse into the following layer. For a extra elegant look, use a piping bag with an ornamental tip. If you may be layering multiple mousse variations, layer them sequentially to create a visually attention-grabbing impact, maybe alternating flavors.
Intermediate Layers: Add your other layers – the berry coulis or whipped cream – carefully, ensuring each layer is evenly distributed. Use a small offset spatula to softly clean the floor of every layer earlier than including the subsequent, preventing it from sinking or mixing excessively.
Top Layer: The high layer ought to complement the overall design. It could probably be a final layer of mousse, a sprinkle of cocoa powder, finely chopped nuts, or even contemporary berries (use sparingly as they contain sugar and should affect the overall keto-friendliness of the dessert). Consider making a sample or design for a refined finish.
Garnish: A ultimate garnish can elevate the dessert’s presentation. This would possibly include chocolate shavings, fresh mint leaves (used sparingly), or a dusting of powdered erythritol. The garnish ought to be visually interesting and complement the flavor profile.
Chilling and Setting:
Refrigeration: Once assembled, refrigerate the dessert for no less than 2-4 hours, or ideally overnight, to permit the layers to set completely. The chilling process helps the mousse agency up and prevents the layers from mixing. The longer it chills, the higher the layers will hold their shape.
Temperature Control: Ensure your mousse and different components are thoroughly chilled earlier than layering to forestall untimely melting or softening of delicate layers. Working in a cool kitchen additionally helps.
Setting Time: The setting time is determined by the components used and the temperature of your refrigerator. If you employ a firmer mousse, such as one thickened with gelatin, it’ll set extra quickly. Weaker or lighter mousses may need an extended chilling time.
Preventing Crystallization: If using a mousse that incorporates components that might crystallize (such as sweeteners), make sure the combination is easy and correctly emulsified earlier than chilling. This helps to stop a grainy texture after chilling.
Serving: Before serving, permit the dessert to take a seat at room temperature for about 10-15 minutes to soften slightly, making it simpler to serve and enhancing the creamy texture. If served instantly from the fridge, it might be too firm.
By paying shut consideration to the meeting, ending touches, chilling, and setting processes, you’ll be able to create fantastically layered keto chocolate mousse desserts that are each visually stunning and scrumptious.
Assembly is essential for layered keto desserts, making certain every element complements the others visually and texturally. Start with a sturdy base, perhaps a crushed almond flour crust or a thin layer of keto-friendly brownie.
Ensure the base is totally chilled before including subsequent layers to stop it from turning into soggy. This chilling is especially essential for mousse-based desserts.
When layering chocolate mousse, use a piping bag or spoon for even distribution. Gentle layering prevents air pockets and ensures a easy, elegant end.
Consider alternating textures. A clean mousse contrasts beautifully with a crunchy base or a layer of whipped coconut cream.
Chill the dessert between layers, permitting every component to set before proceeding. This prevents the layers from mixing and keeps the dessert structurally sound.
For multi-layered desserts, barely underfill every layer to permit for growth throughout chilling and to keep away from overflow.
Finishing touches elevate the dessert from easy to beautiful. A dusting of cocoa powder adds visible richness and a delicate chocolatey note.
Garnishing provides the final flourish. Fresh berries (strawberries, raspberries) offer a vibrant colour distinction and a touch of tartness that balances the richness of the chocolate.
Consider utilizing shaved chocolate, chocolate curls, or perhaps a few chopped nuts for added textural complexity and visual attraction.
A sprinkle of keto-friendly sweetener (erythritol or stevia) can add a touch of sparkle and sweetness, but use sparingly to avoid overpowering the chocolate flavor.
For a extra sophisticated look, think about using edible flowers or a sprig of mint for an unexpected pop of colour and aroma.
Presentation is as necessary as the style. Serve the dessert on a wonderful plate or in a sublime serving dish. Use appropriate cutlery and napkins.
Consider the general colour palette. A darkish chocolate mousse seems stunning against a white plate, creating a visually interesting contrast.
Lighting also plays a task. Natural light showcases the dessert’s texture and colour extra successfully. Avoid harsh overhead lighting which may create unflattering shadows.
If serving particular person portions, use small, elegant glasses or ramekins. This permits every visitor to have a beautifully presented dessert.
Consider the general theme and occasion. A easy elegant garnish for a romantic dinner is completely different from a fun and playful garnish for a birthday celebration.
Ultimately, the finishing touches and presentation should reflect your private fashion and improve the overall eating expertise, making the layered keto chocolate mousse a very memorable dessert.
Don’t underestimate the ability of a clean, uncluttered presentation. Sometimes, much less is extra. A easy, well-executed dessert is usually more impressive than a very sophisticated one.
Pay consideration to element. Even small imperfections can detract from the general aesthetic. Take pride in your work and strive for perfection in each style and presentation.
Experiment with different garnishes and presentation kinds to find what works greatest for you and your dessert. The most necessary factor is to have enjoyable and create something you’re pleased with.
Troubleshooting and Tips
Troubleshooting Inconsistent Mousse Texture: If your chocolate mousse isn’t achieving the specified airy texture, it is crucial to ensure proper whipping of the cream. Under-whipped cream will end in a dense mousse, while over-whipped cream can lead to a grainy or buttery texture. Aim for stiff peaks, but keep away from going past that point. Also, guarantee your bowl and whisk are utterly chilled earlier than whipping.
Addressing a Too-Sweet Mousse: The sweetness of your mousse could be simply adjusted. If you discover it overly candy, reduce the quantity of sweetener known as for in your recipe. For future batches, consider using a much less candy sweetener like erythritol or monk fruit, or balancing the sweetness with a contact of unsweetened cocoa powder.
Fixing a Grainy Mousse: A grainy texture typically signifies improper melting of the chocolate. Ensure the chocolate is melted utterly and easily earlier than incorporating it into the whipped cream. Use a double boiler or microwave in short bursts, stirring incessantly to prevent scorching.
Troubleshooting Separation: If your mousse separates after mixing, it’s likely as a end result of temperature inconsistencies. Ensure all ingredients are at the same temperature (ideally, cold) before combining them. Gently fold the elements together instead of vigorously mixing to prevent separation.
Achieving the Right Chocolate Flavor: The kind of chocolate you use significantly impacts the final taste. For a richer, extra intense chocolate taste, go for high-quality darkish chocolate with a excessive share of cocoa solids. Milk chocolate will lead to a milder, sweeter mousse. Experiment with differing types to search out your most popular taste.
Preventing a Runny Mousse: A runny mousse normally outcomes from insufficiently whipped cream or not sufficient gelatin (if using). Make certain you whip the cream to stiff peaks and precisely measure the gelatin in case your recipe requires it. Cold components are also key to stopping a runny consistency.
Layer Stability: If your layered dessert is unstable or the layers are collapsing, you could want to chill the layers totally earlier than including the next. Ensure every layer is firm before continuing to the following to prevent blending or sinking.
Tips for Layering Success: Use a piping bag or spoon to create neat and even layers. This creates a visually interesting dessert. Gently press down on every layer to ensure even distribution and remove any air pockets. Chill the dessert completely between layers and after the final layer is added to allow it to set correctly.
Flavor Enhancements and Variations: Consider adding a pinch of sea salt to boost the chocolate flavor. Experiment with completely different extracts like vanilla or almond for a refined flavor twist. Incorporate different keto-friendly components like nuts, berries, or cocoa nibs for added texture and taste complexity.
Storage and Serving Suggestions: Store your layered keto chocolate mousse dessert within the fridge. Serve chilled for the most effective texture and taste. Garnish with fresh berries, chocolate shavings, or whipped cream earlier than serving for a chic presentation. Consider using different flavored mousses in your layers for an attention-grabbing style combination.
Making Ahead: Chocolate mousse can often be made ahead of time. Prepare the mousse components prematurely and assemble the layers just before serving or a couple of hours earlier than, allowing for sufficient chilling time.
Ingredient Substitutions: Many keto sweeteners may be substituted, such as erythritol, monk fruit, or stevia. Experiment to seek out your most popular sweetness degree and texture. Always comply with the guidelines for the precise sweetener used.
Troubleshooting a Too-Dense Mousse: A dense mousse often comes from using too much chocolate or not enough whipped cream. Adjust the ratio of elements in your recipe to search out the best balance of richness and airiness. Ensure thorough whipping of the cream.
Troubleshooting Chocolate Mousse Layers:
• Mousse too runny: Check your recipe ratios; guarantee adequate whipping cream quantity and correct chilling time. Over-whipping can even incorporate too much air, leading to a less-dense mousse. Gently fold within the cream, not whisk.
• Mousse too thick: This may point out over-whipping of the cream or inadequate liquid in the chocolate part. Add a tiny amount of extra heavy cream or milk, a teaspoon at a time, to loosen the consistency.
• Mousse grainy: Use high-quality chocolate that melts smoothly. Ensure you’re properly tempering your chocolate if using a technique that requires it, as improperly tempered chocolate can end result in a grainy texture.
• Layers not setting properly: Insufficient chilling time is the most common wrongdoer. Allow ample time for each layer to set firmly in the refrigerator before adding the next. Consider utilizing a slightly chilled bowl for layering to keep away from speedy melting.
• Chocolate seizing: This happens when water or different liquids are launched to scorching chocolate. Always be sure that your bowls, utensils, and components are fully dry. Work quickly to stop this.
• Air bubbles in the mousse: Gently fold the whipped cream into the chocolate combination to avoid incorporating an extreme quantity of air. A few small bubbles are nice, but extreme bubbles will end in a less-smooth texture.
Tips for Success:
- Use high-quality components: The better your chocolate and cream, the richer and smoother your mousse shall be. Consider using dark chocolate with a high cacao percentage for a deeper taste.
- Precise measurements: Accurate measurements are essential for a successful mousse. Use a kitchen scale for essentially the most precise results.
- Chill totally: Always chill your components – chocolate, cream, and bowl – earlier than starting to prevent the chocolate from seizing or the cream from melting too rapidly. Let the mousse chill completely after layering to make sure firm layers.
- Gentle folding method: Use a spatula and gently fold the whipped cream into the chocolate combination to prevent deflating the cream and incorporating extreme air.
- Layer in phases: Don’t rush the layering course of. Allow every layer to set within the fridge earlier than including the next one. This will ensure neat and defined layers in your dessert.
- Creative layering: Explore completely different textures and flavors. Add layers of keto-friendly berries, nuts, or maybe a crunchy keto crumble topping for added curiosity.
- Get creative with flavors: Experiment with various kinds of chocolate (dark, milk, white) and incorporate extra keto-friendly flavors corresponding to espresso powder, vanilla extract, or spices like cinnamon or cardamom.
- Presentation matters: Take the time to present your layered dessert attractively. Garnish with contemporary berries, chocolate shavings, or a dusting of cocoa powder for an elegant end.
- Plan forward: Chocolate mousse usually needs enough chilling time. Plan ahead and permit plenty of time for the dessert to set utterly earlier than serving.
- Taste and modify: Once you’ve made a layer or two, taste the mousse and adjust sweetness or different flavorings if needed. This prevents having to make drastic modifications after building the complete dessert.
Tips for Keto Success:
• Check your sweeteners: Ensure your chosen sweetener is keto-friendly and measure it fastidiously to manage sugar alcohols.
• Use keto-friendly substitutes: If your recipe calls for elements that aren’t keto-friendly, look for appropriate substitutes. Many keto baking blogs and web sites provide good choices.
• Track your macros: Use a food monitoring app to observe your carbohydrate intake to guarantee you are staying inside your every day macro limits.
• Adjust to your preferences: Keto is a customized journey. Adjust the recipes to your liking and what your body tolerates.
Troubleshooting: If your chocolate mousse is simply too thick, add a tablespoon or two of heavy cream at a time till you reach the specified consistency. If it’s too skinny, gently fold in more whipped cream until it thickens.
If your layers aren’t setting properly, ensure your components are thoroughly chilled before layering. Allow enough time for each layer to set within the fridge between additions.
Avoid over-mixing the mousse, as this could incorporate an extreme quantity of air and result in a less steady, extra airy texture. Gentle folding is vital.
If your chocolate is seizing (becoming grainy), it’s likely due to the addition of water or a cold liquid. Try slowly whisking in a small amount of hot heavy cream to soften the chocolate utterly and easy the combination before continuing.
Make sure your serving dishes are fully chilled before layering the mousse to prevent untimely melting.
Tips for Success: Use high-quality dark chocolate with a excessive cocoa content for the richest flavor. Unsweetened cocoa powder can also be substituted however will yield a slightly much less intense chocolate style.
For a sweeter mousse, use a contact of granulated erythritol or one other keto-friendly sweetener. Adjust to your choice.
Use a stand mixer for easier whipping of the cream. If using a hand mixer, work in batches to avoid over-mixing.
For greatest outcomes, let the dessert chill within the refrigerator for at least 4 hours, ideally overnight, to allow the layers to totally set and the flavors to meld.
Get inventive together with your layering! Try including berries (raspberries, strawberries), nuts (almonds, pecans), or even a layer of keto-friendly brownie crumble for added texture and taste.
Storage: Store leftover layered keto chocolate mousse dessert in an hermetic container within the refrigerator for up to 3 days. The mousse may turn out to be barely softer as it sits.
Freezing just isn’t beneficial as the feel of the mousse might change considerably upon thawing.
Serving Suggestions: Serve the dessert chilled. Garnish with fresh berries, chocolate shavings, or a sprinkle of cocoa powder for a sublime presentation.
Consider serving small parts as this dessert is wealthy and decadent. It pairs completely with a cup of unsweetened almond milk or a keto-friendly beverage of your alternative.
For a special occasion, add a contact of whipped coconut cream on high before serving for a beautiful and scrumptious distinction in texture.
Present your creation beautifully! Use engaging serving dishes and garnish fastidiously to impress your visitors.
Enjoy responsibly, as even keto-friendly desserts must be consumed in moderation as a half of a balanced food plan.