
Buttercream Sculpting Tips And Tricks
Choosing the Right Buttercream
Choosing the proper buttercream for sculpting is essential for a profitable project. Different buttercreams offer varying consistencies and properties, impacting your capability to create intricate details and preserve structural integrity.
American Buttercream: This basic, secure buttercream is a well-liked alternative for sculpting due to its agency yet malleable texture. It’s made with butter, powdered sugar, and flavorings, generally incorporating meringue powder for further stability. It pipes properly, holds its shape superbly, and is straightforward to work with for newbies.
Swiss Meringue Buttercream: Known for its smooth, silky texture and incredibly secure structure, Swiss meringue buttercream is a favourite amongst skilled cake decorators. It includes cooking egg whites with sugar to create a meringue, which is then whipped with butter. While tougher to make, it provides superior smoothness and holds its form exceptionally well, perfect for intricate designs and delicate details.
Italian Meringue Buttercream: Similar to Swiss meringue buttercream in its smooth texture and stability, Italian meringue buttercream entails cooking sugar syrup and slowly whipping it into egg whites to create a glossy meringue. This technique ends in a buttercream that’s much more stable and fewer susceptible to weeping than the Swiss model, making it ideal for heat climates or giant, elaborate sculptures.
French Buttercream: This buttercream shares similarities with Swiss and Italian, nevertheless it incorporates scorching sugar syrup immediately into beaten egg yolks, resulting in a richer, custard-like base. The end result’s exceptionally smooth and luxurious, but it’s less stable than the meringue-based choices and requires specific dealing with to prevent melting or separating.
Ermine Buttercream: This sort presents exceptional stability and a light texture. It entails making a cornstarch-based custard that is then whipped with butter and powdered sugar. It’s less vulnerable to melting and holds its form exceptionally properly, notably useful for heat weather sculpting or advanced buildings. However, it has a barely much less sweet style than other buttercreams.
Choosing the right buttercream depends largely on your talent degree and the complexity of your design.
Beginners: American buttercream is an excellent start line because of its ease of use and forgiving nature.
Intermediate: Swiss meringue buttercream offers a step up in terms of texture and stability, providing better outcomes for intricate designs.
Advanced: Italian meringue buttercream and Ermine buttercream present the last word in stability and smoothness, excellent for large-scale sculptures and difficult initiatives.
Beyond the sort of buttercream, think about these sculpting ideas:
Chill your buttercream: Refrigerating your buttercream for a short while earlier than sculpting will agency it up, making it easier to deal with and pipe.
Use the best instruments: Invest in quality piping ideas and a sturdy piping bag. Different ideas create completely different results, permitting you to add numerous particulars to your sculpture.
Work in phases: Build your sculpture steadily, permitting each layer to set earlier than adding more. This prevents the construction from collapsing underneath its own weight.
Use dowels or helps: For giant sculptures, use dowels or cake boards to support the structure and prevent sagging.
Practice: Don’t be afraid to experiment and practice different strategies. The more you’re employed with buttercream, the higher you may become at sculpting.
Embrace imperfections: Remember that handcrafted items often have a unique allure, and small imperfections add to the general character.
By understanding the properties of various buttercreams and using the following tips, you possibly can confidently create stunning and impressive buttercream sculptures.
Buttercream is the sculptor’s clay within the cake decorating world, and choosing the right one is paramount to success. The fat content material plays an important position in its workability, stability, and overall aesthetic.
American buttercream, a traditional selection, boasts a high fats content material, sometimes from shortening or butter, leading to a fluffy, easily-piped consistency. Its excessive fats content material contributes to a smooth, almost cloud-like texture, perfect for creating delicate particulars and complicated designs. However, its softness can be a challenge in hotter climates.
Using a mix of butter and shortening provides a steadiness of taste and stability. A larger butter proportion enhances taste, while the shortening boosts durability and prevents melting. This compromise is often most well-liked for larger sculptures or projects requiring structural integrity.
For those seeking a richer flavor and a barely firmer texture, European-style buttercream is a robust contender. This buttercream incorporates meringue, including a distinct lightness and tang. While the meringue provides stability, its much less forgiving nature necessitates precision in mixing to prevent curdling.
Swiss meringue buttercream, a variation of the European style, includes cooking egg whites and sugar over a double boiler. The resulting buttercream is remarkably clean, stable, and boasts an intensely wealthy taste profile. Its stability makes it perfect for complicated sculpting where structural integrity is essential, especially in hot conditions.
Italian meringue buttercream, one other refinement, whips the sugar syrup into the egg whites, creating a shiny, extremely smooth, and intensely secure buttercream. This is the last word selection for professionals sculpting intricate, gravity-defying designs.
The perfect fat content relies upon closely on the climate and the complexity of the sculpture. In hotter climates, a better shortening content material provides greater stability, while cooler climates enable for a higher proportion of butter for a superior taste.
When contemplating fats content material, it’s essential to account for the season. During hotter months, consider a blend with higher shortening content to prevent melting or softening. Conversely, throughout cooler months, the next butter content allows for enhanced flavor and a richer texture.
Remember, experimentation is essential. Start with a recipe as a information and adjust the fats ratio based on your climate and private preferences. Consider the kind of design you may be creating. Delicate work might necessitate a softer buttercream, while bigger structures require larger stability.
Beyond fat content material, consider these components when choosing your buttercream:
- Flavor Profiles: Enhance the buttercream’s style with extracts, cocoa powder, or fruit purees.
- Coloring: Use high-quality meals coloring for vibrant hues.
- Texture: Adjust the consistency by adding roughly liquid.
- Storage: Properly store your buttercream to take care of quality and prevent spoilage. Airtight containers in a cool place are beneficial.
By understanding the nuances of various buttercream varieties and their various fat contents, you equip yourself with the information to pick the ideal medium in your cake sculpting endeavors, guaranteeing gorgeous outcomes each time.
Choosing the best buttercream is paramount for successful sculpting. American buttercream, with its high butter-to-sugar ratio, presents a clean, easily manipulated consistency perfect for intricate particulars and sharp edges. However, it can be vulnerable to melting in hotter temperatures.
Swiss meringue buttercream, created by whipping egg whites and sugar over a double boiler then incorporating butter, boasts a lighter, airier texture and greater stability. This makes it a superior choice for piping delicate flowers or creating taller constructions, whereas being much less prone to melting.
Italian meringue buttercream, much like Swiss, includes cooking sugar syrup to a particular temperature earlier than whipping it into egg whites and butter. The result is a remarkably steady and shiny buttercream, excellent for bigger initiatives and resists melting exceptionally properly.
French buttercream, made by whipping egg yolks and sugar right into a sabayon then incorporating butter, presents a rich, intensely flavorful choice, although it’s typically much less secure than meringue-based buttercreams for sculpting.
Consider the climate and event period when deciding on your buttercream kind. For warmer climates or longer occasions, Swiss or Italian meringue buttercreams are highly really helpful for their superior stability.
Achieving the best consistency is essential for successful sculpting. Too gentle, and the buttercream will slump; too stiff, and it will crack and be tough to work with. The perfect consistency is akin to a thick, simply spreadable paste.
Start with a recipe you trust and adjust accordingly. If your buttercream is too delicate, gently chill it within the fridge for 15-20 minutes, then whip again to re-incorporate air. Adding a tablespoon or two of powdered sugar progressively helps stiffen the mixture.
Conversely, in case your buttercream is too stiff, add a teaspoon of milk or heavy cream at a time, whipping well after each addition till you achieve the desired consistency. Be cautious not to add too much liquid, as this could compromise the buttercream’s stability.
The temperature of your components issues. Cold butter will make the buttercream tougher to whip and incorporate easily, whereas excessively warm butter can outcome in a greasy texture. Room-temperature butter is ideal for achieving a clean and workable consistency.
Use a high-quality stand mixer with a paddle attachment to realize the right consistency. Whip the buttercream on medium speed until it is mild and fluffy, then improve to excessive speed for the ultimate stages to include more air and achieve a clean texture.
Don’t overwhip the buttercream. Overwhipping can incorporate too much air, resulting in a grainy texture and even inflicting the butter to separate. Stop whipping when the buttercream is light, fluffy, and holds its form.
Before beginning your sculpting, take a look at the buttercream’s consistency on a small batch. This allows you to make necessary changes to the recipe with out wasting a big amount of buttercream.
Consider adding taste extracts or meals coloring through the ultimate phases of whipping. This helps to distribute the flavour and color evenly throughout the buttercream.
For extremely intricate designs, contemplate adding a small quantity of cornstarch (1-2 teaspoons per cup of buttercream) for a firmer, more stable consistency. This is particularly useful when working with delicate piping methods.
Remember that practice makes excellent. Experiment with totally different strategies and buttercream types to search out what works finest on your type and desired consequence. Don’t be afraid to adjust and refine your method until you are assured in achieving the right consistency in your buttercream sculpting initiatives.
Essential Tools and Equipment
Before embarking on your buttercream sculpting journey, gathering the proper instruments and provides is paramount. A well-stocked arsenal will considerably impression the convenience and high quality of your creations.
Essential Tools:
Rotating Cake Turntable: This is arguably probably the most essential software. It permits for even frosting and effortless manipulation of the cake during sculpting, stopping frustrating hand cramps and guaranteeing consistent software.
Various Spatulas: You’ll want a selection. A giant offset spatula is essential for frosting the cake smoothly and creating larger shapes. Smaller offset spatulas are handy for intricate particulars and delicate work. A bench scraper is invaluable for creating sharp edges and smoothing surfaces.
Piping Bags and Tips: A vary of piping bags in several sizes (disposable or reusable) is important for including detailed options and textural components. A wide assortment of piping ideas, from spherical and star tips to leaf and petal suggestions, provides endless artistic prospects.
Cake Leveler: If you’re working with layered cakes, a cake leveler ensures completely even layers, providing a steady base for sculpting. A serrated knife can also be used, but a leveler provides greater precision.
Measuring Cups and Spoons: Accurate measurements are vital for constant buttercream texture. Using reliable measuring tools is essential for achieving the desired consistency.
Food Coloring: Gel food coloring supplies intense shade with out thinning your buttercream. A variety of colors permits for artistic colour combos and gradients.
Smooth Surface: A clean, easy floor like a silicone mat or parchment paper is essential to prevent sticking and facilitate easy cleanup.
Toothpicks or Skewers: These are useful for supporting structures, marking guidelines, and adding small details.
Small Bowls: Several small bowls are wanted for holding completely different colors of buttercream, stopping colours from mixing.
Palette Knife: A palette knife is useful for mixing colours and transferring buttercream to piping bags.
Dowels or Cake Supports: For taller cakes or sculptures, dowels or cake supports present structural integrity, stopping collapse.
Flower Nail (Optional): Helpful for creating roses and different delicate flower designs.
Modeling Tools (Optional): Small, specialised sculpting instruments for extra intricate detailing can elevate your creations.
Gathering Your Supplies:
Before beginning, create a guidelines of your required instruments and ingredients. Ensure you’ve all the mandatory provides readily available to avoid interruptions through the sculpting course of. Organizing your workspace efficiently minimizes stress and improves workflow. Prepare your buttercream ahead of time, guaranteeing it’s at the right consistency. Having a transparent imaginative and prescient of your design helps you gather the suitable instruments and colours accordingly. Consider practicing easier designs earlier than tackling advanced sculptures to construct confidence and ability.
Remember, careful planning and preparation are vital for a successful buttercream sculpting expertise. The proper instruments and organized workspace contribute significantly to attaining your inventive imaginative and prescient.
While buttercream sculpting does not require an enormous arsenal of instruments, investing in a few high-quality items will considerably enhance your results and make the process extra enjoyable.
1. Mixing Bowls: Stainless steel bowls are best. Multiple sizes are beneficial, permitting you to simply work with different quantities of buttercream and separate colors. Look for bowls with sturdy, non-slip bottoms.
2. Spatulas and Scrapers: A good quality offset spatula is essential for smoothing and shaping the buttercream. A bench scraper, with its straight edge, is superb for creating clean, sharp edges and cutting parts of your sculpted items.
3. Electric Mixer: A stand mixer is most well-liked for bigger batches and smoother buttercream, but a hand mixer can work for smaller tasks. Make positive your mixer is powerful enough to deal with the volume and consistency of the buttercream.
4. Piping Bags and Tips: A extensive number of piping ideas can be found, each creating a different texture and form. Reusable silicone piping baggage are easier to wash than disposable ones, and a coupler lets you rapidly change between ideas.
5. Turntable: A cake turntable is invaluable for easily rotating your cake or sculpture while making use of buttercream, ensuring even protection and making intricate detailing a lot easier. Choose a sturdy turntable with a non-slip floor.
6. Measuring Cups and Spoons: Accurate measurements are essential in baking, particularly when working with buttercream. Invest in reliable measuring instruments for consistent results.
7. Serrated Knife: A serrated knife is ideal for cleanly slicing cakes or slicing out sections of your sculpted pieces. This reduces the chance of damaging your creation.
8. Smooth Surface: While not strictly a tool, a clear, clean surface is crucial for working with buttercream. Consider using a marble surface, a large slicing board, or a silicone mat.
9. Cooling Rack: A cooling rack permits for even cooling and prevents the bottom of your cake from getting soggy. This is necessary both earlier than and after sculpting.
10. Palette Knife: A versatile palette knife can be utilized for delicate smoothing, blending colors, and transferring buttercream.
Investing in Quality:
- Durability: High-quality tools are made to final, resisting put on and tear from frequent use. This is a worthwhile investment in the long term.
- Ease of Use: Well-designed tools are comfy and intuitive to use, bettering your efficiency and reducing frustration.
- Performance: Superior tools usually yield better outcomes. For instance, a pointy serrated knife makes for clear cuts, whereas a sturdy turntable provides stability throughout sculpting.
- Cleaning: Easy-to-clean tools save time and effort. Silicone tools are a particularly good choice in this respect.
By investing in these essential instruments and prioritizing high quality, you’ll enhance your buttercream sculpting expertise and obtain professional-looking results.
For intricate buttercream sculpting, a sturdy turntable is indispensable. It permits for even frosting software and easy rotation of the cake.
A palette knife, ideally with a flexible blade, is crucial for smoothing buttercream, creating sharp edges, and making use of delicate particulars.
Offset spatulas are obtainable in varied sizes and are good for frosting desserts, creating easy surfaces, and making use of thicker layers of buttercream.
A bench scraper is a must-have for reaching perfectly straight and easy sides in your sculpted items. Its flat, sharp edge ensures precision.
Piping luggage and a extensive variety of ideas are important for adding intricate designs, creating textures, and writing messages in your buttercream creations.
Couplers are invaluable for quickly changing piping ideas with out refilling the bag, saving time and decreasing mess.
Various sculpting tools, such as small spoons, knives, and even toothpicks, could be surprisingly efficient for creating fantastic particulars and shaping parts.
A set of cake decorating combs can add stunning textures to your buttercream, from delicate lines to daring patterns.
Rolling pins, particularly these with textured surfaces, can be used to create unique patterns and textures on fondant or gum paste earlier than masking the cake.
For larger initiatives, a piping stand can be very helpful for keeping piping luggage upright and simply accessible.
Maintaining your tools is simply as crucial as having the best tools. Always clean your tools totally after each use, especially those who have come into contact with buttercream.
Wash spatulas, knives, and bench scrapers with heat, soapy water. Rinse well and dry fully to stop rust and bacterial growth.
Piping suggestions can be washed in heat, soapy water and a bottle brush to make sure all of the crevices are cleaned. Allow them to air dry completely.
Piping baggage can be cleaned and reused. Turn them inside out and wash totally. Properly drying them is key to prevent mildew.
The turntable must be wiped clean with a humid material and then dried totally to prevent harm or stickiness.
Store your tools in a clean, dry place, preferably in a designated case or container, to guard them from injury and preserve their longevity.
Regularly examine your tools for any indicators of damage or put on and tear. Replace any broken or worn-out tools to make sure your work remains of high of the range and secure.
Proper care will guarantee your instruments final for many years, saving you cash and offering constant, high-quality outcomes for all your buttercream sculpting tasks.
Consider investing in high-quality instruments; they often prove to be extra sturdy and simpler to maintain, delivering superior results in the lengthy run.
Regularly sharpening your palette knives and bench scrapers can improve precision and effectivity, making your sculpting course of smoother and extra gratifying.
Basic Sculpting Techniques
Before beginning any buttercream sculpting, ensure your buttercream is at the good consistency. Too soft, and will in all probability be troublesome to form; too agency, and it’ll crack. Aim for a consistency similar to softened cream cheese.
Start with simple shapes. Practice rolling balls, cones, and cylinders before trying extra advanced varieties. This helps construct hand-eye coordination and muscle reminiscence.
Use a variety of instruments. A easy palette knife is invaluable for smoothing surfaces and creating basic shapes. Piping bags with totally different suggestions allow for intricate particulars and textures. Dental tools, sculpting tools, and even spoons can add distinctive touches.
Embrace the ability of chilling. Chill your buttercream frequently through the sculpting process. This companies it up, making it simpler to handle and preventing sagging. However, do not chill it for too lengthy, or it’s going to become too exhausting to work with.
Layer your sculptures for stability. For bigger or extra intricate designs, build the construction in layers, chilling each layer before adding the subsequent. This prevents collapsing and ensures a powerful foundation.
Consider using a turntable. This rotating platform makes it a lot simpler to work on all sides of your sculpture evenly and constantly.
Master the art of smoothing. Use a bench scraper, offset spatula, or even your warmed hands to create smooth, seamless surfaces. A damp fabric or paper towel might help remove any extra buttercream and achieve a clean end.
Don’t be afraid to experiment with totally different strategies. Try using a crumb coat as a base on your sculpture to supply a sturdy foundation. Use totally different colours and textures to add visible curiosity.
Practice your piping abilities. Different piping suggestions create totally different effects, from delicate swirls to daring traces. Practice on parchment paper earlier than applying them to your sculpture.
Utilize assist structures. For tall or advanced sculptures, consider using dowels or cake boards to offer inner support and stop collapse. Insert these supports earlier than including layers.
Work in levels. Don’t try to do every little thing at once. Break down the sculpting course of into smaller, manageable steps, chilling between each step to maintain up kind.
Plan your design. Before you begin, sketch out your design on paper to visualise the method and ensure you have all the necessary tools and supplies.
Keep your buttercream hydrated. A little bit of milk or heavy cream could be added to buttercream if it becomes too dry, but add it steadily to keep away from making it too runny.
Use meals coloring correctly. Use gel meals coloring quite than liquid for essentially the most vibrant colors and to prevent adjustments in buttercream consistency. Add color gradually to realize your required shade.
Clean your tools regularly. This will stop buttercream from drying and hardening on your tools, permitting for simpler cleanup and smoother sculpting.
Don’t be discouraged by errors. Buttercream is forgiving. If you make a mistake, simply scrape it off and start once more. Practice makes perfect!
Consider utilizing stencils. Stencils can be an efficient way to add intricate designs and patterns to your buttercream sculptures.
Explore different sorts of buttercream. American buttercream is great for sculpting, but Swiss meringue buttercream or Italian meringue buttercream provide smoother, extra secure results for intricate designs.
Invest in good high quality instruments. Good high quality instruments make an enormous distinction in the last product.
Take your time. Buttercream sculpting is a ability that takes time and practice to master. Be patient with your self and enjoy the process.
- Tip: Always have extra buttercream on hand for any unexpected fixes or additions.
- Tip: Cover completed sculptures with a dome or plastic wrap to forestall them from drying out.
- Tip: Watch tutorials! There are countless videos on-line demonstrating totally different buttercream sculpting methods.
Before beginning any buttercream sculpting, guarantee your buttercream is correctly prepared; it must be firm yet pliable, not too stiff or too soft. A good consistency is key to profitable shaping.
Start with basic shapes: spheres, cubes, and cylinders. Practice making excellent spheres by rolling the buttercream between your palms, gradually smoothing out any imperfections. Use a bench scraper or palette knife to attain a really round form, rotating incessantly.
For cubes, type a sq. base, then use a bench scraper to fastidiously construct up the edges, sustaining straight edges and 90-degree angles. A ruler or template could be useful for accuracy.
Cylinders require rolling the buttercream into a log, ensuring even thickness along its length. Use your hands to softly taper the ends if needed, achieving a uniform cylindrical form. A rolling pin could be helpful for creating longer, smoother cylinders.
Mastering these basic shapes lays the inspiration for more complicated buildings. Practice combining them; for example, connect a cylinder to a sphere to create a easy mushroom or a personality’s body.
Use totally different piping tips to create texture and detail. A star tip can be used to create a textured surface on a sphere, simulating a planet or a ball of yarn. A round tip can be used for easy surfaces or to add fantastic particulars.
Employ instruments like spatulas, knives, and sculpting instruments to refine your shapes. A small, sharp knife permits for intricate carving and detailing, while a bench scraper supplies clear, sharp edges and removes extra buttercream.
Consider chilling your buttercream sculptures at various levels to firm them up and stop sagging. This is particularly crucial for taller or more complex designs. Short chilling durations (15-20 minutes) are typically enough.
Use dowels or cake helps for bigger or more intricate buildings. This prevents the buttercream from collapsing underneath its own weight and offers structural integrity to the sculpture.
Coloring is an important side of buttercream sculpting. Use gel meals coloring for vibrant and intense hues that will not affect the consistency of your buttercream. Blend colors gradually to attain refined gradients or unique shades.
For adding intricate particulars like faces or patterns, use smaller instruments and work methodically. Take your time, and do not hesitate to transform areas until you are satisfied. Patience is vital to detailed buttercream sculpting.
Practice makes perfect. Start with easy projects and gradually increase complexity as your skills enhance. Don’t be afraid to experiment with completely different strategies and tools to find your individual style.
Consider utilizing a turntable to rotate your sculpture as you’re employed, permitting for even utility of buttercream and higher access to all sides.
Maintaining a clear workspace is important. Clean your instruments incessantly to prevent the buttercream from becoming sticky or contaminated with other colours.
Remember to plan your design earlier than you begin. Sketching a tough outline can help information your sculpting course of and guarantee you’ve all the mandatory supplies and colors.
Finally, follow using completely different strategies to create realistic textures, such as utilizing a toothpick to create nice strains or a fork to create a rustic surface. The more strategies you be taught, the more prospects you will have.
By mastering these fundamental strategies and constantly practicing, you’ll have the ability to progress to creating increasingly elaborate and spectacular buttercream sculptures.
Begin with a well-chilled, firm buttercream. This prevents it from being too delicate and losing its shape during sculpting.
Use a wide selection of tools. Start with basic tools like offset spatulas, bench scrapers, and palette knives for shaping giant types. Then, incorporate smaller tools like sculpting instruments, toothpicks, and even piping ideas for finer particulars.
Build your sculpture progressively, beginning with the biggest components and including smaller particulars later. Think of it like constructing with clay: begin with a common kind and refine it.
Use a turntable for easier manipulation and constant shaping. This allows you to view your creation from all angles.
Frequently chill your work. Especially after setting up larger sections, chilling helps the buttercream firm up, preventing sagging and smudging.
Consider your design rigorously earlier than you begin. Sketching or creating a small model might help you keep away from mistakes and guarantee a smoother course of.
Work in phases. Don’t try to complete the whole sculpture in one go. Break down the project into manageable portions, allowing time for every part to relax.
Practice your primary shaping methods. This contains smoothly making use of buttercream, creating even curves, and forming sharp edges. Practice with easy shapes like spheres and cylinders earlier than tackling advanced designs.
For adding texture, contemplate these methods:
Use textured rolling pins or embossing mats to create patterns instantly onto rolled-out buttercream.
Apply buttercream with a textured software, similar to a silicone mold or a patterned spatula, to switch the texture.
Use a toothpick or other pointed software to create fantastic strains, dots, or other particulars. This is great for creating wooden grain, scales, or fur.
Employ quite so much of piping tricks to create totally different textures. Small spherical ideas create dots, while bigger suggestions create swirls or ribbons.
Apply a skinny layer of slightly thinned buttercream and then drag a textured device or fork through it to create a country, dragged look.
For adding detail, keep in mind these methods:
Use smaller instruments for exact work. Toothpicks, fine-tipped sculpting tools, and even the tip of a knife can be used for fine particulars.
Gradually build up layers of detail. Avoid making an attempt to add too much element at once, as this can easily smudge or wreck the work.
Consider including edible parts for extra element. Small candies, sprinkles, chocolate shavings, and even dried fruit can be utilized to reinforce the design.
Use contrasting colours to focus on particulars. For instance, use a darker shade to create shadows or to outline edges.
Pay attention to proportions and symmetry. Ensure that the main points are appropriately sized and placed in relation to the general sculpture.
Clean your tools frequently to keep away from smudging and ensure clean buttercream application.
Don’t be afraid to experiment! Try completely different strategies and tools to search out what works best for you and your design. The extra you follow, the better you will turn out to be.
Always hold a bowl of barely thinned buttercream handy to restore any imperfections or blend particulars smoothly.
Remember to chill your completed sculpture to maintain its integrity and prevent melting or sagging earlier than serving or displaying.
Finally, consider using a food-safe sealant or glaze to give your sculpture knowledgeable end and shield it from humidity.
Advanced Sculpting Techniques
Achieving realistic options in buttercream sculpting requires a deep understanding of type, light, and shadow, and a mastery of several key methods.
Understanding Form and Structure: Begin with a solid armature, whether it is a cake, a styrofoam base, or even a wireframe. This provides the underlying structure to support the delicate buttercream layers.
Building Layers: Instead of making use of buttercream in one thick layer, build up the shape steadily with skinny layers. This permits for more precise control and avoids sagging. Each layer ought to subtly refine the form, including detail and quantity.
Using Different Consistencies: Employ a spread of buttercream consistencies. A stiffer buttercream works nicely for structural elements, whereas a softer, more fluid buttercream is right for nice details and mixing.
Blending Techniques: Seamless mixing is crucial for realism. Use a wide range of tools – palette knives, spatulas, sculpting tools, even your fingers – to gently mix the buttercream, creating easy transitions between varieties and colours.
Adding Texture: Texture provides depth and realism. Experiment with varied methods:
Dry brushing: Lightly brush dry powdered sugar or cocoa powder onto the floor to create a delicate, dusty effect.
Wet-on-wet blending: Apply barely moist buttercream over a dry layer to create a softer, extra blended texture.
Tooling: Use textured instruments to impress patterns or create realistic skin textures (e.g., using a fork for wrinkles).
Veining: Use a toothpick or small pointed device to create delicate veins in leaves or pores and skin.
Color Application: Avoid harsh shade transitions. Use a wet-on-wet method to softly mix colors, creating subtle gradations and shading.
Shading and Highlighting: Mastering shading and highlighting is paramount for reaching three-dimensionality. Use darker shades to create shadows and recesses, and lighter shades to emphasize highlights and raised areas. This mimics how gentle interacts with actual objects.
Working with Airbrushing (Advanced): An airbrush can create incredibly fantastic particulars and refined shading gradients, particularly helpful for creating sensible skin tones and hair.
Tool Selection: Invest in a variety of tools. This would possibly embody:
Various sized spatulas and palette knives.
Small sculpting tools (e.g., gum paste tools).
Toothpicks and needles for fine particulars.
Brushes for applying colour and texture.
A turntable for simple rotation and even utility.
Practice and Patience: Sculpting practical features takes practice and endurance. Don’t be discouraged by initial attempts. Start with simple forms, steadily increasing complexity. Each project is a learning alternative.
Reference Images: Always use reference photographs. Observe how gentle and shadow work together with the topic to better understand kind and replicate it accurately in your buttercream work.
Working with Edible Materials: Ensure all of your instruments and supplies are food-safe. Proper hygiene is crucial when working with edible products.
Preservation and Storage: Once completed, properly cover and store your sculpture to keep up its integrity and stop it from drying out or changing into broken.
Experimentation: Don’t be afraid to experiment. Try different strategies, instruments, and buttercream consistencies to find what works best for you and your type.
Mastering buttercream sculpting entails more than just fundamental frosting strategies; it requires a deep understanding of material properties and colour manipulation.
Start with a high-quality buttercream recipe. A stable, agency buttercream is crucial for intricate details. Consider using a meringue-based buttercream for its superior energy and ability to carry its form.
Proper chilling is important. Chill your buttercream incessantly to agency it up, making it simpler to sculpt and stopping sagging.
Invest in a wide range of sculpting instruments. From offset spatulas and bench scrapers to cake decorating ideas and sculpting instruments specifically designed for fondant, the proper tools significantly improve your precision and management.
Begin with simple shapes and steadily progress to extra complex designs. Practice primary types like spheres, cylinders, and cones before tackling intricate characters or landscapes.
Utilize a crumb coat. This skinny layer of frosting seals the cake, stopping crumbs from mixing together with your sculpting buttercream and creating a smooth base for your work.
Work in levels. Don’t try to full the entire sculpture at once. Build it progressively, permitting each layer to chill and agency before including the next.
Consider utilizing a support structure. For massive or complicated sculptures, utilizing dowels or cake boards to bolster the inner structure prevents sagging and collapse.
Color manipulation is a key element. Achieving vibrant, consistent colors requires careful planning and execution.
Use gel food coloring. Gel colors are highly concentrated and don’t have an result on the consistency of your buttercream like liquid meals coloring.
Mix colours in small batches. This prevents wasting buttercream and permits for precise color changes.
Practice shade mixing. Understand the color wheel and how to obtain particular shades and tints by combining completely different colors.
Create a colour palette beforehand. This aids in consistency and prevents color clashes in your ultimate design.
Use a color chart. Document your shade mixtures to simply recreate them in future tasks.
Employ strategies like airbrushing for smooth colour transitions and gradients. Airbrushing allows for delicate shading and highlights, creating a more practical effect.
Consider using edible luster dusts and powders for added shimmer and shine. These could be applied with a brush for a subtle metallic or pearlescent effect.
Mastering color blending is essential for sensible shading and highlighting. Gradually transition colours to create depth and dimension in your sculptures.
Experiment with completely different strategies like dry brushing for textured effects or wet-on-wet blending for smoother transitions.
Practice patience and perseverance. Buttercream sculpting is a skill that requires time and follow to grasp. Don’t be discouraged by preliminary setbacks.
Clean your tools often. This ensures your colors remain pure and prevents unwanted colour mixing.
Observe and be taught from other artists. Studying the work of experienced buttercream sculptors provides valuable inspiration and insights into advanced techniques.
Finally, remember that creativity is essential. Don’t be afraid to experiment, push your boundaries, and develop your own distinctive style.
Beyond the fundamentals of buttercream piping, superior sculpting techniques unlock a world of artistic prospects.
Mastering crumb coating is crucial; a skinny, even layer prevents cracks and provides a steady base for intricate particulars.
Using totally different piping tips and varying pressure permits for various textures, from smooth surfaces to textured bark or fur.
Employing modeling instruments, similar to sculpting tools, palette knives, and even toothpicks, permits precise shaping and detailing.
Creating armatures from floral wire, dowels, or even sturdy straws provides structural support for large or advanced designs.
Working in levels – constructing a primary form earlier than including intricate details – prevents frustration and ensures stability.
Proper chilling is essential. Chill the buttercream frequently to firm it up and prevent sagging or undesirable melting.
Consider utilizing totally different consistencies of buttercream. A firmer buttercream is right for structural parts, whereas a softer one works well for delicate particulars.
Practice makes good. Start with simple shapes and steadily improve complexity as your skills enhance.
Incorporating other supplies dramatically enhances the possibilities.
Fondant, with its smooth floor and ease of coloring, is good for covering cakes, including intricate details, or creating ornamental components.
Gum paste offers superior energy and precision for fine details like flowers, leaves, and delicate elaborations.
Isomalt presents the potential for creating lovely, candy-like structures and decorations; it’s extremely versatile and may be molded into many shapes.
Chocolate, especially molded chocolate pieces, provides a wealthy contrast in texture and color, including another dimension to your creations.
Dried fruits, corresponding to thinly sliced apricots or cranberries, can add colour, texture, and even a refined taste factor to your design.
Edible glitter provides a contact of sparkle and class; use sparingly for optimum impact.
Candies, sprinkles, and different confectionery gadgets supply a wide array of textures, colors, and visual curiosity.
Fresh flowers, fastidiously chosen and handled, can add a touch of natural class; ensure they are food-safe and sourced from a good provider.
For edible pearls, use fastidiously chosen varieties and ensure they’re meals protected.
When combining materials, think about texture, shade, and total design harmony. The completely different supplies should complement each other rather than clash.
Pay consideration to the moisture content of various materials. Some, like fresh flowers, might affect the buttercream’s stability.
Use food-safe adhesives, like royal icing or melted chocolate, to safe completely different elements together.
Proper storage is essential to preserving your masterpiece. Keep sculpted desserts refrigerated and canopy them to forestall drying or contamination.
Experimentation is encouraged! Don’t be afraid to try new techniques and combinations of materials. The possibilities are infinite.
Consider taking a category or watching tutorials from experienced cake artists to be taught superior techniques and achieve inspiration.
Remember to all the time prioritize food security when working with varied supplies.
With practice and creativity, superior buttercream sculpting methods, combined with the artful incorporation of different supplies, will transform your desserts from ordinary to extraordinary.
Troubleshooting Common Issues
Achieving a easy, flawless buttercream floor for sculpting requires cautious consideration to detail and proactive troubleshooting. One of the most important challenges is dealing with cracks and crumbles.
Understanding the Causes: Cracks often stem from a buttercream that is too stiff or has inadequate moisture. This can happen if you’ve over-whipped the butter, used an extreme quantity of powdered sugar, or if the ingredients are too cold. Crumbling, however, is usually as a result of a buttercream that’s too dry, missing sufficient fat to bind the ingredients together properly. It could be from using an excessive quantity of powdered sugar, not sufficient butter, and even inadequate mixing.
Preventing Cracks and Crumbles: The secret is to achieve the right consistency. Start with high-quality ingredients – unsalted butter at room temperature is essential. Gradually add powdered sugar, mixing on low velocity until just combined. Avoid over-mixing, as this incorporates too much air, which results in a less secure, more prone-to-crack buttercream. Adding a tablespoon or two of milk or cream can help regulate the consistency and enhance moisture content material, preventing cracking. If using meals coloring, add it sparingly and gently, as some gel colors could make the buttercream drier.
Repairing Cracks: If cracks appear, don’t panic! For small cracks, a simple answer is to rigorously use a palette knife or offset spatula to softly easy over the affected space. Warm the blade slightly under sizzling water (making certain to dry it totally beforehand) for simpler spreading. For larger cracks, you could need to use a thin layer of recent, barely thinned buttercream to fill the gaps, then clean it out carefully. Let it set barely earlier than persevering with to sculpt.
Fixing Crumbles: If your buttercream is crumbling, you would possibly have to add more butter or a small quantity of milk or cream to re-hydrate it. Start with a tiny quantity and blend progressively on low pace, checking the consistency frequently. Be cautious not to overwork the combination, as this could result in more air incorporation. If the crumbles are extreme, think about beginning once more with recent elements to make sure a smoother, extra cohesive outcome.
Other elements influencing stability: The temperature of your workspace also plays a job. Too much heat can soften the buttercream excessively, making it difficult to work with and resulting in cracks or melting. Conversely, a cold setting can harden the buttercream too rapidly and cause it to become brittle.
Consistency is Key: Achieving the right consistency is paramount. The best buttercream must be smooth, spreadable, and maintain its shape. It shouldn’t be so stiff that it cracks easily, nor so soft that it loses its structure. Practice makes perfect, so do not be discouraged if your first attempt is not flawless. Experiment with completely different ratios of components to search out what works best for you and your surroundings.
Using a Piping Bag Strategically: For intricate designs, using a piping bag with the appropriate tip can help you create clean surfaces and avoid many issues. A constant strain whereas piping will also contribute to preventing uneven textures which lead to cracking.
Chilling and Setting: Allowing your sculpted buttercream to chill within the fridge for a brief period (15-30 minutes) can help agency it up and forestall sagging or further cracking. However, be mindful not to chill it for too lengthy, which might make it too exhausting to work with and even trigger condensation.
By understanding the causes of cracks and crumbles, and implementing these preventative and repair techniques, you can create stunning, professional-looking buttercream sculptures.
Achieving a easy, constant texture in buttercream is essential for profitable sculpting. Several factors can lead to inconsistencies, from ingredient temperature to mixing technique.
Ingredient Temperature: Butter that’s too cold will end in a grainy, stiff buttercream, making it troublesome to sculpt and susceptible to cracking. Conversely, butter that’s too warm will create a gentle, oily buttercream that lacks construction and is vulnerable to melting. Ideally, your butter ought to be at room temperature, gentle but not melting.
Mixing Technique: Overmixing is a standard culprit. Overbeating incorporates an extreme amount of air, resulting in a fluffy but unstable buttercream that’s simply broken during sculpting. Undermixing, on the opposite hand, results in a lumpy, uneven texture. The secret is to combine until the ingredients are simply combined and easy, avoiding excessive air incorporation.
Type of Butter: Not all butter is created equal. Some butters have a higher fats content material than others, influencing the final texture of the buttercream. Using a high-quality, unsalted butter with a better fat content material typically yields better results for sculpting.
Type of Sugar: Powdered sugar is the standard for buttercream, however the fineness of the powder can affect texture. Ensure your powdered sugar is contemporary and nice, sifting it before use to take away any lumps.
Adding Liquids: Liquid components like milk or cream are generally added to regulate consistency. Adding an extreme amount of liquid can create a thin, unstable buttercream. Start with a small amount and steadily add more until you achieve the specified consistency.
Troubleshooting Specific Texture Issues:
Grainy Texture: This usually indicates undermixing or using cold butter. Let the butter soften to room temperature, and remix completely till easy. If still grainy, add a small amount of milk or cream to assist incorporate the elements.
Oily Texture: This often results from utilizing an excessive amount of butter or using butter that’s too warm. Chill the buttercream within the fridge for 30 minutes to allow it to firm up. If it’s still too oily, contemplate adding extra powdered sugar.
Lumpy Texture: This is often due to undermixing or using lumpy powdered sugar. Ensure the powdered sugar is sifted and blend the buttercream totally till it’s utterly smooth and free of lumps. Use a stand mixer to ensure thorough mixing.
Crumbling Texture: This usually means the buttercream is merely too dry. Adding a small amount of milk or cream, one teaspoon at a time, may help enhance the texture and prevent crumbling. Alternatively, it may indicate insufficient butter.
Too Stiff Texture: If the buttercream is just too stiff to work with, let it sit at room temperature to soften slightly. Avoid over-mixing to re-soften. Adding a small quantity of milk or cream may also assist.
Prevention is Key:
Use a stand mixer for consistent outcomes.
Always use room temperature butter.
Sift powdered sugar before utilizing.
Add liquids gradually.
Don’t overmix.
By rigorously controlling these components and understanding how to troubleshoot common problems, you possibly can achieve a easy, constant buttercream texture that is perfect for sculpting intricate designs.
Achieving a clean, steady buttercream for sculpting requires cautious attention to components and method. One frequent issue is buttercream that is too gentle, resulting in sagging or melting.
Preventing Melting: The Importance of Fat Content
The type of fat in your buttercream considerably impacts its stability. Unsalted butter with the next fats content (at least 82% milkfat) is essential. Lower-fat butters might be more susceptible to melting, particularly in warmer environments.
Temperature Control is Key
Room temperature is a big factor. Work in a cool surroundings, ideally between 65-70°F (18-21°C). Avoid direct sunlight or warmth sources which might quickly soften the buttercream.
Proper Chilling Techniques
Chill your buttercream frequently through the sculpting process. Briefly refrigerate the sculpted piece for 15-20 minutes to firm up before continuing to work. This permits the butter to solidify, stopping structural collapse.
Using a Stable Recipe
Choose a buttercream recipe identified for its energy and stability. American buttercream (butter, powdered sugar, and flavorings) can be susceptible to melting if not properly chilled, so think about Swiss meringue or Italian meringue buttercreams, that are extra proof against heat and humidity.
Ingredient Quality Matters
High-quality elements are essential. Fresh, chilly butter is vital. Using old or rancid butter can lead to instability and undesirable flavors.
Avoid Overmixing
Overmixing incorporates too much air, making the buttercream softer and extra susceptible to melting. Mix only till the ingredients are nicely mixed.
Adding Stabilizers
For extra stability, think about adding a small amount of stabilizer, corresponding to meringue powder or tylose powder. These elements bind the buttercream and create a firmer construction, resisting melting.
Troubleshooting Common Issues: Fixing Soft Buttercream
If your buttercream is already too soft, you’ll have the ability to strive refrigerating it for an extended period to firm it up. Alternatively, when you’ve added too much liquid (like milk or extracts), you would possibly have to whip in extra powdered sugar to soak up the surplus moisture and increase the consistency.
Troubleshooting Common Issues: Dealing with Cracks
Cracks usually appear due to rapid temperature adjustments or uneven chilling. To stop them, guarantee even chilling and avoid excessive temperature fluctuations. Small cracks can sometimes be repaired by gently smoothing them out with a wet spatula or knife, re-chilling, and then persevering with to sculpt.
Troubleshooting Common Issues: Addressing Sagging
Sagging is a clear sign of a weak buttercream. This may be attributable to an unstable recipe, using the mistaken type of butter, or overmixing. Re-chill the piece and help it with dowels or cake helps until the buttercream companies up. For future tasks, think about using a more steady buttercream recipe or adding a stabilizer.
Troubleshooting Common Issues: Preventing Color Bleeding
If utilizing gel food coloring, ensure that it’s well-mixed to keep away from pockets of concentrated shade. This will help prevent bleeding or discoloration. Use small quantities of coloring gradually, mixing thoroughly after each addition.
By paying shut consideration to temperature, ingredients, and method, you can create beautifully sculpted buttercream items that preserve their form and resist melting, leading to stunning edible creations.
Tips for Success
Start with a stable, secure buttercream. Don’t skimp on the butter quality; it significantly impacts the texture and sculptability.
Invest in good quality meals coloring gels. They provide vibrant, intense colours without thinning your buttercream.
Practice fundamental piping methods earlier than tackling complicated sculpting. Master swirls, stars, and leaves to build foundational abilities.
Use quite lots of piping tricks to obtain different textures and effects. Experiment to search out your favorites.
Chill your buttercream regularly. This firms it up, making it easier to work with and preventing sagging.
Work in small, manageable sections. Sculpting large items all at once could be overwhelming and result in inconsistencies.
Use a turntable to easily rotate your cake and guarantee even frosting utility and sculpting.
Employ dowels or cake boards to support large or intricate buildings. This prevents collapse.
Use a bench scraper to create smooth, clean surfaces and sharp edges. Practice completely different scraping methods for numerous effects.
Don’t be afraid to make use of modeling instruments. Palette knives, sculpting tools, and even toothpicks could be invaluable for detail work.
Build progressively, layer by layer. Add particulars after the bottom construction is complete and steady.
Reference pictures and tutorials. Visual aids are extremely helpful in learning new methods and designs.
Embrace imperfections. Not each creation shall be excellent, but learning from mistakes is a half of the process.
Practice consistency in your buttercream recipe. Use a kitchen scale for precise measurements to ensure dependable outcomes.
Experiment with different flavors and colour mixtures. Let your creativity information you.
Consider using a crumb coat before applying your last layer of buttercream. This creates a clean base for sculpting.
Keep your workspace clean and organized. A clutter-free setting promotes focus and effectivity.

Don’t be discouraged by initial challenges. Mastering buttercream sculpting takes time and practice.
Watch videos and take on-line programs. Visual learning can significantly enhance your understanding of strategies.
Join on-line communities or teams dedicated to cake decorating. Share your work, get suggestions, and study from others.
Start with easy designs and gradually enhance complexity. Build your confidence as your abilities develop.
Use different textures within your design. Combine easy surfaces with textured parts for visual curiosity.
Practice your abilities frequently. Even short, centered classes will improve your proficiency.
Don’t be afraid to experiment with completely different strategies and types to find your personal distinctive method.
Most importantly, have fun! Enjoy the method of making stunning and delicious buttercream sculptures.
Consider using edible glue or piping gel to stick small details or decorations.
Clean your piping tips completely after every use to stop clogging and keep their form.
Store your finished sculptures properly to maintain their freshness and stop melting.
Take photos of your progress. This lets you observe your enchancment and establish areas for additional improvement.
Don’t be afraid to ask for help or suggestions from skilled cake decorators. Learning from others is a valuable resource.
Gather high-quality reference photographs from multiple angles. A single picture would possibly obscure essential particulars.
Choose photographs that clearly show the specified shape, texture, and details. Avoid blurry or poorly lit photos.
Print your reference images for simpler viewing, particularly when you’re working in a kitchen surroundings.
Analyze the reference image for underlying shapes and types. Break down advanced designs into simpler geometric components (spheres, cones, cylinders).
Pay close attention to proportions and scale. Measure key options in your reference picture to make sure accuracy in your sculpture.
Consider using tracing paper to sketch the outlines and key features from your reference images onto the buttercream itself.
If you’re sculpting a personality or object with distinct options, concentrate on these first, building the muse round them.
Don’t be afraid to use multiple reference images of similar objects to get a complete understanding of the subject.
Use a turntable to view your sculpture from all angles, making it easier to match your progress together with your reference photographs.
Utilize digital tools to boost your reference pictures. Increase brightness, contrast, or saturation to spotlight key particulars.
Keep your reference images visible and readily accessible all through the sculpting process for constant comparability.
Don’t attempt for a pixel-perfect duplicate. Use your reference picture as a guide, including your own artistic flair and interpretation.
Practice frequently with less complicated designs before making an attempt more complex sculptures using reference pictures.
Experiment with totally different buttercream consistencies to achieve the specified texture and workability shown in your reference images.
If a element in your reference image appears unimaginable, simplify it or find another methodology to characterize it realistically in buttercream.
Take breaks and step away from your work periodically to refresh your perspective and examine your progress against the reference pictures.
Document your progress with photographs. This might help you identify areas that need improvement and learn from errors.
Consider utilizing color-coded notes or annotations on your printed reference pictures to highlight key building or detail components.
For intricate designs, consider using smaller instruments and strategies to achieve fine particulars as seen in your reference image.
Remember that your reference image is only a guide; do not be afraid to adjust your strategy if one thing is not working.
Learn to acknowledge when a technique or component from your reference image just isn’t transferable to buttercream sculpting.
Embrace imperfections. Even skilled sculptors do not achieve perfection each time; focus on steady enchancment.
Invest in good high quality tools, which is ready to make it simpler to work with precision and replicate the details out of your reference photographs.
Explore various online sources like tutorials and movies which reveal techniques used in replicating complicated types from reference pictures.
Use quite so much of smoothing tools, from spatulas to bench scrapers, to realize the polished look you see in your high-quality reference pictures.
Don’t be discouraged if your first try doesn’t perfectly match your reference picture. Practice and endurance are key.
If working with edible photographs, ensure they’re high-resolution and printed on acceptable edible paper for a seamless integration into your sculpture.
When utilizing multiple reference pictures for a complex sculpture, create a composite image combining the most effective angles and details for a complete guide.
Start with a steady, firm buttercream. Too soft and it’ll stoop; too stiff and it’ll crack.
Use high-quality components. Good butter makes an enormous difference in flavor and texture.
Invest in the proper instruments. A number of piping ideas, spatulas, and sculpting tools will expand your prospects.
Practice your piping strategies. Consistency is vital to clean strains and precise particulars.
Chill your buttercream incessantly. This firms it up, preventing sagging and making it easier to work with.
Build your sculptures in levels. Start with a base, then add layers, allowing each to chill earlier than proceeding.
Use a turntable to easily rotate your work and access all sides.
Don’t be afraid to experiment with totally different colours and textures. Adding food coloring gels offers vibrant hues.
Consider using edible glue to adhere items collectively securely. Melted white chocolate works nicely.
Work in a cool surroundings to stop your buttercream from melting too quickly.
Use a easy surface in your base. This prevents uneven settling of the sculpture.
Start with easy designs and steadily work your way up to more complicated ones.
Reference images for inspiration. Find footage of sculptures you’d wish to recreate or adapt.
Watch tutorials and movies. Observing skilled sculptors can teach invaluable strategies.
Don’t be discouraged by mistakes. Buttercream is forgiving; you’ll have the ability to simply rework imperfections.
Use stencils for intricate designs or repetitive patterns.
Consider adding texture with tools like combs, forks, or textured rolling pins.
Keep your tools clear and organized for environment friendly workflow.
Experiment with completely different flavor combos. Infuse your buttercream with extracts or spices.
Use food-safe modeling instruments for finer particulars and complex shaping.
Practice correct food safety strategies all through the process.
Let your creativity flow! Don’t be afraid to experiment and develop your distinctive type.
Take your time and enjoy the process. Buttercream sculpting is a rewarding talent to develop.
Photograph your creations to doc your progress and share your successes.
Consider taking a category or workshop to study from professionals.
Seek feedback from others and use it to improve your expertise.
Remember that apply makes good. The extra you sculpt, the higher you may turn out to be.
Explore totally different buttercream recipes to search out one that best suits your wants and preferences.
Use a piping bag with a coupler to simply change ideas without wasting buttercream.
Keep your workspace well-lit to see details clearly.
Consider using a crumb coat to create a clean surface earlier than making use of the final layer of buttercream.
Don’t be afraid to ask for help or recommendation from other bakers.
Most importantly, have fun and be patient with yourself!
Storing and Preserving Your Creations
Preserving your painstakingly crafted buttercream sculptures requires careful attention to element. The aim is to maintain their structural integrity and prevent melting, sagging, or discoloration.
Temperature Control is paramount. Ideal storage temperatures hover around 65-70°F (18-21°C). Fluctuations should be minimized. Avoid direct sunlight, drafts, and heat areas like ovens or radiators.
A cool, dry environment is crucial. A pantry or devoted baking area is most well-liked over a refrigerator, until the sculpture is extraordinarily massive and must be saved cool quickly after completion.
Refrigeration ought to be used judiciously. While it slows down the melting process, it can additionally trigger the buttercream to harden excessively, leading to cracking and structural injury upon thawing. If refrigeration is critical, use it sparingly, ideally for less than a quick time.
Airtight containers are your finest good friend. These prevent the buttercream from drying out, absorbing odors, and turning into contaminated. Consider using a quantity of containers for large sculptures to facilitate easier handling and stop injury.
For smaller sculptures, cake domes or lined serving platters work wonders. Larger pieces might require custom-built packing containers lined with parchment paper or plastic wrap.
Cake boards are invaluable for supporting your creations. They provide a sturdy base and prevent sagging. Use appropriately sized boards to assist the load of the sculpture.
Proper handling is vital during transportation and placement. Always raise from beneath the cake board, avoiding direct stress on the sculpture itself. Gentle movements are very important.
Consider utilizing dowels for help, significantly in taller sculptures. These inner helps add energy and forestall collapse.
Timing is essential. Ideally, retailer your buttercream sculpture as shut as potential to its show or serving time. Avoid lengthy storage intervals to take care of optimal freshness and appearance.
Preventing discoloration is achieved by minimizing publicity to light and air. Use airtight containers and think about overlaying the uncovered floor with plastic wrap, taking care to not smudge the element.
If you want to transport your sculpture, use a car with climate control and secure it to prevent motion throughout transit. Avoid bumpy roads and extreme temperature adjustments.
Freezing is generally not recommended for buttercream sculptures. The texture and appearance usually undergo upon thawing. It is preferable to prioritize acceptable storage strategies to stop the necessity for freezing.
For long-term storage (though not ideal), consider separating the components of the sculpture and storing them individually in hermetic containers. This could help protect them longer than assembling the entire piece.
Remember to always label your containers with the date of creation to trace freshness and keep away from unintentional consumption of old buttercream.
By following these buttercream sculpture storage pointers, you presumably can guarantee your edible masterpieces remain visually beautiful and structurally sound, ready to impress for his or her intended occasion.
Maintaining the integrity and longevity of your buttercream creations is essential for each professional and private tasks. Proper storage and preservation methods are essential to forestall melting, shrinking, discoloration, and bacterial progress.
Refrigeration: For short-term storage (up to three days), refrigeration is your greatest good friend. Keep your sculpted items in an hermetic container to prevent them from drying out and absorbing odors from different meals in the fridge.
Freezing: For longer storage (up to three months), freezing is a viable choice. Ensure your sculpture is totally cooled before wrapping it tightly in plastic wrap, followed by aluminum foil. This double wrapping acts as a barrier in opposition to freezer burn and maintains moisture. Once frozen, store in an hermetic container or freezer bag.
Thawing: When thawing a frozen sculpture, move it from the freezer to the refrigerator for gradual thawing, allowing approximately 24 hours per pound. This gradual thawing minimizes moisture loss and prevents cracking. Avoid thawing at room temperature to forestall bacterial progress.
Humidity Control: Buttercream is vulnerable to humidity. Avoid inserting your creations in areas with excessive humidity. If storing in a humid environment, consider using a silica gel packet inside the hermetic container to soak up excess moisture. A dehumidifier within the room can help as well.
Temperature Control: Consistent temperatures are key. Avoid significant temperature fluctuations throughout each storage and transportation. Rapid temperature changes can cause sweating and cracking.
Display and Transportation: When displaying your creations, think about the ambient temperature and humidity. A cool, shaded area is right. If transporting your sculpture, use a sturdy, insulated service to maintain up a stable temperature. A cooler with ice packs may be extremely helpful, especially in warmer climate.
Adding Stabilizers: Incorporating components like meringue powder or tylose powder into your buttercream recipe can significantly enhance its stability, rising its shelf life and resistance to melting. These additions contribute to a firmer, less delicate texture.
Preventing Crusting: A crust can kind on uncovered buttercream surfaces. To prevent this, contemplate masking uncovered areas with a thin layer of clear plastic wrap, making certain it doesn’t touch the buttercream on to keep away from sticking.
Using a Buttercream Dam: For complicated designs, contemplate creating a protecting dam around the sculpture with additional buttercream, serving to to maintain shape and prevent cracking.
Choosing the Right Buttercream Recipe: Different buttercream recipes have various shelf lives. American buttercream, for example, tends to be more steady and holds its form better than other varieties. Experiment with varied recipes to search out the one best suited in your sculpting wants and desired shelf life.
Maintaining Hygiene: Always apply correct hygiene when dealing with buttercream. Use clear tools and surfaces, and guarantee your hands are washed completely before and through the sculpting course of. This will minimize the chance of bacterial contamination and prolong the shelf lifetime of your creations.
- Remember: The shelf life of your buttercream sculpture depends on a number of elements including the recipe, storage conditions, and the complexity of the design.
- Always err on the facet of caution, particularly when working with components that might spoil extra simply.
- Proper storage and preservation are essential for reaching the desired visible enchantment and How To Make Buttercream Frosting sustaining the standard of your masterpiece.
- Plan forward: Consider the shelf life requirements when designing your piece, taking into account the timeframe till the occasion or display.
- Test your recipe: Experiment with completely different recipes and storage methods to discover out the optimal strategy in your creations and your local weather.
- Document your process: Keep records of your successes and challenges to improve your techniques and ensure future creations last more.
Once your buttercream masterpiece is full, correct storage and preservation are essential to sustaining its integrity and preventing melting or structural collapse.
The ideal setting is cool, dry, and preferably between 65-75°F (18-24°C).
Avoid direct daylight or any heat sources, as these will trigger the buttercream to soften and probably soften.
A refrigerator is usually not beneficial for long-term storage of buttercream sculptures as condensation may cause the frosting to weep and the construction to turn into unstable. Short-term refrigeration (a couple of hours) may be acceptable, but intently monitor for condensation.
If you should hold it cool for a short period earlier than an occasion, use a refrigerated space with low humidity. A chilled room, not the fridge itself, may be a better solution.
Consider putting your sculpture on a cake board or sturdy base to forestall injury throughout dealing with and storage.
Covering is crucial. A clear cake dome is good for stopping dust and particles from settling on your creation. Alternatively, a loosely-fitting plastic wrap can work, but guarantee it does not touch the surface of the sculpture to forestall moisture switch.
For longer storage (more than a day), think about using a refrigerated display case if obtainable –this provides a controlled setting.
Transporting your buttercream sculptures requires careful planning and execution.
Use a secure and stage platform, such as a sturdy cake provider or a field specifically designed for transporting desserts.
Secure the sculpture firmly to stop movement throughout transit. You may use dowels or other supports to supply extra stability.
Ensure the provider is well-padded to cushion the sculpture from bumps and vibrations.
If transporting in a automotive, hold the air conditioning on to hold up a cool temperature. Avoid placing it in direct daylight or close to heat sources.
Consider the gap and period of transport. For longer journeys, a refrigerated automobile may be needed, especially in heat climates.
For very intricate or large sculptures, skilled cake transportation providers may be worthwhile to make sure secure arrival.
If you are transporting throughout warmer months, think about using gel ice packs or comparable cooling elements in the provider, but ensure they’re sealed properly to keep away from moisture injury to the buttercream.
Test your transport setup beforehand with a smaller practice piece to make sure the security and stability of your system.
Always deal with your sculpture gently, minimizing any shaking or jarring actions.
Proper storage and transport will considerably enhance the lifespan and visual appeal of your buttercream creations.
Remember to plan forward and take precautions to minimize threat of damage.
Buttercream Recipe Variations
Swiss meringue buttercream, a staple for cake adorning and sculpting, provides incredible stability and a clean, creamy texture. Its versatility permits for a variety of flavor and color variations, crucial for attaining the specified aesthetic in cake sculpting.
Mastering the Base: The foundation of any profitable buttercream sculpture lies in a perfectly made Swiss meringue buttercream. Begin with high-quality elements; unsalted butter at room temperature is key to attaining a clean emulsion. Over-whipped egg whites will lead to a grainy buttercream, while under-whipped egg whites will not create the necessary stability.
Flavor Explorations: The fantastic thing about Swiss meringue buttercream is its adaptability. Beyond the basic vanilla, contemplate these exciting taste infusions:
Chocolate: Melt high-quality dark, milk, or white chocolate and temper it correctly earlier than incorporating it into the buttercream. Adding cocoa powder immediately can generally end in a grainy texture.
Citrus: Zest and juice from lemons, limes, or oranges add bright, refreshing notes. A touch of Grand Marnier or Cointreau elevates the citrus flavor.
Coffee: Strong brewed coffee, espresso, and even immediate coffee dissolved in hot water infuses a rich, robust flavor. Consider including a contact of chocolate for an mocha buttercream.
Nutty Delights: Finely ground nuts like almonds, hazelnuts, or pistachios add textural complexity and refined nutty notes. Nut butters, corresponding to almond or peanut butter, additionally work nicely, but keep in mind to add them gradually to take care of the buttercream’s smooth consistency.
Spiced Wonders: Cinnamon, cardamom, nutmeg, and ginger create warm, inviting flavors, particularly appropriate for autumnal or holiday-themed sculptures.
Floral Elegance: Rosewater, lavender extract, and even edible flower extracts create delicate and sophisticated floral undertones.
Color Coordination: Achieving vibrant and constant colours in your buttercream is paramount for sculpting. Use gel food coloring, which is way extra concentrated than liquid food coloring, preventing you from including excessive liquid and ruining your buttercream’s texture. Start with small quantities and progressively add more until you reach the specified shade. Consider utilizing a colour chart to plan your shade palette and ensure a cohesive look in your ultimate sculpture.
Consistency Control: The consistency of your buttercream directly impacts your sculpting abilities. A thicker buttercream is ideal for creating robust, well-defined buildings. To thicken the buttercream, gently whip in more powdered sugar, a tablespoon at a time. To soften it, add a touch of milk or cream, once more one tablespoon at a time, whereas continuously mixing.
Chilling Strategically: Chilling your buttercream earlier than sculpting is important for maintaining its shape and stopping melting. Chill the buttercream in an hermetic container for at least 30 minutes, but do not freeze it, as this could have an result on its texture. Bring it to a slightly softer consistency before sculpting by permitting it to sit at room temperature for a couple of minutes.
Sculpting Tools: Invest in a spread of sculpting tools to realize completely different effects. Offset spatulas, piping luggage with various ideas, sculpting instruments, and even simple knives and spoons can be used to create intricate designs. Don’t be afraid to experiment and find what works finest in your style.
Adding Texture: Achieving practical texture is a trademark of advanced buttercream sculpting. Use methods like including edible crumb coating, pressing totally different textured surfaces into the buttercream, or employing specialised cake adorning tools to create a variety of textures – from rough and rustic to clean and polished.
Practice Makes Perfect: Buttercream sculpting is a skill that improves with practice. Start with easy shapes and progressively progress to more complicated designs. Don’t be discouraged by initial imperfections; every try provides valuable studying expertise.
American buttercream, the cornerstone of many cake decorating tasks, provides unimaginable versatility beyond its basic type. Its forgiving nature allows for numerous flavor and texture variations, making it good for sculpting.
Flavor Explorations:
Chocolate Decadence: Incorporate melted high-quality chocolate (dark, milk, or semi-sweet) into the base recipe for a wealthy chocolate buttercream. Adding cocoa powder is an alternative but may lead to a slightly drier texture; modify accordingly with extra milk or cream.
Citrus Zing: Freshly squeezed lemon, lime, or orange juice provides a vibrant tang. A teaspoon or two, along with the zest for extra aroma, brightens the buttercream and enhances many cake flavors.
Nutty Indulgence: Finely ground nuts like almonds, pecans, or pistachios contribute a beautiful texture and flavor. Toasting them beforehand intensifies their flavor profile. A nut butter (peanut, almond, and so forth.) can be incorporated, but it may make the buttercream slightly softer.
Spiced Delight: A pinch of cinnamon, nutmeg, or cardamom creates a heat, comforting taste, notably suited to autumnal muffins or those with spiced elements. Experiment with completely different spice combos for unique outcomes.
Floral Freshness: A delicate trace of floral taste can be achieved with extracts like rose, lavender, or orange blossom. Use sparingly, as these flavors may be potent.
Coffee Kick: Strong brewed espresso adds a sophisticated bitterness, completely balancing the sweetness of the buttercream. This is ideal for coffee-flavored muffins or those paired with chocolate.
Texture Tweaks:
Creamier Consistency: For a smoother, softer buttercream, add a tablespoon or two of heavy cream or milk during creaming. This can even help in creating extra easily sculpted shapes.
Firmer Consistency: If your buttercream is too delicate for sculpting, increase the quantity of powdered sugar steadily, beating till the specified consistency is achieved. A barely firmer buttercream holds its shape higher.
Adding Meringue Powder: Incorporating meringue powder provides stability and helps create a firmer buttercream ideal for intricate detailing and preventing sagging.
Sculpting Specific Considerations:
Coloring: Use gel meals coloring for vibrant, saturated hues. Liquid food coloring can skinny the buttercream. Divide your buttercream into smaller batches to simply create varied colours.
Chill Time: Chill your buttercream for a quick time earlier than sculpting to make it simpler to deal with and preserve its shape. This is very helpful for intricate designs.
Tools of the Trade: Invest in quality piping tips and sculpting tools. Offset spatulas, bench scrapers, and varied piping suggestions are invaluable for creating completely different textures and types.
Practice Makes Perfect: Start with easy shapes and steadily work your way up to extra complicated designs. Don’t be discouraged by mistakes; follow is essential to mastering buttercream sculpting.
Support Structures: For massive or elaborate sculptures, consider using dowels or cake boards to offer inner support and prevent sagging.
Remember that the important thing to profitable buttercream sculpting is understanding how completely different ingredients and methods affect the texture and consistency of the buttercream. Experimentation is encouraged – discover your favorite taste combinations and strategies to create stunning, edible artistic endeavors.
Italian meringue buttercream, a staple for cake decorating and sculpting, presents an expensive, smooth texture and unbelievable stability, making it best for intricate designs.
Its glossy finish and talent to hold its form for extended periods are unmatched by other buttercream varieties.
The key to a profitable Italian meringue buttercream lies in achieving the proper meringue.
This requires precise temperature management and careful whisking.
The sugar syrup should attain the hard-crack stage (240-245°F), a vital component in creating the specified texture.
Incorrectly cooked syrup results in a grainy or unstable buttercream.
Using a thermometer is strongly really helpful.
Once the syrup is ready, slowly drizzle it into the whipped egg whites, whisking continually at medium-high speed.
This process progressively incorporates the new syrup without causing the whites to scramble.
Continue whisking till the meringue is cool, glossy, and stiff peaks form—a crucial step in stabilizing the buttercream.
Gradually incorporate softened, unsalted butter, one piece at a time, guaranteeing every addition is totally included earlier than including more.
Under-whipped or over-whipped butter can result in a separated or grainy buttercream.
A stand mixer is usually most well-liked for this step as a result of its superior energy and consistency.
Once the buttercream is easy and fluffy, you can begin to incorporate flavorings and colorings.
Vanilla extract, almond extract, and other flavorings can be added to create an enormous range of customized flavors.
Gel meals coloring is the best choice for Italian meringue buttercream as it doesn’t add excess moisture that may weaken the structure.
For reaching the perfect consistency for sculpting, contemplate these factors:
Butter Temperature: Slightly softened butter is good for simple incorporation and a smooth texture. Too chilly, and it’ll be troublesome to mix; too warm, and it may cause separation.
Whipping Time: Over-whipping can incorporate too much air, making the buttercream too soft for sculpting. Under-whipping will result in a dense, difficult-to-work-with consistency.
Hydration: Adding a small quantity of milk or cream can modify consistency, but use sparingly, as extreme moisture can weaken the buttercream’s structure.
To make it simpler to pipe and sculpt, chill the buttercream for 30 minutes to an hour earlier than use. This firms it up, stopping it from sagging or dropping its form.
When sculpting, work with small portions to prevent the buttercream from turning into too heat and soft.
Keep your instruments and surfaces cool.
Use quite a lot of tips and strategies to create completely different textures and results.
Practice is vital to mastering buttercream sculpting, so do not be discouraged in case your initial makes an attempt aren’t good.
Experiment with different strategies and instruments to discover what works best for you.
Consider utilizing different instruments like offset spatulas, piping luggage, sculpting tools, and even your fingers to create quite so much of textures.
Remember to maintain your workspace clean and arranged to create efficient and smooth workflow.
Adding a small quantity of powdered sugar may help stiffen the buttercream additional for extra intricate sculpting.
For added stability, think about using a buttercream dam or structure on the cake itself to assist help heavier elements of your sculpture.
Most importantly, have fun and be creative!
Designing Your Masterpiece
Before you even think about piping a single rose, meticulously plan your buttercream masterpiece. Start with a solid concept—a whimsical character, a realistic cake, or an abstract design. Sketch it out, specializing in proportions and overall composition. Consider the cake’s shape and size; a towering creation requires completely different structural considerations than a smaller, easier design.
Choose your buttercream recipe correctly. The consistency is vital. Too stiff, and it will be tough to pipe and sculpt; too gentle, and your particulars will stoop. Experiment beforehand to realize the right pipeable consistency in your chosen techniques.
Color choice is paramount. Develop a colour palette that enhances your theme and creates visible harmony. Consider using food coloring gels for vibrant, intense hues that will not skinny your buttercream. Plan the appliance of color—will you utilize different shades to create depth and shadow, or persist with a extra uniform palette?
Select your piping tips strategically. Different ideas create drastically different results, from delicate petals to daring leaves. Invest in quite lots of configurations and dimensions; a well-stocked arsenal of suggestions expands your artistic possibilities considerably.
Practice your strategies. Don’t jump straight into the final design. Start with easy follow items, working on totally different piping techniques like stars, swirls, and leaves. Master the artwork of making clean surfaces and consistent shapes earlier than transferring onto intricate details.
Structure is vital, especially for advanced designs. Consider utilizing dowels or cake boards to help heavy elements, guaranteeing stability and stopping collapse. For intricate carvings, use a sculpting tool or maybe a butter knife to form the buttercream into your required types. Pre-planning the structure reduces stress and allows for correct execution.
Consider incorporating texture into your design. Use various tools like combs, spatulas, and even forks to create interesting surface patterns. Textured buttercream can add dimension and visible curiosity to your sculpted design, making it much more participating.
Pay attention to details. These are what elevate a good design to a masterpiece. Perfecting petal shapes, creating practical shadows and highlights, and thoroughly considering the placement of each element all contribute to a cohesive and visually stunning last product.
Use reference pictures. If you’re sculpting a sensible subject, having high-quality photographs to discuss with all through the method might help immensely. This permits you to maintain accuracy and seize the finer particulars.
Layer your design. Instead of building everything at once, think about layering elements to realize depth and realism. For instance, create a base layer, then add particulars on prime. This prevents unintended smudging and maintains clean strains.
Chill frequently. Working with buttercream in a cool surroundings considerably helps preserve its shape and consistency. Chill your cake and buttercream between phases of sculpting to stop melting or slumping, permitting for extra exact work.
Embrace imperfection. Even probably the most experienced sculptors make errors. Don’t let minor imperfections wreck your masterpiece. Learn from them and use them as alternatives to refine your technique.
Most importantly, have fun! Buttercream sculpting is a creative process. Enjoy the journey, experiment with completely different techniques, and allow your creativity to flow. The final product is a reflection of your passion and dedication.
Before you even take into consideration piping, understand your design. A clear imaginative and prescient is paramount. Start with inspiration – Pinterest, Instagram, even a easy flower in your backyard can spark an thought.
Sketching your masterpiece is not nearly drawing; it’s about planning the development. Think of your sculpture as an architectural marvel of buttercream. Consider How To Make Buttercream Frosting each element helps the following.
Use completely different sketching methods: Isometric views give a 3D perspective, exhibiting top and width. Side profiles clarify the shape and layering. Detailed close-ups of intricate components guarantee precision in execution.
Annotate your sketches liberally. Note the specific colours, forms of frosting (Swiss meringue, Italian meringue, American), nozzle sizes, and even instructed piping strategies (star, rose, leaf suggestions, etc.).
Consider the cake’s construction. Will it be a single tier or multiple? Sketch the cake’s shape and size in relation to your sculpture. Ensure a sturdy base to support the load of the buttercream.
Plan your workflow. Start with the foundational elements. If you are sculpting a character, the body must be stable earlier than you add arms or a head. Layering is vital; give every layer time to set.
Experiment with completely different wire supports. Floral wire can add strength to delicate branches or stems, while dowels provide structural integrity to larger pieces.
Don’t be afraid to play with textures. Use contrasting textures to create visual curiosity. A easy, polished surface may be contrasted with a tough, textured space, enhancing the overall aesthetic.
Practice your piping strategies on parchment paper or a silicone mat earlier than transferring them to the cake. This allows for refinement and avoids ruining the final piece.
Think about color palettes. Harmonious shade schemes can create a unified and pleasing aesthetic. Consider using meals coloring gels for intense, vibrant hues.
Develop a timeline. Buttercream sculpting may be time-consuming, so sensible planning prevents last-minute stress. Allow ample time for chilling, setting, and making adjustments.
Embrace imperfections. Buttercream is forgiving, but don’t be afraid to adjust your design mid-process. Sometimes the most lovely creations come up from joyful accidents.
Document your progress. Take pictures at each stage. This serves as a reference level, and allows you to analyze your process for future initiatives.
- Mastering the Basics: Before tackling complex designs, follow fundamental piping techniques like stars, swirls, and leaves.
- Building Strength: Utilize wire supports and dowels for elevated structural integrity in your creations.
- Color Theory: Experiment with complementary and analogous shade palettes to create visually appealing designs.
- Texture Play: Vary the feel of your buttercream to add depth and visible interest.
- Patience and Practice: Buttercream sculpting is a skill that improves with time and dedication. Don’t get discouraged by early makes an attempt.
- Sketching: Detailed sketches are your blueprint.
- Planning: Consider workflow, construction, and materials.
- Construction: Build layers rigorously, permitting for setting time.
- Refinement: Add details, regulate as wanted, and How To Make Buttercream Frosting perfect your design.
- Presentation: Carefully switch your masterpiece to a suitable base or stand.
Before you even start mixing your buttercream, think about the overall scale of your sculpture. Will or not it’s a small, delicate figurine, or a big, imposing centerpiece?
Establishing the dimensions informs every subsequent choice, from the amount of buttercream wanted to the dimensions of your sculpting instruments.
Think concerning the context: the place will your masterpiece reside? A tiny cake topper needs a different scale than a free-standing sculpture on a dessert desk.
Proportions are paramount. Accurate proportions give your sculpture realism and visible enchantment. Even a slight imbalance can throw the complete design off.
Use reference photographs. Whether it’s a photograph, a drawing, or perhaps a real-life object, a visible reference helps you keep accurate proportions throughout the sculpting process.
Consider utilizing a wire frame or armature. This is especially necessary for larger sculptures to supply support and stop sagging.
For complicated shapes, break the sculpture down into simpler, manageable forms. Build it part by part, guaranteeing every part is appropriately proportioned relative to the whole.
Work from general to particular. Begin by establishing the overall form and quantity. Then, add finer particulars gradually, ensuring every little thing remains in proportion.
Use a wide range of sculpting tools. From spatulas and offset spatulas to piping bags and small knives, different instruments are essential for achieving completely different textures and ranges of element.
Regularly step back and assess your work from a distance. This helps you keep perspective and spot any disproportionate parts early on.
Don’t be afraid to adjust. Buttercream is malleable. If something is out of proportion, you can simply rework it.
Practice makes excellent. Start with less complicated projects to develop your abilities in scale and proportion earlier than tackling extra formidable designs.
Consider the buttercream consistency. A firmer buttercream is best for structural parts, while a softer consistency is right for fantastic details.
Temperature management is vital. Buttercream can soften and become troublesome to work with in hotter temperatures. Work in a cool environment and use chilled buttercream when attainable.
Mastering the art of buttercream sculpting is a journey, not a race. Be affected person, and enjoy the course of of making your masterpiece.
Remember the importance of fresh instruments and a clear workspace to ensure a easy and profitable sculpting expertise.
Experiment with completely different methods. There are countless methods to sculpt with buttercream; discover what works finest for you and your style.
Use a turntable. This allows for easier entry to all sides of your sculpture, making the sculpting course of smoother and extra efficient.
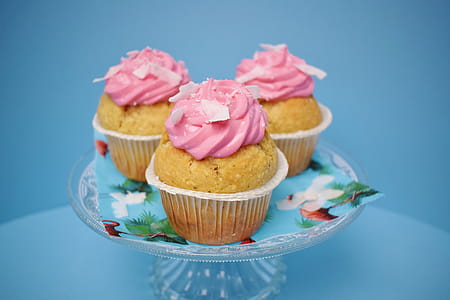
Finally, embrace imperfections. Handmade creations often have a novel charm that completely fashioned, mass-produced objects lack.
- Planning: Start with a sketch or blueprint.
- Structure: Use a cake as a base or create a supporting structure.
- Consistency: Adjust buttercream consistency for different elements of the sculpture.
- Tools: Gather your tools earlier than beginning.
- Patience: Allow enough time for the sculpting course of.